Bramble Scramble (Donkey Kong Country 2: Diddy's Kong Quest): Difference between revisions
Fawfulfury65 (talk | contribs) (I don't think I'll be able to get this all done within the next few days but I'm trying with the time I have.) |
LinkTheLefty (talk | contribs) mNo edit summary |
||
| (94 intermediate revisions by 47 users not shown) | |||
| Line 1: | Line 1: | ||
{{FA}} | {{FA}} | ||
{{ | {{italic title|id=yes}} | ||
{{ | {{level infobox | ||
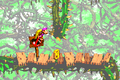
|image=[[File:BrambleScrambleSNES1.png]] | |||
|image=[[ | |code=4 - 3 | ||
|code=4 - 3 | |world=[[Krazy Kremland]] | ||
|game=''[[Donkey Kong Country 2: Diddy's Kong Quest | |game=''[[Donkey Kong Country 2: Diddy's Kong Quest]]'' | ||
| | |track=Stickerbush Symphony | ||
| | |before=[[Target Terror (Donkey Kong Country 2: Diddy's Kong Quest)|<<]] | ||
| | |after=[[Rickety Race (Donkey Kong Country 2: Diddy's Kong Quest)|>>]] | ||
}} | }} | ||
'''Bramble Scramble''' is the nineteenth level of ''[[Donkey Kong Country 2: Diddy's Kong Quest]]'' | '''Bramble Scramble''' is the nineteenth level of ''[[Donkey Kong Country 2: Diddy's Kong Quest]]'' and the third level of [[Krazy Kremland]]. Bramble Scramble takes place within a large infestation of brambles inside the carnival area of Krazy Kremland. It is the second [[bramble]] level, the first one being [[Bramble Blast (Donkey Kong Country 2: Diddy's Kong Quest)|Bramble Blast]]. Instead of blasting through [[Barrel Cannon]]s, [[Diddy Kong|Diddy]] and [[Dixie Kong]] must climb up vertical and horizontal vines to go through the level. The main enemies of the level are red and yellow [[Zinger]]s, who patrol the tight areas. [[Krook]]s and [[Flitter]]s are also somewhat common in the level. Aside from those enemies, there are a few [[Click-Clack]]s, [[Mini-Necky]]s, [[Kloak]]s, and [[Kannon]]s that appear in this level. | ||
[[Squawks]] reappears in the level from his previous appearance in [[Bramble Blast (Donkey Kong Country 2: Diddy's Kong Quest)|Bramble Blast]]. There are two [[animal crate]]s of Squawks appearing in the level: the first one is near the start of the level, on a wooden platform shortly after the Click-Clack and [[Invincibility Barrel|Exclamation Point Barrel]]. The second animal crate of Squawks is after the [[Star Barrel]], shortly after passing the two [[Kannon]] enemies. Squawks himself also appears at the start of the first [[Bonus Level]], although a No Animal Sign prevents him from leaving the area. Aside from Squawks, an [[Animal Barrel]] of [[Squitter]] appears in a secret room directly right of the Star Barrel. The Kongs can access it from the wooden platform beneath the Star Barrel: there is a bramble dividing the platform and a smaller one with a single [[banana]]. The Kongs can easily reach it just by jumping through the bramble dividing the two platforms. | |||
== | ==Layout== | ||
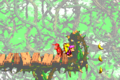
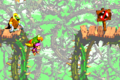
[[File:Bramble Scramble GBA Flitter.png|thumb|left|Bramble Scramble in the Game Boy Advance version]] | |||
[[ | At the beginning of the level, the Kongs must walk down a wooden path and jump over the brambles to reach a horizontal vine. On the way to the vine, they encounter a Krook and a [[DK Barrel]]. A hidden area is behind the entrance to the level, and it contains a [[Barrel Cannon]], the [[K-O-N-G Letters|letter K]], a [[Banana Bunch]], and, in the [[Game Boy Advance]] version of the game, a [[Diddy Barrel]] that can shoot the primates to a [[photograph]]. Once the Kongs reach the aforementioned vine, they encounter several Zingers that they must dodge to progress. One of these Zingers guards a Banana Bunch. There is a vertical vine near here that leads up to a Krook in a small alcove, and then up to a wooden platform that holds a Click-Clack. An [[Invincibility Barrel|Exclamation Point Barrel]] is hidden high above here, and it can help the heroes journey through a bramble-filled pit located just ahead, which leads to a [[Bonus Barrel]]. On the other side of this pit, the heroes can find a trio of spaced-out, wooden platforms that are structured on top of the brambles. A Krook stands between two of these platforms. The third of the three platforms here supports an animal crate containing Squawks. The Animal Friend is required to progress north, where there is a wide path among the brambles that they must travel through. | ||
At the beginning of the level, the Kongs must walk down a wooden path and jump over the brambles to reach a horizontal vine. On the way to the vine, they encounter a Krook and a [[DK Barrel]]. A hidden area is behind the entrance to the level, and it contains a [[Barrel Cannon]], the [[K-O-N-G Letters|letter K]], a [[Banana Bunch]], and, in the [[Game Boy Advance]] version of the game, a [[Diddy Barrel]] that can shoot the primates to a [[photograph]]. Once the Kongs reach the aforementioned vine, they encounter several Zingers that they must dodge to progress. One of these Zingers guards a Banana Bunch. There is a vertical vine near here that leads up to a Krook in a small alcove, and then up to a wooden platform that holds a Click-Clack. An [[Invincibility Barrel]] is hidden high above here, and it can help the heroes journey through a bramble-filled pit located just ahead, which leads to a [[Bonus Barrel]]. On the other side of this pit, the heroes can find a trio of spaced-out, wooden platforms that are structured on top of the brambles. A Krook stands between two of these platforms. The third of the three platforms here supports an | |||
There are Zingers and Flitters in the way, and one of the Zingers blocks an opening | There are Zingers and Flitters in the way, and one of the Zingers blocks an opening that leads a wide area that contains many bananas, a [[Banana Coin]], and a DK Barrel. Once they pass a pair of Zingers, one of which that is red and therefore indestructible at this point of the level, they reach a DK Barrel in a corner. A path among the brambles is below here, and as the primates travel down it, a Krook throws its hook at them. A pair of red, indestructible Zingers also fly in their way as they descent. At the bottom of the area, they can discover more Zingers and Flitters. Some of these Zingers fly together in circles around the wide passage, much like [[Boo|Boo Buddies]] from ''[[Super Mario World]]''. Upon passing these foes, the Kongs approach a Kannon that shoots [[Cannonball|kannonball]]s below it as it stands in a square-shaped section of brambles. Some bananas and a Banana Bunch float above the foe, but the area around them is much longer and thinner than the one below the enemy. After continuing past the Kannon and a lone Zinger, the primates reach an alcove with the letter O in it. If they head north from here, they come past two more Krook enemies, who throw their hooks at the heroes as they pass. The second Krook stands in front of a thin alcove that holds a pair of Banana Coins. A [[No Animal Sign]] sits on some wooden boards ahead of here, and once it is reached, Squawks disappears and the Kongs are given a Banana Bunch. The [[Star Barrel]] floats in front of a long, vertical vine nearby. | ||
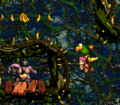
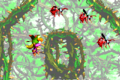
To the right of the vine, there is a set of brambles that can be jumped through to reach a hidden area that contains an [[Animal Barrel]] that holds Squitter the Spider and several collectibles, including a [[DK Coin]]. At the end of this hidden area, there is a No Animal Sign that causes Squitter to disappear when reached. The Kongs are given an [[Extra Life Balloon]] in return. There is | [[File:Bramble Scramble DKC2 Squitter.png|thumb|Squitter travels in a hidden section of the level]] | ||
To the right of the vine, there is a set of brambles that can be jumped through to reach a hidden area that contains an [[Animal Barrel]] that holds Squitter the Spider and several collectibles, including a [[DK Coin|Video Game Hero Coin]]. At the end of this hidden area, there is a No Animal Sign that causes Squitter to disappear when reached. The Kongs are given an [[Extra Life Balloon]] in return. There is a [[Blast Barrel]] ahead of the sign that can fire the primates out of the hidden area and to the section of the level that contains the second animal crate for Squawks. If the heroes choose not to take the hidden path, they can instead continue up the aforementioned vine to reach a horizontal vine with a DK Barrel under the end of it. A few Mini-Neckys attack them as they climb the vine, and a Zinger also surrounds the DK Barrel. To progress, the primates much climb east along the horizontal vine, and, along the way, pass a Kannon that shoots three kannonballs from above them. After they climb an additional vertical vine, they reach a long, thin area with a horizontal vine running through it. | |||
A Kannon at the end of the vines shoots kannonballs across the area. A few alcoves are scattered along the passage to be used to the Kongs' advantage in dodging the attacks. They soon meet the Kannon, who they must jump over to reach a separate vine that they can use to hang over some wooden boards with Click-Clacks on them. If the primates manage to climb over the small wall of brambles to the right of here, they make their way down along a trail of bananas and onto an | A Kannon at the end of the vines shoots kannonballs across the area. A few alcoves are scattered along the passage to be used to the Kongs' advantage in dodging the attacks. They soon meet the Kannon, who they must jump over to reach a separate vine that they can use to hang over some wooden boards with Click-Clacks on them. If the primates manage to climb over the small wall of brambles to the right of here, they make their way down along a trail of bananas and onto an animal crate containing another Squawks. The parrot can help them pass a pair of Zingers in their way and fly through the large area located just ahead, which many more Zingers are scattered throughout. All of these Zingers are red, meaning that they cannot be defeated by any of the heroes' attacks at this point. The letter N floats in the top-right corner of this area, and in the bottom-right corner of it, they can find a passage that holds a DK Barrel. As they continue through the rather wide passage, a few Zingers, most of which that are red, fly in their way. The last two of these Zingers guard a [[golden feather]] in the Game Boy Advance version of the game. | ||
North of here, | North of here, there is a path that leads up to circular area with a few red Zingers flying through it. After the heroes make their way through here, they access a wider passage to the east with several red and yellow Zingers hovering through it. A few Mini-Neckys wait ahead of here to dive at the Kongs as they approach. The primates can then find another circular area to the north with several red Zingers flying throughout it. One of the red Zingers is stationary and blocks the Kongs' path, so they must take the long way around the round path. Once they successfully progress through here, they access a wider passage that contains a quadruplet of Kloaks that constantly throw crates at the heroes, until they are defeated. A No Animal Sign is near here on some wooden boards attached to the top of some brambles. Once they reach it, Squawks disappears and they are given the letter G in return. An [[End of Level Target]] is located at the bottom of a small ledge located ahead of here. The prizes include a Banana Coin, a Banana Bunch, and a Red Balloon. | ||
==Enemies== | |||
<gallery> | |||
Click Clack DKC2.png|[[Click-Clack]] (3) | |||
Flitter DKC2.png|[[Flitter]] (8) | |||
Kannon DKC2 enemy.png|[[Kannon]] (3) | |||
Kloak DKC2.png|[[Kloak]] (4) | |||
Krook DKC2.png|[[Krook]] (7) | |||
Mini Necky DKC2.png|[[Mini-Necky]] (5) | |||
Zinger DKC2 yellow.png|[[Zinger]] (yellow) (31){{footnote|main|1}} | |||
Zinger DKC2 red.png|Zinger (red) (3) | |||
</gallery> | |||
{{footnote|note|1|Of the 31 Zingers, 10 of them appear in a Bonus Area. A total of 61 Zingers appear in the level, if counting both the yellow and red types}} | |||
==Objects== | |||
The following objects appear, in the following quantities: | |||
<gallery> | |||
DKC2 Bramble.png|[[Bramble]] | |||
DK Barrel.png|[[DK Barrel]] (6) | |||
</gallery> | |||
==Items== | |||
===Collectible=== | |||
The following collectible items appear, in the following quantities: | |||
<gallery> | |||
Banana Bunch DKC SNES.png|[[Banana Bunch]] (4) | |||
Banana Coin.png|[[Banana Coin]] (7) | |||
Blue Extra Life Balloon DKC2.png|[[Blue Balloon]] (1) | |||
</gallery> | |||
===K-O-N-G Letters=== | |||
[[File:BrambleScramble-SNES-K.png|thumb|The location for the letter K]] | |||
*'''K:''' At the very start of the level, the Kongs must jump behind into a hidden area. The letter K appears at the bottom-right on a wooden platform. | |||
*'''O:''' After passing the first Kannon, the Kongs and Squawks must continue left and pass a Zinger to find the letter O in an alcove. | |||
*'''N:''' After freeing Squawks a second time, the Kongs must navigate through an area with numerous red Zingers. By flapping to the top-right, the Kongs and Squawks can find the letter N just before a Krook. | |||
*'''G:''' The letter G is rewarded by the second No Animal Sign for Squawks, near the end of the level. | |||
{{br}} | |||
===Key items=== | |||
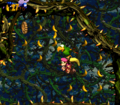
[[File:Bramble Scramble DK Coin location.png|thumb|Squitter finds the Video Game Hero Coin.]] | |||
*'''[[DK Coin|Cranky's Video Game Hero Coin]]:''' Just beneath the Star Barrel, the Kongs must jump through a bramble on the right to land on a small wooden platform with a lone banana. From there, the Kongs must jump across a bramble gap to land on the other wooden platform. Squitter's Animal Barrel appears above the platform. As Squitter, it must create web platforms to go up a path, featuring numerous bananas and two Banana Coins in the center. About midway up the path, directly left of the Banana Coins, is a lone banana hovering between a bramble on the left. Squitter must carefully create a web platform to walk through to the banana and enter the other side, where the Video Game Hero Coin appears directly to the left. | |||
*'''[[Golden feather]]''' (Game Boy Advance version only): After the Kongs find the second Squawks in the level, they must fly past a group of red Zingers and continue down the path below. After passing another red Zinger, the Kongs can find the golden feather located at the top-right in a corner above a yellow and a red Zinger. They can safely obtain it by defeating the yellow Zinger, who directly flies up into the golden feather. | |||
*'''[[Photograph]]''' (Game Boy Advance version only): At the very start of the level, the Kongs must jump into an area behind them with a [[Barrel Cannon]] and a [[Diddy & Dixie Barrels|Diddy Barrel]]. When the Barrel Cannon moves to the rightmost corner, the must blast up into the Diddy Barrel, which blasts them slightly above to a hidden [[Blast Barrel]], which then blasts them to the photograph and into another Blast Barrel, which blasts them back down into the Barrel Cannon. The photograph takes up the first half of the eighth page of the [[Scrapbook (Donkey Kong Country series)|Scrapbook]], and it shows Diddy using a boombox. | |||
{{br}} | |||
==Bonus Area== | |||
{{multiple image | |||
|align=right | |||
|direction=horizontal | |||
|footer=Diddy locates the Exclamation Point Barrel at the start (left image). After becoming invincible, he runs through the bramble thicket, which is a path to the Bonus Barrel. | |||
|width=256 | |||
|image1=Bramble Scramble DKC2 Bonus Area location 1.png | |||
|image2=Bramble Scramble DKC2 Bonus Area location 2.png | |||
}} | |||
There is only one Bonus Area, located around the start, where the Kongs must use [[team up]] to reach an [[Invincibility Barrel|Exclamation Point Barrel]] above them. While they are temporarily invincible, Diddy and Dixie must go down into a small gap just after the wooden platform and go through a thicket of brambles while following trail of individual [[banana]]s; this leads into an area with a [[Barrel Cannon]] at the bottom. The Kongs can blast up into the [[Bonus Barrel]] from the left side, which has three Bananas floating beneath it, or optionally from the right to collect more bananas and a Banana Coin. | |||
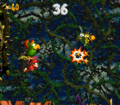
In the Bonus Area, which is a Collect the Stars! challenge, the Kongs must collect 40 stars within 40 seconds. In the Game Boy Advance port, the number of stars to collect was reduced to 36, and they are more spread out to compensate. They must mount Squawks at the very start and defeat the ten Zingers, each of whom are guarding four stars. At the top of the area, there are two Zingers flying in a vertical pattern, guarding some stars within a very tight space. After collecting every star, the Kongs and Squawks must go to the wooden platform on the right and obtain the Kremkoin. Squawks cannot continue into the main level with them due to a [[No Animal Sign]] prohibiting him; crossing it rewards a [[Banana Coin]] to the Kongs. | |||
==Gallery== | ==Gallery== | ||
===Super Nintendo Entertainment System=== | |||
<gallery> | |||
Bramble Scramble concept.jpg|Concept drawing of Bramble Scramble from designer [[Gregg Mayles]]. | |||
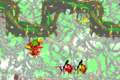
Bramble Scramble DKC2 Krook.png|The Kongs climbing up a vine beneath a Krook. | |||
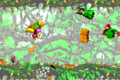
Bramble Scramble DKC2 hidden area.png|Squawks and Dixie travel through a hidden area with many bananas and a Banana Coin. | |||
</gallery> | Bramble Scramble DKC2 false wall.png|Diddy jumping through a false bramble wall to the other side. | ||
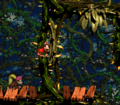
==Names in | BrambleScrambleSNES2.png|The Kongs stand at the beginning of the level | ||
{{ | BrambleScrambleSNES3.png|Diddy and Squawks in the first Bonus Area | ||
Bramble Scramble DKC2 first Kannon.png|Squawks flying around the first Kannon of the level. | |||
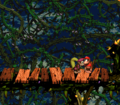
BrambleScrambleSNES4.png|Squawks attacks a Kloak near the end of the level | |||
</gallery> | |||
===Game Boy Advance=== | |||
<gallery> | |||
Bramble Scramble DKC2 GBA.png|The start of the level | |||
Bramble Scramble GBA No Animal Sign.png|Squawks and the Kongs approach the first No Animal Sign | |||
BrambleScramble-GBA-N.png|The letter N | |||
Bramble Scramble GBA Golden Feather.png|Location of the golden feather | |||
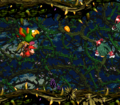
Bramble Scramble GBA circular area.png|Squawks and the Kongs in an enclosed circular area with some red Zingers. | |||
Bramble Scramble GBA Kloaks.png|Squawks and the Kongs approaching [[Kloak]]s late into the level | |||
BrambleScramble-GBA-G.png|The letter G | |||
</gallery> | |||
==Names in other languages== | |||
{{foreign names | |||
|Jap=スコークス ライド | |||
|JapR=Sukōkusu Raido | |||
|JapM=Squawks Ride | |||
|Spa=Destrozazarzas | |Spa=Destrozazarzas | ||
|SpaM=Brambledestroyer | |SpaM=Brambledestroyer | ||
|Ger=Brombeer Gedrängel (SNES)<br | |Fre=Embrouillamini Joli | ||
|GerM= | |FreM=Beautiful Mess | ||
|Ger=Brombeer Gedrängel (SNES)<br>Dornen-Desaster (GBA) | |||
|GerM=Bramble Blast<br>Thorn Disaster | |||
|Ita=Sulle Spine | |||
|ItaM=On your toes (lit. "On the thorns") | |||
}} | |||
{{DKC2}} | {{DKC2}} | ||
[[Category:Sky areas]] | |||
[[Category: | |||
[[Category:Crocodile Isle]] | [[Category:Crocodile Isle]] | ||
[[Category | [[Category:Donkey Kong Country 2: Diddy's Kong Quest levels]] | ||
Latest revision as of 13:18, March 30, 2024
| Level | |
|---|---|
| Bramble Scramble | |

| |
| Level code | 4 - 3 |
| World | Krazy Kremland |
| Game | Donkey Kong Country 2: Diddy's Kong Quest |
| Music track | Stickerbush Symphony |
| << Directory of levels >> | |
Bramble Scramble is the nineteenth level of Donkey Kong Country 2: Diddy's Kong Quest and the third level of Krazy Kremland. Bramble Scramble takes place within a large infestation of brambles inside the carnival area of Krazy Kremland. It is the second bramble level, the first one being Bramble Blast. Instead of blasting through Barrel Cannons, Diddy and Dixie Kong must climb up vertical and horizontal vines to go through the level. The main enemies of the level are red and yellow Zingers, who patrol the tight areas. Krooks and Flitters are also somewhat common in the level. Aside from those enemies, there are a few Click-Clacks, Mini-Neckys, Kloaks, and Kannons that appear in this level.
Squawks reappears in the level from his previous appearance in Bramble Blast. There are two animal crates of Squawks appearing in the level: the first one is near the start of the level, on a wooden platform shortly after the Click-Clack and Exclamation Point Barrel. The second animal crate of Squawks is after the Star Barrel, shortly after passing the two Kannon enemies. Squawks himself also appears at the start of the first Bonus Level, although a No Animal Sign prevents him from leaving the area. Aside from Squawks, an Animal Barrel of Squitter appears in a secret room directly right of the Star Barrel. The Kongs can access it from the wooden platform beneath the Star Barrel: there is a bramble dividing the platform and a smaller one with a single banana. The Kongs can easily reach it just by jumping through the bramble dividing the two platforms.
Layout[edit]

At the beginning of the level, the Kongs must walk down a wooden path and jump over the brambles to reach a horizontal vine. On the way to the vine, they encounter a Krook and a DK Barrel. A hidden area is behind the entrance to the level, and it contains a Barrel Cannon, the letter K, a Banana Bunch, and, in the Game Boy Advance version of the game, a Diddy Barrel that can shoot the primates to a photograph. Once the Kongs reach the aforementioned vine, they encounter several Zingers that they must dodge to progress. One of these Zingers guards a Banana Bunch. There is a vertical vine near here that leads up to a Krook in a small alcove, and then up to a wooden platform that holds a Click-Clack. An Exclamation Point Barrel is hidden high above here, and it can help the heroes journey through a bramble-filled pit located just ahead, which leads to a Bonus Barrel. On the other side of this pit, the heroes can find a trio of spaced-out, wooden platforms that are structured on top of the brambles. A Krook stands between two of these platforms. The third of the three platforms here supports an animal crate containing Squawks. The Animal Friend is required to progress north, where there is a wide path among the brambles that they must travel through.
There are Zingers and Flitters in the way, and one of the Zingers blocks an opening that leads a wide area that contains many bananas, a Banana Coin, and a DK Barrel. Once they pass a pair of Zingers, one of which that is red and therefore indestructible at this point of the level, they reach a DK Barrel in a corner. A path among the brambles is below here, and as the primates travel down it, a Krook throws its hook at them. A pair of red, indestructible Zingers also fly in their way as they descent. At the bottom of the area, they can discover more Zingers and Flitters. Some of these Zingers fly together in circles around the wide passage, much like Boo Buddies from Super Mario World. Upon passing these foes, the Kongs approach a Kannon that shoots kannonballs below it as it stands in a square-shaped section of brambles. Some bananas and a Banana Bunch float above the foe, but the area around them is much longer and thinner than the one below the enemy. After continuing past the Kannon and a lone Zinger, the primates reach an alcove with the letter O in it. If they head north from here, they come past two more Krook enemies, who throw their hooks at the heroes as they pass. The second Krook stands in front of a thin alcove that holds a pair of Banana Coins. A No Animal Sign sits on some wooden boards ahead of here, and once it is reached, Squawks disappears and the Kongs are given a Banana Bunch. The Star Barrel floats in front of a long, vertical vine nearby.

To the right of the vine, there is a set of brambles that can be jumped through to reach a hidden area that contains an Animal Barrel that holds Squitter the Spider and several collectibles, including a Video Game Hero Coin. At the end of this hidden area, there is a No Animal Sign that causes Squitter to disappear when reached. The Kongs are given an Extra Life Balloon in return. There is a Blast Barrel ahead of the sign that can fire the primates out of the hidden area and to the section of the level that contains the second animal crate for Squawks. If the heroes choose not to take the hidden path, they can instead continue up the aforementioned vine to reach a horizontal vine with a DK Barrel under the end of it. A few Mini-Neckys attack them as they climb the vine, and a Zinger also surrounds the DK Barrel. To progress, the primates much climb east along the horizontal vine, and, along the way, pass a Kannon that shoots three kannonballs from above them. After they climb an additional vertical vine, they reach a long, thin area with a horizontal vine running through it.
A Kannon at the end of the vines shoots kannonballs across the area. A few alcoves are scattered along the passage to be used to the Kongs' advantage in dodging the attacks. They soon meet the Kannon, who they must jump over to reach a separate vine that they can use to hang over some wooden boards with Click-Clacks on them. If the primates manage to climb over the small wall of brambles to the right of here, they make their way down along a trail of bananas and onto an animal crate containing another Squawks. The parrot can help them pass a pair of Zingers in their way and fly through the large area located just ahead, which many more Zingers are scattered throughout. All of these Zingers are red, meaning that they cannot be defeated by any of the heroes' attacks at this point. The letter N floats in the top-right corner of this area, and in the bottom-right corner of it, they can find a passage that holds a DK Barrel. As they continue through the rather wide passage, a few Zingers, most of which that are red, fly in their way. The last two of these Zingers guard a golden feather in the Game Boy Advance version of the game.
North of here, there is a path that leads up to circular area with a few red Zingers flying through it. After the heroes make their way through here, they access a wider passage to the east with several red and yellow Zingers hovering through it. A few Mini-Neckys wait ahead of here to dive at the Kongs as they approach. The primates can then find another circular area to the north with several red Zingers flying throughout it. One of the red Zingers is stationary and blocks the Kongs' path, so they must take the long way around the round path. Once they successfully progress through here, they access a wider passage that contains a quadruplet of Kloaks that constantly throw crates at the heroes, until they are defeated. A No Animal Sign is near here on some wooden boards attached to the top of some brambles. Once they reach it, Squawks disappears and they are given the letter G in return. An End of Level Target is located at the bottom of a small ledge located ahead of here. The prizes include a Banana Coin, a Banana Bunch, and a Red Balloon.
Enemies[edit]

Click-Clack (3)

Flitter (8)

Kannon (3)

Kloak (4)

Krook (7)

Mini-Necky (5)

Zinger (red) (3)


1 - Of the 31 Zingers, 10 of them appear in a Bonus Area. A total of 61 Zingers appear in the level, if counting both the yellow and red types
Objects[edit]
The following objects appear, in the following quantities:

DK Barrel (6)


Items[edit]
Collectible[edit]
The following collectible items appear, in the following quantities:

Banana Bunch (4)

Banana Coin (7)

Blue Balloon (1)


K-O-N-G Letters[edit]

- K: At the very start of the level, the Kongs must jump behind into a hidden area. The letter K appears at the bottom-right on a wooden platform.
- O: After passing the first Kannon, the Kongs and Squawks must continue left and pass a Zinger to find the letter O in an alcove.
- N: After freeing Squawks a second time, the Kongs must navigate through an area with numerous red Zingers. By flapping to the top-right, the Kongs and Squawks can find the letter N just before a Krook.
- G: The letter G is rewarded by the second No Animal Sign for Squawks, near the end of the level.
Key items[edit]

- Cranky's Video Game Hero Coin: Just beneath the Star Barrel, the Kongs must jump through a bramble on the right to land on a small wooden platform with a lone banana. From there, the Kongs must jump across a bramble gap to land on the other wooden platform. Squitter's Animal Barrel appears above the platform. As Squitter, it must create web platforms to go up a path, featuring numerous bananas and two Banana Coins in the center. About midway up the path, directly left of the Banana Coins, is a lone banana hovering between a bramble on the left. Squitter must carefully create a web platform to walk through to the banana and enter the other side, where the Video Game Hero Coin appears directly to the left.
- Golden feather (Game Boy Advance version only): After the Kongs find the second Squawks in the level, they must fly past a group of red Zingers and continue down the path below. After passing another red Zinger, the Kongs can find the golden feather located at the top-right in a corner above a yellow and a red Zinger. They can safely obtain it by defeating the yellow Zinger, who directly flies up into the golden feather.
- Photograph (Game Boy Advance version only): At the very start of the level, the Kongs must jump into an area behind them with a Barrel Cannon and a Diddy Barrel. When the Barrel Cannon moves to the rightmost corner, the must blast up into the Diddy Barrel, which blasts them slightly above to a hidden Blast Barrel, which then blasts them to the photograph and into another Blast Barrel, which blasts them back down into the Barrel Cannon. The photograph takes up the first half of the eighth page of the Scrapbook, and it shows Diddy using a boombox.
Bonus Area[edit]


There is only one Bonus Area, located around the start, where the Kongs must use team up to reach an Exclamation Point Barrel above them. While they are temporarily invincible, Diddy and Dixie must go down into a small gap just after the wooden platform and go through a thicket of brambles while following trail of individual bananas; this leads into an area with a Barrel Cannon at the bottom. The Kongs can blast up into the Bonus Barrel from the left side, which has three Bananas floating beneath it, or optionally from the right to collect more bananas and a Banana Coin.
In the Bonus Area, which is a Collect the Stars! challenge, the Kongs must collect 40 stars within 40 seconds. In the Game Boy Advance port, the number of stars to collect was reduced to 36, and they are more spread out to compensate. They must mount Squawks at the very start and defeat the ten Zingers, each of whom are guarding four stars. At the top of the area, there are two Zingers flying in a vertical pattern, guarding some stars within a very tight space. After collecting every star, the Kongs and Squawks must go to the wooden platform on the right and obtain the Kremkoin. Squawks cannot continue into the main level with them due to a No Animal Sign prohibiting him; crossing it rewards a Banana Coin to the Kongs.
Gallery[edit]
Super Nintendo Entertainment System[edit]
Concept drawing of Bramble Scramble from designer Gregg Mayles.

The Kongs climbing up a vine beneath a Krook.
Squawks and Dixie travel through a hidden area with many bananas and a Banana Coin.
Diddy jumping through a false bramble wall to the other side.
The Kongs stand at the beginning of the level
Diddy and Squawks in the first Bonus Area
Squawks flying around the first Kannon of the level.
Squawks attacks a Kloak near the end of the level


Game Boy Advance[edit]
The start of the level
Squawks and the Kongs approach the first No Animal Sign

The letter N
Location of the golden feather
Squawks and the Kongs in an enclosed circular area with some red Zingers.
Squawks and the Kongs approaching Kloaks late into the level
The letter G


Names in other languages[edit]
| Language | Name | Meaning |
|---|---|---|
| Japanese | スコークス ライド Sukōkusu Raido |
Squawks Ride |
| French | Embrouillamini Joli |
Beautiful Mess |
| German | Brombeer Gedrängel (SNES) Dornen-Desaster (GBA) |
Bramble Blast Thorn Disaster |
| Italian | Sulle Spine |
On your toes (lit. "On the thorns") |
| Spanish | Destrozazarzas |
Brambledestroyer |