Squawks's Shaft (Donkey Kong Country 2: Diddy's Kong Quest): Difference between revisions
(layout) |
(rewrite (sorry for delay)) |
||
| Line 10: | Line 10: | ||
|after=[[Kleever's Kiln|>>]] | |after=[[Kleever's Kiln|>>]] | ||
}} | }} | ||
'''Squawks's Shaft''' is the tenth level of ''[[Donkey Kong Country 2: Diddy's Kong Quest]]'' | '''Squawks's Shaft''' is the tenth level of ''[[Donkey Kong Country 2: Diddy's Kong Quest]]'' and the fifth and last regular level of [[Crocodile Cauldron]]. | ||
As | ==Summary== | ||
The level takes place in a mine shaft. As its name suggests, Squawks's Shaft features [[Squawks the Parrot]], who makes his in-game level debut. During the first half of the level, [[Diddy Kong]] and [[Dixie Kong]] must blast through many [[Barrel Cannon]]s. In the second half, the Kongs must ride Squawks. Squawks's Shaft is the first level to have [[Krook]]s, who are one of the most common enemies in the level, aside from [[Zinger]]s. | |||
==Layout== | ==Layout== | ||
| Line 79: | Line 80: | ||
|- | |- | ||
| align="center" |[[File:Letter K.png]] | | align="center" |[[File:Letter K.png]] | ||
| | |Inside a Treasure Chest at the very start of the level. | ||
|- | |- | ||
| align="center" |[[File:Letter O.png]] | | align="center" |[[File:Letter O.png]] | ||
|The letter O is | |The letter O is behind a Krook shortly after the [[Star Barrel]] and just before the Squawks Crate. | ||
|- | |- | ||
| align="center" |[[File:Letter N.png]] | | align="center" |[[File:Letter N.png]] | ||
| | |After the Kongs mount Squawks, they must continue flying upward. The letter N is floating over a red Zinger centered between two yellow Zingers. | ||
|- | |- | ||
| align="center" |[[File:Letter G.png]] | | align="center" |[[File:Letter G.png]] | ||
| | |One of the End of Level Target prizes | ||
|} | |} | ||
| Line 98: | Line 99: | ||
|- | |- | ||
| align="center" |[[File:DK Coin sprite.png]]<br>[[DK Coin]] | | align="center" |[[File:DK Coin sprite.png]]<br>[[DK Coin]] | ||
| | |Floating to the right of the third Bonus Barrel. | ||
|- | |- | ||
| align="center" | [[File:Golden Feather DKC2 GBA.png]]<br>[[Golden Feather]] (GBA version) | | align="center" | [[File:Golden Feather DKC2 GBA.png]]<br>[[Golden Feather]] (GBA version) | ||
| | |After the second group of three Klomps, Diddy and Dixie must blast from two Barrel Cannons to land on a long platform. The Kongs must then jump up on another long platform just above it, then left onto a small platform. A [[Diddy & Dixie Barrels|Dixie Barrel]] is floating above and can only be entered via [[Team-up]] where Diddy throws Dixie into the Dixie Barrel. The Golden Feather is directly above the Dixie Barrel, and upon entering it, the Kongs are blasted through a few Auto-Fire Barrels and returned back onto the small platform. | ||
|- | |- | ||
| align="center" | [[File:Photograph DKC2GBA sprite.png]]<br>[[Photograph]] (GBA version) | | align="center" | [[File:Photograph DKC2GBA sprite.png]]<br>[[Photograph]] (GBA version) | ||
| | |When the Kongs encounter the second grup of three Klomps, they can find a photograph icon over the first Klomp's head. By defeating the Klomp, the Kongs obtain the photograph, which is a picture of Klomp in the first page of the [[scrapbook]]. | ||
|} | |} | ||
| Line 115: | Line 116: | ||
|- | |- | ||
|[[File:Squawks's Shaft GBA Bonus Level 1.png]] | |[[File:Squawks's Shaft GBA Bonus Level 1.png]] | ||
|'''Find the Token!'''<br> | |'''Find the Token!'''<br>From the right side of the platform with the second trio of Klomps, the Kongs must perform a roll jump (or have Dixie use her [[Helicopter Spin]]) to land into a Barrel Cannon. The barrel shifts direction to the next Barrel Cannon; a Zinger is centered between both Barrel Cannons, and two bananas are floating above it. When the Kongs enter the second Barrel Cannon, it turns to face the Bonus Barrel on the right side, and the Kongs can blast into the Bonus Barrel. Two bananas are centered between them, and two Zingers are floating above the bananas. The Kongs can also enter the Bonus Barrel by taking the main path: when they encounter the two Krooks, each on a long platform, Diddy and Dixie must go on the higher platform and jump off all the way right. As they fall, the Kongs are caught below into a Bonus Barrel. | ||
Diddy and Dixie have twenty seconds to find the [[Kremkoin]], which is inside one of the seven [[Treasure Chest]]s. They must throw Treasure Chests at a red [[Zinger]], which is in the center of the area, until they break the Treasure Chest which releases the Kremkoin. The Bonus Level takes place in a symmetrical area, and each side has three platforms with a Treasure Chest on each one. A seventh Treasure Chest appears on the bottom-right, on the ground beneath the three platforms above it. Most Treasure Chests release a banana except the one at the top left, which releases a [[Banana Coin|Banana Bunch Coin]]. The Kremkoin is inside the Treasure Chest on the middle-right platform. | |||
|- | |- | ||
|[[File:Squawks Shaft Bonus Area 2.png]] | |[[File:Squawks Shaft Bonus Area 2.png]] | ||
|'''Find the Token!'''<br> | |'''Find the Token!'''<br>Left of the Star Barrel, the Kongs must use Team-up to enter into an Auto Fire Barrel, which blasts them left into the Bonus Barrel. In the Bonus Level, Diddy and Dixie have 25 seconds to obtain the Kremkoin. The Kongs must blast through a series of Barrel Cannons, which bananas appear between to indicate the directions and path to the Kremkoin. The Kremkoin is hovering over a wooden platform at the top-right of the Bonus Level. | ||
|- | |- | ||
|[[File:Squawks's Shaft Bonus Level 3.png]] | |[[File:Squawks's Shaft Bonus Level 3.png]] | ||
|'''Destroy Them All!'''<br> | |'''Destroy Them All!'''<br>Shortly after the letter N, the Kongs encounter two Mini-Neckies. Two Krooks appear directly above, each on a separate platform. Squawks must defeat the Krook to the right and continue in that direction. Just after the Banana Bunch Coin, Squawks and the Kongs encounter another Krook, left of some bananas shaping an up arrow. Squawks and the Kongs must continue in that direction, and when they reach the second group of bananas in the shape of an up arrow, they must continue straight up into the Bonus Barrel. | ||
In the Bonus Level, Squawks fly around a wide area and defeat eight Zingers in a wide area within 30 seconds. When Squawks defeats every Zinger, the Kremkoin appears on the right of the wooden platfor. | |||
|} | |} | ||
| Line 131: | Line 136: | ||
|- | |- | ||
|[[File:Squawks's Shaft GBA Warp Barrel.png]]<br>[[Warp Barrel]] | |[[File:Squawks's Shaft GBA Warp Barrel.png]]<br>[[Warp Barrel]] | ||
| | |At the very start, the Kongs must continue right until they find a Banana Bunch Coin beneath a platform. The Kongs must either perform a roll jump or use Dixie's Helicopter Spin to collect the Banana Bunch Coin and land right into a hidden Auto-Fire Barrel, which then blasts them into the Warp Barrel. The warp room has a group of bananas shaped like an exclamation mark like other ones. Upon exiting the warp room, Diddy and Dixie are sent into a Barrel Cannon right before the End of Level Target. | ||
|} | |} | ||
Revision as of 01:52, September 8, 2019
Template:Levelbox Squawks's Shaft is the tenth level of Donkey Kong Country 2: Diddy's Kong Quest and the fifth and last regular level of Crocodile Cauldron.
Summary
The level takes place in a mine shaft. As its name suggests, Squawks's Shaft features Squawks the Parrot, who makes his in-game level debut. During the first half of the level, Diddy Kong and Dixie Kong must blast through many Barrel Cannons. In the second half, the Kongs must ride Squawks. Squawks's Shaft is the first level to have Krooks, who are one of the most common enemies in the level, aside from Zingers.
Layout

The Kongs begin the level on a platform next to a treasure chest that contains the letter K. A raised platform is ahead of here that holds a Krook, who stands under a trio of bananas. At the edge of the starting platform, the heroes can find a Banana Coin with a platform above it that holds a Klomp. They can find a Barrel Cannon above here that they can aim to blast them towards a few small platforms that they must climb to reach a long platform, which supports three Klomps and a DK Barrel. Two more platforms are to the left of here, and they both hold Krooks. A Banana Bunch is to the left of the second platform, which stands below a Barrel Cannon that can blast the heroes to a group of three platforms. They must climb to the top platform to find another trio of Klomps and a Barrel Cannon. If the primates roll-jump to the right of here, they can find a hidden Barrel Cannon that can fire them into another Barrel Cannon that is surrounded by Zingers and a Bonus Barrel.
If the Kongs blast through the non-hidden Barrel Cannon, they can reach an additional barrel, which is able to blast them onto a long platform with a slightly smaller platform above it. Krooks are on the ends of both of these platforms, and the Krook on the lower platform guards a Banana Bunch and a treasure chest that contains a red Extra Life Balloon. A smaller platform is located to the left of these enemies, and a Dixie Barrel is above it that can blast the heroes towards some more Barrel Cannons. These cannons can shoot them into many bananas, two Banana Coins, and, in the Game Boy Advance version of the game, a Golden Feather. If the heroes travel east from here, they reach a Barrel Cannon that they must aim to blast them upwards, where there are two more cannons that they must shoot through to progress. As they blast between the last two of these barrels, a Zinger tries to get in their way and flies back and forth between them in a horizontal path. The third barrel in this area is able to blast the two friends to a pair of small platforms that carry one Klampon each. A Barrel Cannon floats next to the platforms, and it can blast the heroes towards several more Barrel Cannons. As they shoot through these barrels, they come up to a Zinger that they must avoid and many bananas. Eventually, they make their way onto a platform with a Star Barrel above it and an Auto Fire Barrel that can blast them to a Bonus Barrel to the left of it.

To the right of here, the duo can find a small platform with a Barrel Cannon above it. The cannon is able to shoot them past a pair of Zingers that move parallel to each other and then to another Barrel Cannon, which can then send them to a platform. This platform supports a Krook, who guards the letter O. An additional platform is to the left of here, and it holds an Animal Crate that contains Squawks the Parrot. After the heroes free the parrot, they must grab onto to him so that the bird can lift them through the remaining part of the level. As the heroes begin to ascend, they come up to a DK Barrel in a small gap between two platforms. Above these platforms, the heroes can find a group of bananas that form the letter Y (or the letter B in the Game Boy Advance version of the game). Some more platforms stick out of the side of the area on the way up this part of the level; the first platform holds a yellow Zinger, the second holds a red Zinger, and the third carries a Krook. These three platforms are followed by a group of Zingers that consist of two stationary red Zingers that float under the letter N and two yellow Zingers that hover next to their allies. Three additional platforms are above here, and they all hold one Krook each. A DK Barrel is located just above the third platform, and it is followed by a few Mini-Neckies that swoop down at the heroes to attack. After the group passes these small vulture enemies, they come up to four platforms that stick out of the wall. Two of these platforms, which are positioned across from each other, hold Krooks that both throw their hooks at the heroes. To the right of these Krooks, the heroes can find a Banana Coin and a hidden area that contains another Krook on a platform, two groups of bananas that form arrows pointing upwards, a Bonus Barrel, and a DK Coin. If the Kongs and Squawks continue upwards from the location of the previous two Krooks, they reach a platform with a Kannon on it. The heroes must pass under this enemy to progress, but as they do so, they must watch out for the kannonballs it shoots at them. Once the group passes this foe and heads farther upwards, they reach a pair of red Zingers moving back and forth in a horizontal path around a Banana Bunch. A few more Mini-Neckies are ahead of here, and once the trio continues past them, they reach long platform that holds a No Animal Sign. If they pass the sign, Squawks disappears and they are given a Banana Bunch. An End of Level Target is near here, and the Kongs must jump on it to complete the level successfully. Additionally, the Kongs can win a prize from the target if they hit it immediately after shooting out of a nearby barrel.
Enemies
| Enemy | Count |
|---|---|
 Kannon |
1 (facing down) |
Klampon |
2 |
Klomp |
7 |
Krook |
13 |
Mini-Necky |
7 |
Zinger |
18 (yellow) 5 (1 is in a Bonus Level) Total: 23 |
Items and objects
| Sprite | Name | Count |
|---|---|---|
| Banana Bunch | 4 (1 is a No Animal Sign reward) | |
| Banana Bunch Coin | 6 | |
| DK Barrel | 3 | |
| Treasure Chest | 3 (1 is in a Bonus Level) |
K-O-N-G Letters
| Letter | Location |
|---|---|
| Inside a Treasure Chest at the very start of the level. | |
| The letter O is behind a Krook shortly after the Star Barrel and just before the Squawks Crate. | |
| After the Kongs mount Squawks, they must continue flying upward. The letter N is floating over a red Zinger centered between two yellow Zingers. | |
| One of the End of Level Target prizes |
Collectibles
| Item | Location |
|---|---|
DK Coin |
Floating to the right of the third Bonus Barrel. |
Golden Feather (GBA version) |
After the second group of three Klomps, Diddy and Dixie must blast from two Barrel Cannons to land on a long platform. The Kongs must then jump up on another long platform just above it, then left onto a small platform. A Dixie Barrel is floating above and can only be entered via Team-up where Diddy throws Dixie into the Dixie Barrel. The Golden Feather is directly above the Dixie Barrel, and upon entering it, the Kongs are blasted through a few Auto-Fire Barrels and returned back onto the small platform. |
Photograph (GBA version) |
When the Kongs encounter the second grup of three Klomps, they can find a photograph icon over the first Klomp's head. By defeating the Klomp, the Kongs obtain the photograph, which is a picture of Klomp in the first page of the scrapbook. |
Secrets
Bonus Levels
| Image | Type and description |
|---|---|

|
Find the Token! From the right side of the platform with the second trio of Klomps, the Kongs must perform a roll jump (or have Dixie use her Helicopter Spin) to land into a Barrel Cannon. The barrel shifts direction to the next Barrel Cannon; a Zinger is centered between both Barrel Cannons, and two bananas are floating above it. When the Kongs enter the second Barrel Cannon, it turns to face the Bonus Barrel on the right side, and the Kongs can blast into the Bonus Barrel. Two bananas are centered between them, and two Zingers are floating above the bananas. The Kongs can also enter the Bonus Barrel by taking the main path: when they encounter the two Krooks, each on a long platform, Diddy and Dixie must go on the higher platform and jump off all the way right. As they fall, the Kongs are caught below into a Bonus Barrel. Diddy and Dixie have twenty seconds to find the Kremkoin, which is inside one of the seven Treasure Chests. They must throw Treasure Chests at a red Zinger, which is in the center of the area, until they break the Treasure Chest which releases the Kremkoin. The Bonus Level takes place in a symmetrical area, and each side has three platforms with a Treasure Chest on each one. A seventh Treasure Chest appears on the bottom-right, on the ground beneath the three platforms above it. Most Treasure Chests release a banana except the one at the top left, which releases a Banana Bunch Coin. The Kremkoin is inside the Treasure Chest on the middle-right platform. |

|
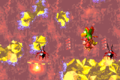
Find the Token! Left of the Star Barrel, the Kongs must use Team-up to enter into an Auto Fire Barrel, which blasts them left into the Bonus Barrel. In the Bonus Level, Diddy and Dixie have 25 seconds to obtain the Kremkoin. The Kongs must blast through a series of Barrel Cannons, which bananas appear between to indicate the directions and path to the Kremkoin. The Kremkoin is hovering over a wooden platform at the top-right of the Bonus Level. |

|
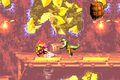
Destroy Them All! Shortly after the letter N, the Kongs encounter two Mini-Neckies. Two Krooks appear directly above, each on a separate platform. Squawks must defeat the Krook to the right and continue in that direction. Just after the Banana Bunch Coin, Squawks and the Kongs encounter another Krook, left of some bananas shaping an up arrow. Squawks and the Kongs must continue in that direction, and when they reach the second group of bananas in the shape of an up arrow, they must continue straight up into the Bonus Barrel. In the Bonus Level, Squawks fly around a wide area and defeat eight Zingers in a wide area within 30 seconds. When Squawks defeats every Zinger, the Kremkoin appears on the right of the wooden platfor. |
Warp Barrel
| Image | Location |
|---|---|
 Warp Barrel |
At the very start, the Kongs must continue right until they find a Banana Bunch Coin beneath a platform. The Kongs must either perform a roll jump or use Dixie's Helicopter Spin to collect the Banana Bunch Coin and land right into a hidden Auto-Fire Barrel, which then blasts them into the Warp Barrel. The warp room has a group of bananas shaped like an exclamation mark like other ones. Upon exiting the warp room, Diddy and Dixie are sent into a Barrel Cannon right before the End of Level Target. |
Gallery
Super Nintendo Entertainment System
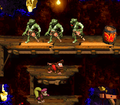
Diddy and Dixie beneath some Klomps and a DK Barrel
Diddy jumps towards a Krook
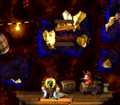
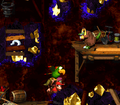
The location of the first Bonus Barrel
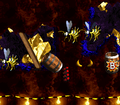
The Kongs and Squawks find the letter N
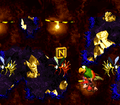
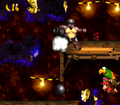
The Kongs and Squawks approach a Krook overhead
The only Kannon in the level


Game Boy Advance
Dixie encounters a Klomp
Diddy and Squawks move between two red Zingers


Names in other languages
| Language | Name | Meaning |
|---|---|---|
| Japanese | スコークスこうざん Sukōkusu kōzan |
Squawks Mine |
| German | Squawks Schacht |
Literal translation |
| Spanish | Turno de Squawks |
Squawks' Turn |