Topsail Trouble (Donkey Kong Country 2: Diddy's Kong Quest): Difference between revisions
mNo edit summary |
(most of it done -- just need to do images...) |
||
| Line 2: | Line 2: | ||
{{levelbox | {{levelbox | ||
|title=Topsail Trouble | |title=Topsail Trouble | ||
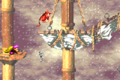
|image=[[File:Topsail Trouble DKC2.png | |image=[[File:Topsail Trouble DKC2.png]] | ||
|code=1 - 5 | |code=1 - 5 | ||
|world=[[Gangplank Galleon (world)|Gangplank Galleon]] | |world=[[Gangplank Galleon (world)|Gangplank Galleon]] | ||
| Line 10: | Line 10: | ||
|after=[[Krow's Nest (Donkey Kong Country 2: Diddy's Kong Quest)|>>]] | |after=[[Krow's Nest (Donkey Kong Country 2: Diddy's Kong Quest)|>>]] | ||
}} | }} | ||
'''Topsail Trouble''' is the fifth level of ''[[Donkey Kong Country 2: Diddy's Kong Quest]]'', | '''Topsail Trouble''' is the fifth level of ''[[Donkey Kong Country 2: Diddy's Kong Quest]]'' and the first world, [[Gangplank Galleon]]. | ||
==Description== | |||
Topsail Trouble is the second rigging level, and the first one is [[Mainbrace Mayhem (Donkey Kong Country 2: Diddy's Kong Quest)|Mainbrace Mayhem]]. It is another vertical level, where [[Diddy Kong]] and [[Dixie Kong]] must reach the top. Unlike Mainbrace Mayhem, Topsail Trouble takes place during a rainstorm. [[Rattly the Rattlesnake]] first appears in the level, and its [[Animal Crate]] is at the very start. The [[Kong]]s can optionally ride Rattly for the first half, up until the [[No Animal Sign]], and make use of its high jumping ability to travel higher more easily. If they do not ride Rattly, the Kongs must jump from hooks to move between platforms and masts. During the second half, the Kongs must climb up horizontal and vertical [[rope]]s while avoiding enemies, especially [[Zinger]]s. | |||
== | Topsail Trouble features more enemies than Mainbrace Mayhem, including [[Neek]]s, [[Kaboing]]s, [[Click-Clack]]s, [[Klinger]]s, Zingers, a [[Kruncha]], and [[Klomp]]s. [[Flitter]]s also first appear in the level. | ||
==Layout== | |||
[[File:Topsail Trouble DKC2 shot 2.png|left|thumb|Diddy hangs on a hook near the beginning of the level.]] | [[File:Topsail Trouble DKC2 shot 2.png|left|thumb|Diddy hangs on a hook near the beginning of the level.]] | ||
The [[Kong]]s begin the level on a short yard next to an Animal Crate that contains Rattly. Two rows of bananas are above the heroes in this area. If they travel ahead from here, they reach a longer yard with a pair of Neeks and a Kaboing on it. The [[K-O-N-G Letters|letter K]] hovers above the yard, which is followed by another yard that is connected to a large mast with some platforms on it that the heroes can use to climb. If they do not have Rattly to help them head up the platforms, they can instead use a hook between the structures on the mast. Once the primates reach the second level of yards, they can find a higher part of the previous mast with a red [[Extra Life Balloon]] above it. A [[DK Barrel]] also sits on the first yard in this area, which also holds a Click-Clack. There are two smaller yards ahead of here that are both tilted and hold a Click-Clack. The Kongs can find a mast sticking out from behind the last of these yards that holds a few round structures. They can use the platforms on the masts and a hook to climb to the third level of yards, where there is a small, tilted yard that is held by a mast with a [[Bonus Barrel]] above it. | The [[Kong]]s begin the level on a short yard next to an Animal Crate that contains Rattly. Two rows of bananas are above the heroes in this area. If they travel ahead from here, they reach a longer yard with a pair of Neeks and a Kaboing on it. The [[K-O-N-G Letters|letter K]] hovers above the yard, which is followed by another yard that is connected to a large mast with some platforms on it that the heroes can use to climb. If they do not have Rattly to help them head up the platforms, they can instead use a hook between the structures on the mast. Once the primates reach the second level of yards, they can find a higher part of the previous mast with a red [[Extra Life Balloon]] above it. A [[DK Barrel]] also sits on the first yard in this area, which also holds a Click-Clack. There are two smaller yards ahead of here that are both tilted and hold a Click-Clack. The Kongs can find a mast sticking out from behind the last of these yards that holds a few round structures. They can use the platforms on the masts and a hook to climb to the third level of yards, where there is a small, tilted yard that is held by a mast with a [[Bonus Barrel]] above it. | ||
| Line 23: | Line 26: | ||
A long set of ropes with a Zinger and a [[Banana Bunch]] at the beginning of it is located after the yard found under the Star Barrel. As the heroes head to the east with these ropes, they come under a few bananas with a DK Barrel among them. Some more ropes that can be climbed to travel upwards are ahead of here, and the first Klinger in the level climbs along them. A rope leading to the west is at the top of these ropes that is positioned slightly above a Zinger. If they pass this wasp foe, they come along a set of ropes that lead higher up. A Klinger climbs along the ropes, which is placed next to a hidden yard with a [[Golden Feather]] (exclusive to the [[Game Boy Advance]] version) and a Banana Bunch on it. The heroes can find another yard farther up at the top of the ropes. This yard holds a small crate and is structured under a Flitter with some bananas above it. Some ropes are under this yard that the Kongs can climb down to find the letter N being guarded by a Zinger. As the primates travel upwards with the ropes, they come up to a Zinger that flies close to an invisible Banana Coin and then a horizontal tightrope with another Zinger in front of it. A DK Barrel is above the Zinger, and a pair of Flitters are above the rope. The heroes can bounce on them to reach a hidden Bonus Barrel, which is positioned under a yard that Diddy and Dixie are sent too after playing in the second [[Bonus Level]]. | A long set of ropes with a Zinger and a [[Banana Bunch]] at the beginning of it is located after the yard found under the Star Barrel. As the heroes head to the east with these ropes, they come under a few bananas with a DK Barrel among them. Some more ropes that can be climbed to travel upwards are ahead of here, and the first Klinger in the level climbs along them. A rope leading to the west is at the top of these ropes that is positioned slightly above a Zinger. If they pass this wasp foe, they come along a set of ropes that lead higher up. A Klinger climbs along the ropes, which is placed next to a hidden yard with a [[Golden Feather]] (exclusive to the [[Game Boy Advance]] version) and a Banana Bunch on it. The heroes can find another yard farther up at the top of the ropes. This yard holds a small crate and is structured under a Flitter with some bananas above it. Some ropes are under this yard that the Kongs can climb down to find the letter N being guarded by a Zinger. As the primates travel upwards with the ropes, they come up to a Zinger that flies close to an invisible Banana Coin and then a horizontal tightrope with another Zinger in front of it. A DK Barrel is above the Zinger, and a pair of Flitters are above the rope. The heroes can bounce on them to reach a hidden Bonus Barrel, which is positioned under a yard that Diddy and Dixie are sent too after playing in the second [[Bonus Level]]. | ||
If the primates continue along the aforementioned tightrope, they climb towards a pair of Zingers that block their path. After they are passed, the heroes come up to some more ropes that lead upwards past a Klinger. A horizontal rope is to the left of the top of these ropes, and a Zinger flies around it. Some more ropes leading upwards are soon after the Zinger, and as they are climbed, the duo can find a yard to their right that holds the hidden [[DK Coin]]. If they continue along the ropes, they come up to a horizontal rope with three Zingers all the way across it. Once they dodge all of the foes, they can find more ropes that can help them continue upwards. Once they climb the ropes, they reach another horizontal rope that is guarded by two Zingers, one of which that is stationary. In the Game Boy Advance version of the game, a few hooks are hidden to the left of this rope that can help the heroes reach a yard positioned high in the air. It supports a lone Click-Clack, who is in possession of a [[photograph]]. If the primates pass the previously-mentioned Zingers, they reach a yard with an [[End of Level Target]] on it, which they can jump on to complete the level successfully. If they jump on the target from the nearby ropes, they can win a prize, | If the primates continue along the aforementioned tightrope, they climb towards a pair of Zingers that block their path. After they are passed, the heroes come up to some more ropes that lead upwards past a Klinger. A horizontal rope is to the left of the top of these ropes, and a Zinger flies around it. Some more ropes leading upwards are soon after the Zinger, and as they are climbed, the duo can find a yard to their right that holds the hidden [[DK Coin]]. If they continue along the ropes, they come up to a horizontal rope with three Zingers all the way across it. Once they dodge all of the foes, they can find more ropes that can help them continue upwards. Once they climb the ropes, they reach another horizontal rope that is guarded by two Zingers, one of which that is stationary. In the Game Boy Advance version of the game, a few hooks are hidden to the left of this rope that can help the heroes reach a yard positioned high in the air. It supports a lone Click-Clack, who is in possession of a [[photograph]]. If the primates pass the previously-mentioned Zingers, they reach a yard with an [[End of Level Target]] on it, which they can jump on to complete the level successfully. If they jump on the target from the nearby ropes, they can win a prize, either the letter G, a Banana Bunch, or a Banana Coin. They can also find a Crate and a blue Extra Life Balloon (which quickly floats away) beyond the target. | ||
==Items and objects== | |||
{|class="dktable-brown" width=20% | |||
!Sprite | |||
!Name | |||
!Count | |||
|- | |||
|align=center|[[File:Banana Coin.png]] | |||
|[[Banana Coin|Banana Bunch Coin]] | |||
|3 | |||
|- | |||
|align=center|[[File:Crate DKC2.png]] | |||
|[[Crate]] | |||
|3 | |||
|- | |||
|align=center|[[File:DK Barrel.png]] | |||
|[[DK Barrel]] | |||
|4 | |||
|- | |||
|align=center|[[File:Red Extra Life Balloon DKC2.png]] [[File:Blue Extra Live Balloon DKC2.png]] | |||
|[[Extra Life Balloon]] | |||
|1 (red)<br>1 (blue)<br>'''Total:''' 2 | |||
|- | |||
|align=center|[[File:Treasure Chest DKC2.png]] | |||
|[[Treasure Chest]] | |||
|1 | |||
|} | |||
===Collectibles=== | |||
{|class="dktable-brown" width=70% | |||
|- | |||
!Item | |||
!Location | |||
|- | |||
| align="center" | [[File:DK Coin sprite.png]]<br>[[DK Coin]] | |||
|After the third Klinger, the Kongs must pass a Zinger and then climb to the top of some square-shaped ropes. They must jump to the right to land on a hidden yard. The DK Coin hovers above it, and the Kongs can use [[Team-up]] to reach the DK Coin. | |||
|- | |||
| align="center" | [[File:Golden Feather DKC2 GBA.png]]<br>[[Golden Feather]] (GBA version) | |||
|When the Kongs encounter the second Klinger, they must jump to the right to land on a hidden yard. It has the Golden Feather and a Banana Bunch. | |||
|- | |||
| align="center" | [[File:Photograph DKC2GBA sprite.png]]<br>[[Photograph]] (GBA version) | |||
|At the end of the level, when the Kongs encounter two Zingers, they must jump from the left end of the horizontal rope. This reveals a hidden hook, and the Kongs can jump again to grab another hook and then get onto a hidden yard. They must defeat the Click-Clack to earn its photograph, which shows artwork of Click-Clack on the [[scrapbook]]'s first page. | |||
|} | |||
===K-O-N-G Letters=== | |||
{|class="dktable-brown" width=70% | |||
|- | |||
!Letter | |||
!Location | |||
|- | |||
| align="center" |[[File:Letter K.png]] | |||
|The letter is floating high above the second yard, near the end, where two Neeks and a Klomp are found. Rattly is required to reach the letter. | |||
|- | |||
| align="center" |[[File:Letter O.png]] | |||
| After the first Bonus Level, the Kongs must continue onward and pass two Kaboings. Shortly after, they can find the letter O floating over a platform with a Klomp. | |||
|- | |||
| align="center" |[[File:Letter N.png]] | |||
|After the Kongs pass the second Klinger, they end up on a horizontal rope. Instead of going left, the Kongs must go right and then move down some square-shaped ropes. The letter N is at the lowest rope, where a Zinger passes back and forth through the letter. | |||
|- | |||
| align="center" |[[File:Letter G.png]] | |||
|The letter G is one of the End of Level Target prizes. | |||
|} | |||
==Secrets== | ==Secrets== | ||
==== | ===Bonus Level=== | ||
{|class="dktable-brown" width=70% | |||
|- | |||
!Image | |||
!Type and description | |||
= | |- | ||
[[File:Topsail Trouble Bonus | | align="center" | [[File:Topsail Trouble Bonus Level 1.png]] | ||
| '''Destroy them All!'''<br>After passing a few Click-Clacks, the Kongs and Rattly must get on the yard. From there, Rattly must perform a Superjump to get onto a circular platform, and then jump again to land into the [[Bonus Barrel]] above. The objective is to defeat six [[Flitter]]s within 15 seconds. After the Kongs and Rattly do so, a [[Kremkoin]] appears on right-side mast for them to obtain. | |||
|- | |||
| align="center" | [[File:Topsail Trouble Bonus Level 2.png]] | |||
| '''Find the Token!'''<br>After the letter N, the Kongs eventually come across two Flitters stationed in midair. Diddy and Dixie must jump to the right of both Flitters to grab a hidden hook. They must jump on the Flitters and land into a Bonus Barrel in midair. The objective is for the Kongs to obtain the Kremkoin within 15 seconds. The Kongs must climb up a single large series of ropes and avoid four Flitters, who horizontally move back and forth across the rope. When the Kongs reach the top of the rope, they must jump right to collect the Kremkoin, which is hovering above a yard. | |||
|} | |||
==== | ===Warp Barrel=== | ||
{|class="dktable-brown" width=70% | |||
|- | |||
!Sprite | |||
!Location | |||
|- | |||
|[[File:Warp Barrel sprite GBA.png]]<br>[[Warp Barrel]] | |||
|At the very start, the Kongs must perform a roll jump below the yard and land into a hidden Warp Barrel. This takes them into a hidden warp room, which has some bananas forming the shape of an exclamation mark. By continuing right, Diddy and Dixie exit the room, and they are sent at the end of the main level, right between two Zingers just before the End of Level Target. | |||
|} | |||
==Gallery== | ==Gallery== | ||
<gallery> | <gallery> | ||
TopsailTrouble1.png|The Kongs | TopsailTrouble1.png|The Kongs and Rattly standing next to a Kaboin | ||
Topsail Trouble DKC2 GBA.png|The Kongs | Topsail Trouble DKC2 GBA.png|The Kongs jump to a yard in the Game Boy Advance version | ||
</gallery> | </gallery> | ||
Revision as of 20:06, July 3, 2019
Template:Levelbox Topsail Trouble is the fifth level of Donkey Kong Country 2: Diddy's Kong Quest and the first world, Gangplank Galleon.
Description
Topsail Trouble is the second rigging level, and the first one is Mainbrace Mayhem. It is another vertical level, where Diddy Kong and Dixie Kong must reach the top. Unlike Mainbrace Mayhem, Topsail Trouble takes place during a rainstorm. Rattly the Rattlesnake first appears in the level, and its Animal Crate is at the very start. The Kongs can optionally ride Rattly for the first half, up until the No Animal Sign, and make use of its high jumping ability to travel higher more easily. If they do not ride Rattly, the Kongs must jump from hooks to move between platforms and masts. During the second half, the Kongs must climb up horizontal and vertical ropes while avoiding enemies, especially Zingers.
Topsail Trouble features more enemies than Mainbrace Mayhem, including Neeks, Kaboings, Click-Clacks, Klingers, Zingers, a Kruncha, and Klomps. Flitters also first appear in the level.
Layout

The Kongs begin the level on a short yard next to an Animal Crate that contains Rattly. Two rows of bananas are above the heroes in this area. If they travel ahead from here, they reach a longer yard with a pair of Neeks and a Kaboing on it. The letter K hovers above the yard, which is followed by another yard that is connected to a large mast with some platforms on it that the heroes can use to climb. If they do not have Rattly to help them head up the platforms, they can instead use a hook between the structures on the mast. Once the primates reach the second level of yards, they can find a higher part of the previous mast with a red Extra Life Balloon above it. A DK Barrel also sits on the first yard in this area, which also holds a Click-Clack. There are two smaller yards ahead of here that are both tilted and hold a Click-Clack. The Kongs can find a mast sticking out from behind the last of these yards that holds a few round structures. They can use the platforms on the masts and a hook to climb to the third level of yards, where there is a small, tilted yard that is held by a mast with a Bonus Barrel above it.
The primates can find three leveled yards ahead of here, and the first two of them hold Kaboings. The last of the yards is held under a DK Barrel, which a hook can be found next to. Another hook is after this yard with a group of bananas under it that form the letter R. A large mast with some wooden platforms on it is behind the hook and the bananas, and they can use it to climb to the next level of yards. When they reach the first yard, they can find the letter O above them. A hook is next to it, along with a strong mast with a platform on it that supports a treasure chest, which contains a red Extra Life Balloon. The heroes can find an additional structure above them on the mast that they can reach with either a nearby hook or Rattly. If they head west from the platform, they come up to a small yard with a Kruncha on it and then a platform on a mast, which is located under an Auto Fire Barrel. This barrel can blast them onto a higher yard with a crate and a No Animal Sign on it, which makes Rattly disappear when it is passed. The Kongs also earn a Banana Coin if they lead Rattly to this sign. Just before the sign, they can find a platform on the top of a mast, which is structured under another Banana Coin. If the two friends continue from here, they soon reach a Star Barrel.

A long set of ropes with a Zinger and a Banana Bunch at the beginning of it is located after the yard found under the Star Barrel. As the heroes head to the east with these ropes, they come under a few bananas with a DK Barrel among them. Some more ropes that can be climbed to travel upwards are ahead of here, and the first Klinger in the level climbs along them. A rope leading to the west is at the top of these ropes that is positioned slightly above a Zinger. If they pass this wasp foe, they come along a set of ropes that lead higher up. A Klinger climbs along the ropes, which is placed next to a hidden yard with a Golden Feather (exclusive to the Game Boy Advance version) and a Banana Bunch on it. The heroes can find another yard farther up at the top of the ropes. This yard holds a small crate and is structured under a Flitter with some bananas above it. Some ropes are under this yard that the Kongs can climb down to find the letter N being guarded by a Zinger. As the primates travel upwards with the ropes, they come up to a Zinger that flies close to an invisible Banana Coin and then a horizontal tightrope with another Zinger in front of it. A DK Barrel is above the Zinger, and a pair of Flitters are above the rope. The heroes can bounce on them to reach a hidden Bonus Barrel, which is positioned under a yard that Diddy and Dixie are sent too after playing in the second Bonus Level.
If the primates continue along the aforementioned tightrope, they climb towards a pair of Zingers that block their path. After they are passed, the heroes come up to some more ropes that lead upwards past a Klinger. A horizontal rope is to the left of the top of these ropes, and a Zinger flies around it. Some more ropes leading upwards are soon after the Zinger, and as they are climbed, the duo can find a yard to their right that holds the hidden DK Coin. If they continue along the ropes, they come up to a horizontal rope with three Zingers all the way across it. Once they dodge all of the foes, they can find more ropes that can help them continue upwards. Once they climb the ropes, they reach another horizontal rope that is guarded by two Zingers, one of which that is stationary. In the Game Boy Advance version of the game, a few hooks are hidden to the left of this rope that can help the heroes reach a yard positioned high in the air. It supports a lone Click-Clack, who is in possession of a photograph. If the primates pass the previously-mentioned Zingers, they reach a yard with an End of Level Target on it, which they can jump on to complete the level successfully. If they jump on the target from the nearby ropes, they can win a prize, either the letter G, a Banana Bunch, or a Banana Coin. They can also find a Crate and a blue Extra Life Balloon (which quickly floats away) beyond the target.
Items and objects
| Sprite | Name | Count |
|---|---|---|
| Banana Bunch Coin | 3 | |
| Crate | 3 | |
| DK Barrel | 4 | |
| Extra Life Balloon | 1 (red) 1 (blue) Total: 2 | |
| Treasure Chest | 1 |
Collectibles
| Item | Location |
|---|---|
DK Coin |
After the third Klinger, the Kongs must pass a Zinger and then climb to the top of some square-shaped ropes. They must jump to the right to land on a hidden yard. The DK Coin hovers above it, and the Kongs can use Team-up to reach the DK Coin. |
Golden Feather (GBA version) |
When the Kongs encounter the second Klinger, they must jump to the right to land on a hidden yard. It has the Golden Feather and a Banana Bunch. |
Photograph (GBA version) |
At the end of the level, when the Kongs encounter two Zingers, they must jump from the left end of the horizontal rope. This reveals a hidden hook, and the Kongs can jump again to grab another hook and then get onto a hidden yard. They must defeat the Click-Clack to earn its photograph, which shows artwork of Click-Clack on the scrapbook's first page. |
K-O-N-G Letters
| Letter | Location |
|---|---|
| The letter is floating high above the second yard, near the end, where two Neeks and a Klomp are found. Rattly is required to reach the letter. | |
| After the first Bonus Level, the Kongs must continue onward and pass two Kaboings. Shortly after, they can find the letter O floating over a platform with a Klomp. | |
| After the Kongs pass the second Klinger, they end up on a horizontal rope. Instead of going left, the Kongs must go right and then move down some square-shaped ropes. The letter N is at the lowest rope, where a Zinger passes back and forth through the letter. | |
| The letter G is one of the End of Level Target prizes. |
Secrets
Bonus Level
| Image | Type and description |
|---|---|

|
Destroy them All! After passing a few Click-Clacks, the Kongs and Rattly must get on the yard. From there, Rattly must perform a Superjump to get onto a circular platform, and then jump again to land into the Bonus Barrel above. The objective is to defeat six Flitters within 15 seconds. After the Kongs and Rattly do so, a Kremkoin appears on right-side mast for them to obtain. |

|
Find the Token! After the letter N, the Kongs eventually come across two Flitters stationed in midair. Diddy and Dixie must jump to the right of both Flitters to grab a hidden hook. They must jump on the Flitters and land into a Bonus Barrel in midair. The objective is for the Kongs to obtain the Kremkoin within 15 seconds. The Kongs must climb up a single large series of ropes and avoid four Flitters, who horizontally move back and forth across the rope. When the Kongs reach the top of the rope, they must jump right to collect the Kremkoin, which is hovering above a yard. |
Warp Barrel
| Sprite | Location |
|---|---|
Warp Barrel |
At the very start, the Kongs must perform a roll jump below the yard and land into a hidden Warp Barrel. This takes them into a hidden warp room, which has some bananas forming the shape of an exclamation mark. By continuing right, Diddy and Dixie exit the room, and they are sent at the end of the main level, right between two Zingers just before the End of Level Target. |
Gallery

The Kongs and Rattly standing next to a Kaboin
The Kongs jump to a yard in the Game Boy Advance version


Names in other languages
| Language | Name | Meaning |
|---|---|---|
| Japanese | ラトリーとうじょう Ratorī Tōjō |
Enter Rattly |
| German | Segel Trauma (SNES) Segal-Trauma (GBA) |
Sail Trauma |
| Italian | Vele a Volontà |
Canvas at Will |
| Spanish | Problema de Gavia |
Topsail Trouble |