Barrel Bayou (Donkey Kong Country 2: Diddy's Kong Quest): Difference between revisions
7feetunder (talk | contribs) mNo edit summary |
(removed leftover dkl2 information; fixed summary; making consistent with other level pages) |
||
| Line 11: | Line 11: | ||
|after=[[Glimmer's Galleon (Donkey Kong Country 2: Diddy's Kong Quest)|>>]] | |after=[[Glimmer's Galleon (Donkey Kong Country 2: Diddy's Kong Quest)|>>]] | ||
}} | }} | ||
'''Barrel Bayou''' is the eleventh level of ''[[Donkey Kong Country 2: Diddy's Kong Quest]]'' and | '''Barrel Bayou''' is the eleventh level of ''[[Donkey Kong Country 2: Diddy's Kong Quest]]'' and the first level of [[Krem Quay]]. It is the first bayou-themed level of the game. | ||
== Summary == | |||
As its title suggests, Barrel Bayou involves [[Diddy Kong|Diddy]] and [[Dixie Kong]] using [[Rotatable Barrel]]s and [[Arrow Barrel]]s to blast across gaps. Aside from barrel blastting, the [[Kong]]s also travel across a series of moss-covered boardwalks throughout. Barrel Bayou is the first level to feature [[Kloak]]s, which are hovering enemies that throw projectiles, items, or enemies at the Kongs. | |||
An [[Animal Crate]] of [[Rambi the Rhino]] appears early in the level. The Kongs can find its crate shortly after the letter K, by jumping over the first [[Zinger]] and onto a [[Krockhead]], and then jumping from the Krockhead onto a small boardwalk with its Animal Crate. By freeing Rambi, they can ride up until halfway through the level, where its [[No Animal Sign]] appears shortly after the [[Star Barrel]]. | |||
== | The music for this and all the other swamp levels in the games are titled "Bayou Boogie". It bears a similarity to {{wp|Phil Collins}}'s "{{wp|In the Air Tonight}}". The composer for the game, [[David Wise]], confirmed that the similarity was intentional.<ref>[https://twitter.com/David_Wise/status/573863740099158016 Tweet from David Wise]</ref> | ||
==Layout== | |||
[[File:Barrel Bayou DKC2 shot 2.png|thumb|upright=1.1|Diddy and Dixie approach the first Rotatable Barrel in the level]] | [[File:Barrel Bayou DKC2 shot 2.png|thumb|upright=1.1|Diddy and Dixie approach the first Rotatable Barrel in the level]] | ||
The level begins on a grassy platform with a [[barrel]] on it. Ahead, the Kongs can find a trio of Neeks and then a lone Rotatable Barrel with the [[K-O-N-G Letters|letter K]] above it. Some [[banana]]s are also to the left and right of the Rotatable Barrel, which only has five seconds set on it. After the primates stay in the barrel past this time limit, it automatically shoots them out of it. A Klomp is nearby, followed by a small area of water with a lily pad holding a [[DK Barrel]] floating on it. A Flitter also flies at the end of the water area, and once they cross this water, they make their way down a long platform with a [[crate]]-throwing Kloak above it. The Kloak also throws a Banana Bunch if the Kongs wait near it for a while. There is another area of water ahead of here, and it can be crossed with either a group of Rotatable Barrels, each with three to five seconds set on them, or with a [[Krockhead]] sticking its head out of the liquid. If they use the Krockhead to cross, they come up to a small platform in the water, which holds an [[Animal Crate]] with Rambi in it. Additionally, in the [[Game Boy Advance]] version of the game, the heroes collect a [[photograph]] if they grab the banana above this Krockhead. | The level begins on a grassy platform with a [[barrel]] on it. Ahead, the Kongs can find a trio of Neeks and then a lone Rotatable Barrel with the [[K-O-N-G Letters|letter K]] above it. Some [[banana]]s are also to the left and right of the Rotatable Barrel, which only has five seconds set on it. After the primates stay in the barrel past this time limit, it automatically shoots them out of it. A Klomp is nearby, followed by a small area of water with a lily pad holding a [[DK Barrel]] floating on it. A Flitter also flies at the end of the water area, and once they cross this water, they make their way down a long platform with a [[crate]]-throwing Kloak above it. The Kloak also throws a Banana Bunch if the Kongs wait near it for a while. There is another area of water ahead of here, and it can be crossed with either a group of Rotatable Barrels, each with three to five seconds set on them, or with a [[Krockhead]] sticking its head out of the liquid. If they use the Krockhead to cross, they come up to a small platform in the water, which holds an [[Animal Crate]] with Rambi in it. Additionally, in the [[Game Boy Advance]] version of the game, the heroes collect a [[photograph]] if they grab the banana above this Krockhead. | ||
| Line 34: | Line 37: | ||
==Enemies== | ==Enemies== | ||
{|class="dktable-brown" width= | {|class="dktable-brown" width=20% | ||
|- | |- | ||
!Sprite | !Sprite | ||
| Line 40: | Line 43: | ||
!Count | !Count | ||
|- | |- | ||
|align="center"|[[File: | |align="center"|[[File:Flitter DKC2.png]] | ||
|align="center"|[[ | |align="center"|[[Flitter]] | ||
|align="center"| | |align="center"|1 (main level)<br>2 (Bonus Area)<br>'''Total:''' 3 | ||
|- | |- | ||
|align="center"|[[File:Klomp DKC2.png]] | |align="center"|[[File:Klomp DKC2.png]] | ||
|align="center"|[[Klomp]] | |align="center"|[[Klomp]] | ||
|align="center"|1 | |align="center"|1 | ||
|- | |- | ||
|align="center"|[[File:Kloak DKC2.png]] | |align="center"|[[File:Kloak DKC2.png]] | ||
|align="center"|[[Kloak]] | |align="center"|[[Kloak]] | ||
|align="center"|10 | |align="center"|10 | ||
|- | |- | ||
|align="center"|[[File:Klobber DKC2 green.png]][[File:Klobber DKC2 yellow.png]] | |align="center"|[[File:Klobber DKC2 green.png]][[File:Klobber DKC2 yellow.png]] | ||
|align="center"|[[Klobber]] | |align="center"|[[Klobber]] | ||
|align="center"|1 (green)<br>3 (yellow)<br>'''Total''': 4 | |align="center"|1 (green)<br>3 (yellow)<br>'''Total''': 4 | ||
|- | |||
|align="center"|[[File:Neek DKC2.png]] | |||
|align="center"|[[Neek]] | |||
|align="center"|9 | |||
|- | |||
|align="center"|[[File:Zinger DKC2 yellow.png]] | |||
|align="center"|[[Zinger]] (yellow) | |||
|align="center"|11 (main level)<br>1 (Bonus Area)<br>'''Total:''' 12 | |||
|} | |} | ||
==Items and objects== | ==Items and objects== | ||
{|class="dktable-brown" width= | {|class="dktable-brown" width=15% | ||
|- | |- | ||
!Name | !Name | ||
| Line 76: | Line 79: | ||
| align="center" |[[File:Banana Coin.png]]<br>[[Banana Coin|Banana Bunch Coin]] | | align="center" |[[File:Banana Coin.png]]<br>[[Banana Coin|Banana Bunch Coin]] | ||
|2 | |2 | ||
|- | |||
| align="center" |[[File:DKC2 Barrel.png]]<br>[[Barrel]] | |||
|1 <!--(not including Kloak barrels)--> | |||
|- | |- | ||
| align="center" |[[File:DK Barrel.png]]<br>[[DK Barrel]] | | align="center" |[[File:DK Barrel.png]]<br>[[DK Barrel]] | ||
| Line 85: | Line 91: | ||
| align="center" |[[File:Kannonball.png]]<br>[[Kannonball]] | | align="center" |[[File:Kannonball.png]]<br>[[Kannonball]] | ||
|2 | |2 | ||
|- | |- | ||
| align="center" |[[File:Treasure Chest DKC2.png]]<br>[[Treasure Chest]] | | align="center" |[[File:Treasure Chest DKC2.png]]<br>[[Treasure Chest]] | ||
| Line 108: | Line 111: | ||
| align="center" |1 | | align="center" |1 | ||
|- | |- | ||
| align="center" |[[File:Red Extra Life Balloon DKC2.png]]<br>[[Extra Life Balloon]] | | align="center" |[[File:Red Extra Life Balloon DKC2.png]]<br>[[Extra Life Balloon|Red Life Balloon]] | ||
| align="center" |1 | | align="center" |1 | ||
|} | |} | ||
==Secrets== | ==Secrets== | ||
====Bonus | ====Bonus Areas==== | ||
{|class="dktable-brown" width=70% | {|class="dktable-brown" width=70% | ||
|- | |- | ||
| Line 120: | Line 123: | ||
|- | |- | ||
| align="center" |[[File:Barrel Bayou Bonus Area 1.png]] | | align="center" |[[File:Barrel Bayou Bonus Area 1.png]] | ||
|'''''Destroy them All!'''''<br>Immediately after passing Rambi's No Animal Sign, the Kongs discover an arrow formed by bananas pointing to the left and a Kloak. If the Kongs wait for a few seconds, the Kloak begins to float to the left. They must chase the villain all the way to the end of the big platform, where it stops and throws a treasure chest | |'''''Destroy them All!'''''<br>Immediately after passing Rambi's No Animal Sign, the Kongs discover an arrow formed by bananas pointing to the left and a Kloak. If the Kongs wait for a few seconds, the Kloak begins to float to the left. They must chase the villain all the way to the end of the big platform, where it stops and throws a treasure chest containing a [[kannonball]]. After they release the kannonball from the chest, they must pick it up and carry it to the left, where a kannon sits on a lily pad. If they insert the kannonball into the kannon, and then enter the object, they are fired up into a Bonus Area. Here, the Kongs have 15 seconds to defeat two Flitters and a Zinger, which are flying high into the air. After defeating every enemy, a [[Kremkoin]] spawns on the right side for the Kongs to obtain. | ||
|- | |- | ||
| align="center" |[[File:Barrel Bayou Bonus Area 2.png]] | | align="center" |[[File:Barrel Bayou Bonus Area 2.png]] | ||
|'''''Find the Token!'''''<br>Just before reaching the end of the level, the Kongs make their way onto a platform with a Bonus Barrel and the level's final Kloak floating above it. By using their Team-up move, or by bouncing on the barrels thrown by the nearby Kloak, the Kongs can make their way into the Bonus Barrel. The Bonus Barrel then sends them to a Bonus Level, where they must use many Rotatable Barrels, each with only two seconds set on them, to cross a large | |'''''Find the Token!'''''<br>Just before reaching the end of the level, the Kongs make their way onto a platform with a Bonus Barrel and the level's final Kloak floating above it. By using their Team-up move, or by bouncing on the barrels thrown by the nearby Kloak, the Kongs can make their way into the Bonus Barrel. The Bonus Barrel then sends them to a Bonus Level, where they must use many Rotatable Barrels, each with only two seconds set on them, to cross a large swamp pit. The Kongs have 20 seconds to successfully cross the pit and obtain the Kremkoin from a boardwalk on the right side. | ||
|} | |||
===Collectibles=== | |||
[[File:Barrel Bayou DK Coin.png|thumb|The Kongs can obtain a DK Coin by crossing the No Animal Sign with Rambi]] | |||
{|class="dktable-brown" width=70% | |||
|- | |||
!Item | |||
!Location | |||
|- | |||
| align="center" |[[File:DK Coin sprite.png]]<br>[[DK Coin]] | |||
|The Kongs must ride Rambi past the [[No Animal Sign]]. | |||
|- | |||
| align="center" | [[File:Golden Feather DKC2 GBA.png]]<br>[[Golden Feather]] (GBA version) | |||
|Almost immediately after passing the letter O, the Kongs must blast through six Rotatable Barrels. The Golden Feather is located between the fourth and fifth Rotatable Barrels. | |||
|- | |||
| align="center" | [[File:Photograph DKC2GBA sprite.png]]<br>[[Photograph]] (GBA version) | |||
|When the Kongs encounter the first Zinger (just before the Rambi Crate), they must jump over it and onto the Krockhead. If the Kongs obtain the Banana above it, they are provided with a photograph. The picture shows a Krockhead on the seventh page of the [[scrapbook]]. | |||
|} | |} | ||
| Line 143: | Line 163: | ||
| align="center" |[[File:Letter G.png]] | | align="center" |[[File:Letter G.png]] | ||
|Reached with an Auto Fire Barrel after the second Bonus Barrel. | |Reached with an Auto Fire Barrel after the second Bonus Barrel. | ||
|} | |} | ||
==Gallery== | ==Gallery== | ||
===Super Nintendo Entertainment System=== | |||
<gallery> | <gallery> | ||
Barrel Bayou DKC2 shot.png|The Kongs approach a DK Barrel | Barrel Bayou DKC2 shot.png|The Kongs approach a DK Barrel | ||
Barrel Bayou DKC2 | Barrel Bayou DKC2 letter O.png|Diddy and Rambi approaching the letter O | ||
BarrelBayou-GBA-K.png|The letter | Barrel Bayou DKC2 letter G.png|Dixie blasting toward the letter G | ||
BarrelBayou-GBA-N.png|The letter | </gallery> | ||
===Game Boy Advance=== | |||
<gallery> | |||
Barrel Bayou GBA world map.png|Location from the world map | |||
BarrelBayou-GBA-K.png|The location of the letter K | |||
Barrel Bayou GBA first Zinger.png|The Kongs encounter the first Zinger | |||
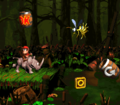
Barrel Bayou DKC2 GBA crate.png|The Kongs find the Rambi Crate | |||
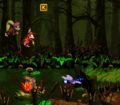
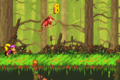
Barrel Bayou DKC2 GBA.png|The Kongs riding Rambi, who defeats some Neeks | |||
Barrel Bayou GBA Golden Feather.png|Location of the Golden Feather | |||
BarrelBayou-GBA-N.png|The location of the letter N | |||
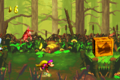
Barrel Bayou DKC2 GBA Bonus Barrel.png|Location of the Bonus Barrel, which leads to the second Bonus Area | |||
</gallery> | </gallery> | ||
Revision as of 22:16, March 28, 2019
Template:Levelbox Barrel Bayou is the eleventh level of Donkey Kong Country 2: Diddy's Kong Quest and the first level of Krem Quay. It is the first bayou-themed level of the game.
Summary
As its title suggests, Barrel Bayou involves Diddy and Dixie Kong using Rotatable Barrels and Arrow Barrels to blast across gaps. Aside from barrel blastting, the Kongs also travel across a series of moss-covered boardwalks throughout. Barrel Bayou is the first level to feature Kloaks, which are hovering enemies that throw projectiles, items, or enemies at the Kongs.
An Animal Crate of Rambi the Rhino appears early in the level. The Kongs can find its crate shortly after the letter K, by jumping over the first Zinger and onto a Krockhead, and then jumping from the Krockhead onto a small boardwalk with its Animal Crate. By freeing Rambi, they can ride up until halfway through the level, where its No Animal Sign appears shortly after the Star Barrel.
The music for this and all the other swamp levels in the games are titled "Bayou Boogie". It bears a similarity to Phil Collins's "In the Air Tonight". The composer for the game, David Wise, confirmed that the similarity was intentional.[1]
Layout

The level begins on a grassy platform with a barrel on it. Ahead, the Kongs can find a trio of Neeks and then a lone Rotatable Barrel with the letter K above it. Some bananas are also to the left and right of the Rotatable Barrel, which only has five seconds set on it. After the primates stay in the barrel past this time limit, it automatically shoots them out of it. A Klomp is nearby, followed by a small area of water with a lily pad holding a DK Barrel floating on it. A Flitter also flies at the end of the water area, and once they cross this water, they make their way down a long platform with a crate-throwing Kloak above it. The Kloak also throws a Banana Bunch if the Kongs wait near it for a while. There is another area of water ahead of here, and it can be crossed with either a group of Rotatable Barrels, each with three to five seconds set on them, or with a Krockhead sticking its head out of the liquid. If they use the Krockhead to cross, they come up to a small platform in the water, which holds an Animal Crate with Rambi in it. Additionally, in the Game Boy Advance version of the game, the heroes collect a photograph if they grab the banana above this Krockhead.
A Rotatable Barrel with three seconds on it is to the right of Rambi's Animal Crate, and it can shoot the heroes into a trail of bananas and onto a platform on the other side of the water. The Kongs can find a Zinger on the edge of this platform. A Kloak is near here, and it throws a Zinger onto the platform and then hovers off-screen. If the primates continue, they come up to an additional Zinger that guards a quadruplet of bananas, and then reach a Klobber. A DK Barrel is ahead of here, but before the heroes reach it, they must pass a pair of Kloaks that throw crates at them. After they pass the DK Barrel, they encounter a Zinger that flies over the letter O, which is located above a large pool of water. The group can find a long set of Rotatable Barrels ahead of here, each with only two seconds set on them. As they shoot across the area with these barrels, they come up to a Golden Feather, found only in the Game Boy Advance version of the game. The final barrel can either shoot them onto a long, nearby platform, or into a Zinger guarding a Banana Coin. If they shoot to this Zinger with Rambi, the Animal Friend can slam through the Zinger and safely grab the coin. The heroes land on the platform after shooting to this Zinger, and if they travel forward, they make their way to a second Klobber and a Kloak. The Kloak throws a Banana Bunch and then a Zinger, which lands in front of the Banana Bunch. An area of water is ahead of here, but the group can cross it with the use of three Rotatable Barrels. The first two barrels, both with three to five seconds on them, constantly move up and down, while the last one, with only two seconds set on it, is stationary and placed above a small platform with the level's Star Barrel on it.

At this point, the heroes can find a Zinger floating above the water to the right of them. A half-sunken barrel and a lily pad holding a Kannon float on top of the water, and they can be used as platforms in order to reach a platform suspended over the liquid. Two groups of three Neeks walk down the platform, which also holds two Zingers that the heroes must jump over. After they pass the second Zinger, they reach a No Animal Sign. If they reach this sign with Rambi, the Animal Friend disappears and the Kongs are given a DK Coin. An arrow pointing to the west formed by bananas is nearby, being followed by a Kloak that throws some barrels at the primates. If they wait long enough near this floating enemy, the foe heads to the left to the edge of the platform and throws a treasure chest that contains a kannonball. A DK Barrel shakes in the air to the right of the Kloak, and if they travel past it, they find another water area with a pair of Auto Fire Barrels above it. The barrels are placed nearly back-to-back, but are not facing each other. However, they can still be used to cross: If the primates shift to the right after shooting out of the first barrel, they head along a trail of bananas and then into the neighboring barrel, which then fires them to the other side of the water.

Here, they can find two Kloaks that both throw Click-Clacks. One of these enemies guards the letter N. After the Kloaks throw a few Click-Clacks, they fly away, leaving the letter N open to the Kongs. Another area of water is ahead, and a Zinger floats above the beginning of it. After they jump over this foe, they land in an Auto Fire Barrel that is placed across from another Auto Fire Barrel in a mirrored position. As before, they must shift to the right after firing out of the first of the barrels to land in the second, which then shoots them to the next pair of Auto Fire Barrels. These barrels are positioned in the same way as the previous and must therefore be used in the same way. After they shoot out of the second of these two Auto Fire Barrels, they land in a lone Auto Fire Barrel that is aimed in the opposite direction that they want to go. By shifting to the right after shooting out of the barrel, the heroes can head in the correct direction and land on a solid area of ground. As they shoot out of the barrel, they also hit into a DK Barrel.
Ahead of here, the primates can find two Kobbles and a small pit of water with a lily pad holding a Banana Coin on top of it. A Zinger hovers up and down above it as well, but once the foe hovers upwards, the heroes can drop onto the lily pad and grab the Banana Coin. On the other side of this small water area, the duo encounters a Kloak that throws a few barrels and a Zinger. An additional water area follows the Kloak, who leaves the area after throwing the Zinger. As the heroes cross the water, they come up to a Banana Bunch and a half-sunken barrel that they must use as a platform. The barrel can help them reach another raised piece of ground, which is immediately followed by a water area with an Auto Fire Barrel hovering across it. Many bananas and the letter G float above this Auto Fire Barrel, which must be used to cross. The barrel is positioned so that it only shoots the Kongs upwards. Therefore, as the device shifts over the liquid, the heroes must move with it and constantly try to land back in the barrel.
Soon, they make their way to the other side of the water, where they can find a large platform lifted over the water. A Bonus Barrel is above this piece of land, along with a Kloak, who throws a few barrels and a Zinger at the heroes. After it throws the Zinger, it flies upwards into an area that cannot be accessed. The Kongs can find one last area of water near here, and they can cross it with the use of a barrel floating in it. Once they cross the water, they land in an area with a few Rotatable Barrels, the first two with one second set on them, and the last barrel with five seconds set on it. They can use these barrels to shoot to the End of Level Target found nearby. If they hit this target, they complete the level, but if they hit it immediately after shooting out of the last Rotatable Barrel, they complete the level and win a prize, such as a red Extra Life Balloon. A Zinger hovers around the last Rotatable Barrel, so the heroes must watch for it as they shoot to the End of Level Target.
Enemies
| Sprite | Name | Count |
|---|---|---|
| Flitter | 1 (main level) 2 (Bonus Area) Total: 3 | |
| Klomp | 1 | |
| Kloak | 10 | |
| Klobber | 1 (green) 3 (yellow) Total: 4 | |
| Neek | 9 | |
| Zinger (yellow) | 11 (main level) 1 (Bonus Area) Total: 12 |
Items and objects
| Name | Count |
|---|---|
Banana Bunch |
1 |
Banana Bunch Coin |
2 |
Barrel |
1 |
DK Barrel |
4 |
Kannon |
1 |
Kannonball |
2 |
Treasure Chest |
1 |
Rotatable Barrel |
24 |
End of Level Target prizes
| Name | Count |
|---|---|
Banana Bunch |
2 |
Banana Bunch Coin |
1 |
Red Life Balloon |
1 |
Secrets
Bonus Areas
| Image | Type and description |
|---|---|

|
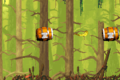
Destroy them All! Immediately after passing Rambi's No Animal Sign, the Kongs discover an arrow formed by bananas pointing to the left and a Kloak. If the Kongs wait for a few seconds, the Kloak begins to float to the left. They must chase the villain all the way to the end of the big platform, where it stops and throws a treasure chest containing a kannonball. After they release the kannonball from the chest, they must pick it up and carry it to the left, where a kannon sits on a lily pad. If they insert the kannonball into the kannon, and then enter the object, they are fired up into a Bonus Area. Here, the Kongs have 15 seconds to defeat two Flitters and a Zinger, which are flying high into the air. After defeating every enemy, a Kremkoin spawns on the right side for the Kongs to obtain. |

|
Find the Token! Just before reaching the end of the level, the Kongs make their way onto a platform with a Bonus Barrel and the level's final Kloak floating above it. By using their Team-up move, or by bouncing on the barrels thrown by the nearby Kloak, the Kongs can make their way into the Bonus Barrel. The Bonus Barrel then sends them to a Bonus Level, where they must use many Rotatable Barrels, each with only two seconds set on them, to cross a large swamp pit. The Kongs have 20 seconds to successfully cross the pit and obtain the Kremkoin from a boardwalk on the right side. |
Collectibles

| Item | Location |
|---|---|
DK Coin |
The Kongs must ride Rambi past the No Animal Sign. |
Golden Feather (GBA version) |
Almost immediately after passing the letter O, the Kongs must blast through six Rotatable Barrels. The Golden Feather is located between the fourth and fifth Rotatable Barrels. |
Photograph (GBA version) |
When the Kongs encounter the first Zinger (just before the Rambi Crate), they must jump over it and onto the Krockhead. If the Kongs obtain the Banana above it, they are provided with a photograph. The picture shows a Krockhead on the seventh page of the scrapbook. |
K-O-N-G Letters
| Letter | Location |
|---|---|
| Above a Rotatable Barrel at the beginning of the level. | |
| Near a Zinger after the second DK Barrel. | |
| By a Kloak, who will move away if the Kongs wait for a bit, after the No Animal Sign. | |
| Reached with an Auto Fire Barrel after the second Bonus Barrel. |
Gallery
Super Nintendo Entertainment System
The Kongs approach a DK Barrel
Diddy and Rambi approaching the letter O
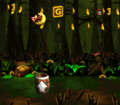
Dixie blasting toward the letter G


Game Boy Advance
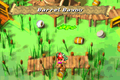
Location from the world map
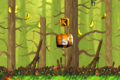
The location of the letter K
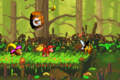
The Kongs encounter the first Zinger
The Kongs find the Rambi Crate
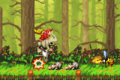
The Kongs riding Rambi, who defeats some Neeks
Location of the Golden Feather
The location of the letter N

Location of the Bonus Barrel, which leads to the second Bonus Area


Names in other languages
| Language | Name | Meaning |
|---|---|---|
| Japanese | かいてんタルさんばし Kaiten taru sambashi |
Rotatable Barrel Pier |
| German | Sumpf der Fässer |
Swamp of Barrels |
| Spanish | Pantanos Barril |
Barrel Swamps |