Pirate Panic (Donkey Kong Country 2: Diddy's Kong Quest): Difference between revisions
LinkTheLefty (talk | contribs) mNo edit summary |
LinkTheLefty (talk | contribs) mNo edit summary |
||
| (26 intermediate revisions by 11 users not shown) | |||
| Line 1: | Line 1: | ||
{{italic title| | {{italic title|id=yes}} | ||
{{FA}} | {{FA}} | ||
{{ | {{level infobox | ||
|image=[[File:PiratePanic.png]] | |image=[[File:PiratePanic.png]] | ||
|code=1 - 1 | |code=1 - 1 | ||
|world=[[Gangplank Galleon (world)|Gangplank Galleon]] | |world=[[Gangplank Galleon (world)|Gangplank Galleon]] | ||
|game=''[[Donkey Kong Country 2: Diddy's Kong Quest]] | |game=''[[Donkey Kong Country 2: Diddy's Kong Quest]] | ||
| | |track=Klomp's Romp | ||
|after=[[Mainbrace Mayhem (Donkey Kong Country 2: Diddy's Kong Quest)|>>]] | |after=[[Mainbrace Mayhem (Donkey Kong Country 2: Diddy's Kong Quest)|>>]] | ||
}} | }} | ||
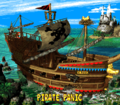
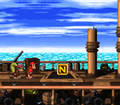
'''Pirate Panic''' is the first level of ''[[Donkey Kong Country 2: Diddy's Kong Quest]]'' and of its world, [[Gangplank Galleon (world)|Gangplank Galleon]]. | '''Pirate Panic''' is the first level of ''[[Donkey Kong Country 2: Diddy's Kong Quest]]'' and of its world, [[Gangplank Galleon (world)|Gangplank Galleon]]. It takes place on a ship deck. Since it is the first level, Pirate Panic only features basic enemies. There are many groups of stacked-up barrels that the [[Kong]]s can jump on to reach collectibles. [[King K. Rool#Donkey Kong Country 2: Diddy's Kong Quest|Kaptain K. Rool]]'s cabin follows after the start of the level. It holds an [[Red Balloon|Extra Life Balloon]] and a note from the crocodile himself, which states that he has kidnapped [[Donkey Kong]] and is holding him ransom in exchange for the [[banana hoard]]. Much like the first level of ''[[Donkey Kong Country]]'', [[Jungle Hijinxs (Donkey Kong Country)|Jungle Hijinxs]], the Kongs discover [[Rambi]] around halfway through the level; he is required to break open a Bonus Area entrance. | ||
Much like the first level of ''[[Donkey Kong Country]]'', [[Jungle Hijinxs (Donkey Kong Country)|Jungle Hijinxs]], the Kongs discover [[ | |||
==Layout== | ==Layout== | ||
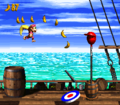
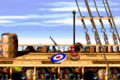
[[File: | [[File:Pirate Panic DKC2 GBA.png|thumb|left|Pirate Panic's appearance in the Game Boy Advance version]] | ||
At the beginning of the level, there is a straight path leading under a trail of [[banana]]s, which the Kongs can optionally collect if they throw one another into a hidden barrel at the start of the trail. A doorway with a pair of bananas in front it is farther ahead that the primates can enter to find a letter from Kaptain K. Rool and an Extra Life Balloon. A pathway is ahead of the bananas that leads the heroes up some stairs with a Neek on them. A crate stands at the top of the stairway near some large barrels that can hold up a nearby Klomp. They can find a Banana Bunch above the barrels. A stairway leading downwards is after these barrels, taking the Kongs towards a flat area with some more large barrels that they can stand on. A gap is between some of the barrels, and the [[ | At the beginning of the level, there is a straight path leading under a trail of [[banana]]s, which the Kongs can optionally collect if they throw one another into a hidden barrel at the start of the trail. A doorway with a pair of bananas in front it is farther ahead that the primates can enter to find a letter from Kaptain K. Rool and an Extra Life Balloon. A pathway is ahead of the bananas that leads the heroes up some stairs with a Neek on them. A crate stands at the top of the stairway near some large barrels that can hold up a nearby Klomp. They can find a Banana Bunch above the barrels. A stairway leading downwards is after these barrels, taking the Kongs towards a flat area with some more large barrels that they can stand on. A gap is between some of the barrels, and the [[KONG Letters|letter K]] floats above this gap. A crate and a [[DK Barrel]] are ahead, followed by a stairway with Neeks on it. Four barrels sit at the top of the stairs with bananas on it. The fruits are formed in the shape of the letter R. The letter O is just ahead in a lower part of the ship, along with two Klomps. The [[Star Barrel]] follows the letter. | ||
A DK Barrel is after the Star Barrel, as well as a stairway holding two Neeks. A gap in the ship is ahead, but the Kongs can jump into it to find special items. On the other side of the gap, there is a Klobber and the letter N. These are followed by a tall pile of barrels with Klomps stomping around them. The Rambi Crate is on top of the barrels. More bananas in the formation of an R are also near here, being followed by stairs that lead down to a trail of Neeks. Many barrels that can be stood on are piled up ahead in a lower part of the ship. Bananas in the formation of an arrow are in front of them. Neeks march in the area ahead of here in front of some large barrels that can be jumped on to reach the [[DK Coin|Video Game Hero Coin]]. There is a stairway after here that can be walked up to reach two Klomps, one of which stands on a few large barrels. Two more over-sized barrels are ahead with a Klobber on them. They can help the heroes jump to a raised part of the ship, where a [[No Animal Sign]] can be found. It can make Rambi disappear if he is in use. A barrel is found, which helps the Kongs land on the [[End of Level Target]] and receive a prize, either a Banana Bunch, Banana Coin, or a [[Red Balloon]]. After landing on the target, the Kongs exit the level and head to Mainbrace Mayhem. | |||
A DK Barrel is after the Star Barrel, as well as a stairway holding two Neeks. A gap in the ship is ahead, but the Kongs can jump into it to find special items. On the other side of the gap, there is a Klobber and the letter N. These are followed by a tall pile of barrels with Klomps stomping around them. The Rambi Crate is on top of the barrels. More bananas in the formation of an R are also near here, being followed by stairs that lead down to a trail of Neeks. Many barrels that can be stood on are piled up ahead in a lower part of the ship. Bananas in the formation of an arrow are in front of them. Neeks march in the area ahead of here in front of some large barrels that can be jumped on to reach the [[DK Coin]]. There is a stairway after here that can be walked up to reach two Klomps, one of which stands on a few large barrels. Two more over-sized barrels are ahead with a Klobber on them. They can help the heroes jump to a raised part of the ship, where a [[No Animal Sign]] can be | |||
{{br|left}} | {{br|left}} | ||
==Enemies== | ==Enemies== | ||
The following enemies appear in the following quantities: | |||
<gallery> | |||
Klobber DKC2 green.png|[[Klobber]] (green) (2) | |||
Klomp DKC2.png|[[Klomp]] (15) | |||
Neek DKC2.png|[[Neek]] (22) | |||
</gallery> | |||
==Items and objects== | ==Items and objects== | ||
The following items and objects appear in the following quantities: | |||
<gallery> | |||
Banana DKC SNES.png|[[Banana]] (108) | |||
Banana Coin.png|[[Banana Coin]] (3){{footnote|main|a}} | |||
DK Barrel.png|[[DK Barrel]] (3){{footnote|main|b}} | |||
Red Extra Life Balloon DKC2.png|[[Red Balloon]] (1, in K. Rool's cabin) | |||
| | Green Extra Life Balloon DKC2.png|[[Green Balloon]] (1, rewarded from No Animal Sign) | ||
| | </gallery> | ||
{{footnote|note|a|The first Banana Coin can be obtained from blasting from a Barrel Cannon just above the starting point; the second one is just after the letter K, only reachable from using [[Team-up]]; and lastly, the third one is on the far right of the first Bonus Level, directly below the Kremkoin.}} | |||
{{footnote|note|b|The first DK Barrel is shortly after the start; the second one is next to the letter K after the three Neeks; and the third one is right after the Star Barrel.}} | |||
===KONG Letters=== | |||
[[File:Pirate Panic SNES K.png|thumb|The location of the letter K]] | |||
*'''K:''' Located in the middle of two barrel platforms, in the air. Three Neeks patrol around the barrels. | |||
| | *'''O:''' Floating in the center of a small pit with two Klomps, right before the Star Barrel. | ||
| | *'''N:''' Behind the first Klobber after the Star Barrel; the Kongs can also automatically collect from entering the first Bonus Area. | ||
*'''G:''' Just before the No Animal Sign, two Klomps walk around a set of five barrel platforms. The "G" is located at the end. | |||
{{br}} | |||
=== | |||
=== | ===Key items=== | ||
[[File:Pirate Panic GBA Golden Feather.png|thumb|The location of the golden feather in the Game Boy Advance version]] | |||
*[[DK Coin|Cranky's Video Game Hero Coin]]: After the second Bonus Area, Diddy and Dixie can jump off of a large stack of two barrel platforms or use [[team up]] to reach it. | |||
*[[Golden feather]] (Game Boy Advance version only): The Kongs must travel through the level to find bananas forming the shape of the letter R on top of four barrels. If they use their team up move to the left of here, they can throw one Kong up into the air, who can grab the feather high above the barrels. | |||
*[[Photograph]] (Game Boy Advance version only): The photograph is a picture of Rambi, whose photo is placed in the twelfth page of the [[Scrapbook (Donkey Kong Country series)|Scrapbook]]. Diddy and Dixie obtain it after defeating the first Klomp of the second Bonus Area. The photograph can only be obtained when the Kongs receive the Scrapbook from [[Kong Kollege]] later. | |||
{{br}} | |||
==Bonus Levels== | |||
{{multiframe|[[File:Pirate Panic Bonus Area 1.png|200px]] [[File:Pirate Panic Bonus Area 2.png|200px]]|size=420|The first and second Bonus Levels respectively}} | |||
{| | *'''''Find the Token!''''': Diddy and Dixie can enter the first Bonus Barrel shortly after the Star Barrel, by running down a crack in the ship. They must follow a short trail of [[banana]]s to the right. In the Bonus Stage, the Kongs' objective is to jump between tall barrel piles and obtain the [[Kremkoin]] from the highest one within 20 seconds. | ||
*'''''Destroy Them All!''''': After the Kongs mount Rambi, they can find a nearby wall, which is pointed at by Bananas in the shape of a left arrow. Rambi must [[super move|Supercharge]] into the wall to break it, therefore allowing access to the Bonus Area. Their objective to defeat every Neek and Klomp within 20 seconds. A Kremkoin appears after they defeat every enemy. | |||
==Warp Barrel== | |||
The [[Warp Barrel]] is hidden above the first barrel platform in the level, which itself is located after the first Crate. They can reach the barrel via team up. If they throw on another into the space that the invisible barrel is located, the Warp Barrel appears and sends them into a Bonus Level that takes place on a ship, where they can find a group of bananas that form an exclamation mark. If they walk into a doorway to the right of the bananas, they are taken out of the bonus and onto a barrel platform placed immediately before the End of Level Target. | |||
==Gallery== | ==Gallery== | ||
| Line 135: | Line 65: | ||
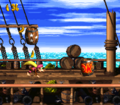
Pirate Panic DKC2 start.png|Diddy at the very start of the level | Pirate Panic DKC2 start.png|Diddy at the very start of the level | ||
PiratePanicAttackedSNES.png|Diddy gets hit by a Neek. | PiratePanicAttackedSNES.png|Diddy gets hit by a Neek. | ||
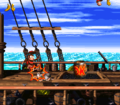
Team-up DKC2.png|The Kongs use | MonkeyTossSNES.png|Diddy throws Dixie at a Klomp near the start]] | ||
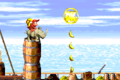
Team-up DKC2.png|The Kongs use team up under a Banana Coin | |||
Pirate Panic SNES O.png|The letter O | |||
1-1Middle DKC2.png|Dixie runs under the Star Barrel | 1-1Middle DKC2.png|Dixie runs under the Star Barrel | ||
Pirate Panic DKC2 hole.png|A gap in the ship that leads down to the first Bonus Level | Pirate Panic DKC2 hole.png|A gap in the ship that leads down to the first Bonus Level | ||
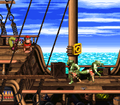
1-1RambiBox DKC2.png|Diddy runs near the Rambi Crate. | |||
Pirate Panic DKC2 Bonus Level 2 location.png|Rambi charging into a wall leading to the second Bonus Level | Pirate Panic DKC2 Bonus Level 2 location.png|Rambi charging into a wall leading to the second Bonus Level | ||
Pirate Panic SNES N.png|The letter N | |||
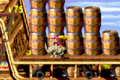
Pirate Panic SNES G.png|The letter G | |||
Pirate Panic End DKC2.png|The End of Level Target | Pirate Panic End DKC2.png|The End of Level Target | ||
</gallery> | </gallery> | ||
| Line 146: | Line 81: | ||
Pirate Panic GBA world map.png|The level as shown from the world map | Pirate Panic GBA world map.png|The level as shown from the world map | ||
Pirate Panic GBA start.png|Diddy at the start of the level | Pirate Panic GBA start.png|Diddy at the start of the level | ||
Pirate Panic GBA cabin.png|Diddy in a cabin with a Red Balloon and K. Rool's letter | Pirate Panic GBA cabin.png|Diddy in a cabin with a Red Balloon and K. Rool's letter | ||
Pirate Panic GBA letter.png|The letter written by Kaptain K. Rool | Pirate Panic GBA letter.png|The letter written by Kaptain K. Rool | ||
Pirate Panic GBA hole.png|The hole that leads down to the first Bonus Level | Pirate Panic GBA hole.png|The hole that leads down to the first Bonus Level | ||
Pirate Panic GBA Rambi charge.png|Rambi charging at a wall to enter the second Bonus Level | Pirate Panic GBA Rambi charge.png|Rambi charging at a wall to enter the second Bonus Level | ||
Pirate Panic GBA DK Coin.png|Location of the | Pirate Panic GBA DK Coin.png|Location of the Video Game Hero Coin | ||
Pirate Panic GBA End of Level Target.png|Diddy plays his boombox on the End of Level Target after completing it | Pirate Panic GBA End of Level Target.png|Diddy plays his boombox on the End of Level Target after completing it | ||
</gallery> | </gallery> | ||
| Line 158: | Line 91: | ||
==Names in other languages== | ==Names in other languages== | ||
{{foreign names | {{foreign names | ||
|Jap=パイレーツ パニック | |||
|JapR=Pairētsu Panikku | |||
|JapM=Pirates Panic | |||
|Spa=Pánico Pirata | |Spa=Pánico Pirata | ||
|SpaM= | |SpaM=Pirate Panic | ||
| | |Fre=Panique à Bord | ||
| | |FreM=Panic Onboard | ||
|Ger=Piraten Panik (SNES)<br | |Ger=Piraten Panik (SNES)<br>Piraten-Panik (GBA) | ||
|GerM= | |GerM=Pirate Panic | ||
|Ita=All'arrembaggio | |Ita=All'arrembaggio | ||
|ItaM=Boarding | |ItaM=Boarding | ||
}} | }} | ||
| Line 174: | Line 107: | ||
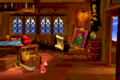
[[File:1-1Message DKC2.png|thumb|K. Rool's note in the original Super Nintendo release]] | [[File:1-1Message DKC2.png|thumb|K. Rool's note in the original Super Nintendo release]] | ||
*In the SNES version, there is a secret that allows the Kongs to obtain all 75 Kremkoins early. Players should head into the cabin where Kaptain K. Rool's note is found, then leave without collecting the Extra Life Balloon or reading the note. The players should then collect the first Banana Bunch without collecting any other bananas. Then, they should go back into the cabin, without collecting any bananas, and grab the 1-Up Balloon. The players should leave the cabin, and repeat the second step. The player should go back into the cabin, without collecting any bananas. This causes one Kremkoin worth 75 to spawn inside. | *In the SNES version, there is a secret that allows the Kongs to obtain all 75 Kremkoins early. Players should head into the cabin where Kaptain K. Rool's note is found, then leave without collecting the Extra Life Balloon or reading the note. The players should then collect the first Banana Bunch without collecting any other bananas. Then, they should go back into the cabin, without collecting any bananas, and grab the 1-Up Balloon. The players should leave the cabin, and repeat the second step. The player should go back into the cabin, without collecting any bananas. This causes one Kremkoin worth 75 to spawn inside. | ||
*In the Game Boy Advance version, the letter in Kaptain K. Rool's cabin was shown earlier during the introduction cutscene. It is the same message as the note in the instruction manual (except for a missing salutation), while the Super Nintendo version has a different message than the manual. | *In the [[Game Boy Advance]] version, the letter in Kaptain K. Rool's cabin was shown earlier during the introduction cutscene. It is the same message as the note in the instruction manual (except for a missing salutation), while the Super Nintendo version has a different message than the manual. | ||
*A few things are in the background of the cabin, including a portrait of K. Rool, a skull-and-crossbones pirate flag, a treasure chest with K. Rool's crown and a cutlass, and a map on a table. In the Game Boy Advance remake, there is a small, green sailboat on a barrel next to the cabin entrance. | *A few things are in the background of the cabin, including a portrait of K. Rool, a skull-and-crossbones pirate flag, a treasure chest with K. Rool's crown and a cutlass, and a map on a table. In the Game Boy Advance remake, there is a small, green sailboat on a barrel next to the cabin entrance. | ||
{{DKC2}} | {{DKC2}} | ||
[[Category:Pirate areas]] | |||
[[Category:Crocodile Isle]] | [[Category:Crocodile Isle]] | ||
[[Category:Donkey Kong Country 2: Diddy's Kong Quest | [[Category:Donkey Kong Country 2: Diddy's Kong Quest levels]] | ||
Latest revision as of 13:11, March 30, 2024
| Level | |
|---|---|
| Pirate Panic | |

| |
| Level code | 1 - 1 |
| World | Gangplank Galleon |
| Game | Donkey Kong Country 2: Diddy's Kong Quest |
| Music track | Klomp's Romp |
| << Directory of levels >> | |
Pirate Panic is the first level of Donkey Kong Country 2: Diddy's Kong Quest and of its world, Gangplank Galleon. It takes place on a ship deck. Since it is the first level, Pirate Panic only features basic enemies. There are many groups of stacked-up barrels that the Kongs can jump on to reach collectibles. Kaptain K. Rool's cabin follows after the start of the level. It holds an Extra Life Balloon and a note from the crocodile himself, which states that he has kidnapped Donkey Kong and is holding him ransom in exchange for the banana hoard. Much like the first level of Donkey Kong Country, Jungle Hijinxs, the Kongs discover Rambi around halfway through the level; he is required to break open a Bonus Area entrance.
Layout[edit]

At the beginning of the level, there is a straight path leading under a trail of bananas, which the Kongs can optionally collect if they throw one another into a hidden barrel at the start of the trail. A doorway with a pair of bananas in front it is farther ahead that the primates can enter to find a letter from Kaptain K. Rool and an Extra Life Balloon. A pathway is ahead of the bananas that leads the heroes up some stairs with a Neek on them. A crate stands at the top of the stairway near some large barrels that can hold up a nearby Klomp. They can find a Banana Bunch above the barrels. A stairway leading downwards is after these barrels, taking the Kongs towards a flat area with some more large barrels that they can stand on. A gap is between some of the barrels, and the letter K floats above this gap. A crate and a DK Barrel are ahead, followed by a stairway with Neeks on it. Four barrels sit at the top of the stairs with bananas on it. The fruits are formed in the shape of the letter R. The letter O is just ahead in a lower part of the ship, along with two Klomps. The Star Barrel follows the letter.
A DK Barrel is after the Star Barrel, as well as a stairway holding two Neeks. A gap in the ship is ahead, but the Kongs can jump into it to find special items. On the other side of the gap, there is a Klobber and the letter N. These are followed by a tall pile of barrels with Klomps stomping around them. The Rambi Crate is on top of the barrels. More bananas in the formation of an R are also near here, being followed by stairs that lead down to a trail of Neeks. Many barrels that can be stood on are piled up ahead in a lower part of the ship. Bananas in the formation of an arrow are in front of them. Neeks march in the area ahead of here in front of some large barrels that can be jumped on to reach the Video Game Hero Coin. There is a stairway after here that can be walked up to reach two Klomps, one of which stands on a few large barrels. Two more over-sized barrels are ahead with a Klobber on them. They can help the heroes jump to a raised part of the ship, where a No Animal Sign can be found. It can make Rambi disappear if he is in use. A barrel is found, which helps the Kongs land on the End of Level Target and receive a prize, either a Banana Bunch, Banana Coin, or a Red Balloon. After landing on the target, the Kongs exit the level and head to Mainbrace Mayhem.
Enemies[edit]
The following enemies appear in the following quantities:


Items and objects[edit]
The following items and objects appear in the following quantities:

Banana (108)

Banana Coin (3)a

Red Balloon (1, in K. Rool's cabin)

Green Balloon (1, rewarded from No Animal Sign)


a - The first Banana Coin can be obtained from blasting from a Barrel Cannon just above the starting point; the second one is just after the letter K, only reachable from using Team-up; and lastly, the third one is on the far right of the first Bonus Level, directly below the Kremkoin.
b - The first DK Barrel is shortly after the start; the second one is next to the letter K after the three Neeks; and the third one is right after the Star Barrel.
KONG Letters[edit]

- K: Located in the middle of two barrel platforms, in the air. Three Neeks patrol around the barrels.
- O: Floating in the center of a small pit with two Klomps, right before the Star Barrel.
- N: Behind the first Klobber after the Star Barrel; the Kongs can also automatically collect from entering the first Bonus Area.
- G: Just before the No Animal Sign, two Klomps walk around a set of five barrel platforms. The "G" is located at the end.
Key items[edit]

- Cranky's Video Game Hero Coin: After the second Bonus Area, Diddy and Dixie can jump off of a large stack of two barrel platforms or use team up to reach it.
- Golden feather (Game Boy Advance version only): The Kongs must travel through the level to find bananas forming the shape of the letter R on top of four barrels. If they use their team up move to the left of here, they can throw one Kong up into the air, who can grab the feather high above the barrels.
- Photograph (Game Boy Advance version only): The photograph is a picture of Rambi, whose photo is placed in the twelfth page of the Scrapbook. Diddy and Dixie obtain it after defeating the first Klomp of the second Bonus Area. The photograph can only be obtained when the Kongs receive the Scrapbook from Kong Kollege later.
Bonus Levels[edit]


- Find the Token!: Diddy and Dixie can enter the first Bonus Barrel shortly after the Star Barrel, by running down a crack in the ship. They must follow a short trail of bananas to the right. In the Bonus Stage, the Kongs' objective is to jump between tall barrel piles and obtain the Kremkoin from the highest one within 20 seconds.
- Destroy Them All!: After the Kongs mount Rambi, they can find a nearby wall, which is pointed at by Bananas in the shape of a left arrow. Rambi must Supercharge into the wall to break it, therefore allowing access to the Bonus Area. Their objective to defeat every Neek and Klomp within 20 seconds. A Kremkoin appears after they defeat every enemy.
Warp Barrel[edit]
The Warp Barrel is hidden above the first barrel platform in the level, which itself is located after the first Crate. They can reach the barrel via team up. If they throw on another into the space that the invisible barrel is located, the Warp Barrel appears and sends them into a Bonus Level that takes place on a ship, where they can find a group of bananas that form an exclamation mark. If they walk into a doorway to the right of the bananas, they are taken out of the bonus and onto a barrel platform placed immediately before the End of Level Target.
Gallery[edit]
Super Nintendo Entertainment System[edit]
Pirate Panic as shown from the world map

Diddy at the very start of the level
Diddy gets hit by a Neek.
![Diddy throws Dixie at a Klomp near the start]]](https://mario.wiki.gallery/images/thumb/3/30/MonkeyTossSNES.png/120px-MonkeyTossSNES.png)
Diddy throws Dixie at a Klomp near the start]]
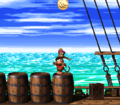
The Kongs use team up under a Banana Coin
The letter O
Dixie runs under the Star Barrel
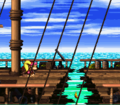
A gap in the ship that leads down to the first Bonus Level
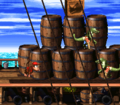
Diddy runs near the Rambi Crate.
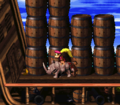
Rambi charging into a wall leading to the second Bonus Level
The letter N

The letter G
The End of Level Target


![Diddy throws Dixie at a Klomp near the start]]](/File:MonkeyTossSNES.png)


Game Boy Advance[edit]
The level as shown from the world map
Diddy at the start of the level
Diddy in a cabin with a Red Balloon and K. Rool's letter
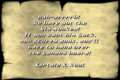
The letter written by Kaptain K. Rool

The hole that leads down to the first Bonus Level
Rambi charging at a wall to enter the second Bonus Level
Location of the Video Game Hero Coin
Diddy plays his boombox on the End of Level Target after completing it


Names in other languages[edit]
| Language | Name | Meaning |
|---|---|---|
| Japanese | パイレーツ パニック Pairētsu Panikku |
Pirates Panic |
| French | Panique à Bord |
Panic Onboard |
| German | Piraten Panik (SNES) Piraten-Panik (GBA) |
Pirate Panic |
| Italian | All'arrembaggio |
Boarding |
| Spanish | Pánico Pirata |
Pirate Panic |
Trivia[edit]

- In the SNES version, there is a secret that allows the Kongs to obtain all 75 Kremkoins early. Players should head into the cabin where Kaptain K. Rool's note is found, then leave without collecting the Extra Life Balloon or reading the note. The players should then collect the first Banana Bunch without collecting any other bananas. Then, they should go back into the cabin, without collecting any bananas, and grab the 1-Up Balloon. The players should leave the cabin, and repeat the second step. The player should go back into the cabin, without collecting any bananas. This causes one Kremkoin worth 75 to spawn inside.
- In the Game Boy Advance version, the letter in Kaptain K. Rool's cabin was shown earlier during the introduction cutscene. It is the same message as the note in the instruction manual (except for a missing salutation), while the Super Nintendo version has a different message than the manual.
- A few things are in the background of the cabin, including a portrait of K. Rool, a skull-and-crossbones pirate flag, a treasure chest with K. Rool's crown and a cutlass, and a map on a table. In the Game Boy Advance remake, there is a small, green sailboat on a barrel next to the cabin entrance.