Krockhead Klamber (Donkey Kong Country 2: Diddy's Kong Quest): Difference between revisions
(→Names in Other Languages: German names) |
Fawfulfury65 (talk | contribs) m (tense and other stuff) |
||
| Line 8: | Line 8: | ||
|after=[[Rattle Battle|>>]] | |after=[[Rattle Battle|>>]] | ||
}} | }} | ||
'''Krockhead Klamber''' is the thirteenth level of ''[[Donkey Kong Country 2: Diddy's Kong Quest]]'' and ''[[Donkey Kong Land 2]]''. It is the third area of [[Krem Quay]], as well as the eighth level in [[Krem Cauldron]] in ''Donkey Kong Land 2''. | '''Krockhead Klamber''' is the thirteenth level of ''[[Donkey Kong Country 2: Diddy's Kong Quest]]'' and ''[[Donkey Kong Land 2]]''. It is also the third area of [[Krem Quay]], as well as the eighth level in [[Krem Cauldron]] in ''Donkey Kong Land 2''. | ||
This is another swamp level, and the first appearance of [[Kutlass]]. The real challenge here is having to rely on [[Krochead]]s for stepping stones, as they only appear briefly when the [[Kong]]s touch one of the [[Krochead Barrel]]s. [[Kaboing]]s, [[Klinger]]s, [[Zinger]]s and [[Flitter]]s can be found here as well. [[Squitter]] is playable in this level, not on the main path, but in a Bonus Level. | This is another swamp level, and the first appearance of [[Kutlass]]. The real challenge here is having to rely on [[Krochead]]s for stepping stones, as they only appear briefly when the [[Kong]]s touch one of the [[Krochead Barrel]]s. [[Kaboing]]s, [[Klinger]]s, [[Zinger]]s and [[Flitter]]s can be found here as well. [[Squitter]] is playable in this level, not on the main path, but in a Bonus Level. | ||
== Level Layout == | == Level Layout == | ||
===Donkey Kong Country 2=== | ===''Donkey Kong Country 2=== | ||
When the level begins, the Kongs must travel along the path, jump over the [[Kutlass]] | When the level begins, the Kongs must travel along the path, jump over the [[Kutlass]] and grab onto the vine hanging out of the water. From there, they need to hop across the platforms floating atop the swampy water and also bounce off a few [[Flitter]]s flying by to avoid falling in the water. Many [[Kaboing]]s hop around the platforms and attempt to knock the heroes off, so they must be careful. They soon find the first [[Krochead]] in the level, between two vines. The monkeys can use it as a stepping stone over the water to get to the next vine, which is followed by some more platforms and half-sunken barrels. Eventually, they come up to a vine, with the [[Star Barrel]] looming slightly ahead. They can break it to mark the halfway point. | ||
Now halfway through the level, the group needs to jump across a couple platforms and get back on the mushy ground. There, they need to defeat another Kutlass and hit the [[Krochead Barrel]]. It should make Krocheads sneak slightly out of the water, so the Kongs can hop on their heads to get across the lake. After crossing the first few Krocheads and platforms, another Krochead Barrel | Now halfway through the level, the group needs to jump across a couple platforms and get back on the mushy ground. There, they need to defeat another Kutlass and hit the [[Krochead Barrel]]. It should make Krocheads sneak slightly out of the water, so the Kongs can hop on their heads to get across the lake. After crossing the first few Krocheads and platforms, another Krochead Barrel is in sight to hit. They should bounce across the next crocodiles and soon make it up to a vine with a [[Klinger]] on it. This enemy can be easily beat with a nearby barrel. After that, the monkeys must break the next Krochead Barrel and jump on each crocodile that comes up. There are also Flitters in between every two Krocheads, so the heroes can use them as an extra boost to get over the water. Later, they must jump two vines, both having Klingers on them, and then bounce on several more Flitters to reach some more vines, where a Krochead Barrel can be seen. Once they hit it, they need to hop across the Krocheads and watch out for [[Zinger]]s floating around. Eventually, the group is flung to another Krochead Barrel by a red Krochead. They should bounce across the next crocodiles and grab onto a couple vines. Right after that, the heroes should see a Zinger over the ending pad. If the monkeys can avoid the wasp, they can land on the pad and finish the level. | ||
===Donkey Kong Land 2=== | ===''Donkey Kong Land 2=== | ||
At the start of the level, the Kongs must hop onto the platforms in the water. After they jump across | At the start of the level, the Kongs must hop onto the platforms in the water. After they jump across the platforms, they can get back to land. From there, they must grab onto a couple of vines. There is a Klinger on one, who can easily be defeated. Then, they have to hop across more platforms in the water, followed by two Flitters to bounce off of and more vines. Eventually, the Kongs should get back on land and hit the Krochead Barrel, making Krocheads move their heads out of the water. The heroes can use them as stepping-stones to get across the dirty lake. After that, they should get on some vines and get on more platforms, where there is another Krochead Barrel. Using the crocodiles that stick out of the swamp, the monkeys should be able to reach land again, where there is a Star Barrel for them to break. | ||
At this point, the heroes must jump over a Zinger and hit the third Krochead Barrel. Then they should bounce across the Krocheads. The crocodiles | At this point, the heroes must jump over a Zinger and hit the third Krochead Barrel. Then they should bounce across the Krocheads. The crocodiles lead the group to another vine. From here, they need to hop off a Flitter and get to the next vine, then repeat the process, where they hit yet another Krochead Barrel. They then need to jump on two platforms and then get on the crocodiles. Flitters float between far apart Krocheads to help the Kongs, as the apes are able to bounce off of them to travel farther distances in air. Soon, the group should get to a lone vine, followed by platforms, which are cluttered with Kaboings. When the pests are past, the heroes reach land again. After that, they need to hit a Krochead Barrel and get over many platforms in the water. Soon, they should jump off a vine and get on the Krocheads, whom they should bounce across. The animals should get back to the mushy land again when this is done, where a spring is in view. It can take the Kongs out of the level. | ||
==Secrets== | ==Secrets== | ||
===Donkey Kong Country 2=== | ===''Donkey Kong Country 2=== | ||
====Bonus Level(s)==== | ====Bonus Level(s)==== | ||
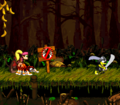
[[Image:Krochead Klamber GBA 65.jpg|thumb | [[Image:Krochead Klamber GBA 65.jpg|thumb|The heroes near the hidden Bonus Barrel.]] | ||
*Right after the Star Barrel, the group should see a [[Bonus Barrel]] above a [[No Animal Sign]], with an arrow pointing up to it. They can easily get in the barrel if they use their Team-up move and toss a monkey in it. Once the heroes are teleported into the Bonus Level, they | *Right after the Star Barrel, the group should see a [[Bonus Barrel]] above a [[No Animal Sign]], with an arrow pointing up to it. They can easily get in the barrel if they use their Team-up move and toss a monkey in it. Once the heroes are teleported into the Bonus Level, they have to defeat four Zingers scattered about a small area. They can not do this alone, however. [[Squitter the Spider]] waits at the start, so the monkeys can get on him. The helpful buddy can shoot webs at the pests to beat them. When the foes are all defeated, the [[Kremkoin]] appears. | ||
====DK Coin==== | ====DK Coin==== | ||
*At the very beginning of the level, the Kongs must look behind themselves. They should see two Zingers. Carefully, they need to use their [[Team-up]] move and toss a monkey over them. From here, the heroes need to cartwheel down in the path of the bananas, jump back up, and cross the dangerous waters. Then, they need to carefully use their Team-up move to go over two groups of Zingers. They are very close together (closer together in the [[Super Nintendo]] version), so the monkeys need to be very cautious. Right after that, they should see the [[DK Coin]] in reach. | |||
At the very beginning of the level, the Kongs must look behind themselves. They should see two Zingers. Carefully, they need to use their [[Team-up]] move and toss a monkey over them. From here, the heroes need to cartwheel down in the path of the bananas, jump back up, and cross the dangerous waters. Then, they need to carefully use their Team-up move to go over two groups of Zingers. They are very close together (closer together in the [[Super Nintendo]] version), so the monkeys need to be very cautious. Right after that, they should see the [[DK Coin]] in reach. | |||
====Golden Feather (GBA Only)==== | ====Golden Feather (GBA Only)==== | ||
*Past the Star Barrel, the heroes must travel to the second Krochead Barrel, which has a Zinger flying around it. The [[Golden Feather]] is right above the barrel, and the Kongs can easily get it, as long as they don't hit into the Zinger. | |||
Past the Star Barrel, the heroes must travel to the second Krochead Barrel, which has a Zinger flying around it. The [[Golden Feather]] is right above the barrel, and the Kongs can easily get it, as long as they don't hit into the Zinger. | |||
====Photograph (GBA Only)==== | ====Photograph (GBA Only)==== | ||
*As the monkeys bounce atop of the last set of Flitters in the level, they can find one of them with a [[photograph]] over its head. They have to defeat the insect to get the photo. Once it is obtained, they are given another picture for their scrapbook. | |||
===''Donkey Kong Land 2=== | |||
===Donkey Kong Land 2=== | |||
====Bonus Level(s)==== | ====Bonus Level(s)==== | ||
*A little before the first Krochead Barrel, the heroes need to get on the vine in the water. There is a Flitter hovering to the right of the vine. They must bounce off the foe and land into a Bonus Barrel, leading to the Bonus Level. Here, the group gets into aseveral [[Rotatable Barrel]]s and shoots themselves across the stage with them. Eventually, they should reach the end of the stage, where they find the Kremkoin. | |||
*A little before the first Krochead Barrel, the heroes need to get on the vine in the water. There is a Flitter hovering to the right of the vine. They must bounce off the foe and land into a Bonus Barrel, leading to the Bonus Level. Here, the group | |||
====DK Coin==== | ====DK Coin==== | ||
*Right before [[Diddy]] and [[Dixie]] get to the platforms cluttered with Kaboings, they should see a vine. They need to climb to the top of it and jump to the left. If the heroes hop high enough, they should grab the DK Coin. | |||
Right before [[Diddy]] and [[Dixie]] get to the platforms cluttered with Kaboings, they should see a vine. They need to climb to the top of it | |||
==Gallery== | ==Gallery== | ||
<center> | <center> | ||
<gallery> | <gallery> | ||
Revision as of 20:50, September 21, 2010
Template:Level Krockhead Klamber is the thirteenth level of Donkey Kong Country 2: Diddy's Kong Quest and Donkey Kong Land 2. It is also the third area of Krem Quay, as well as the eighth level in Krem Cauldron in Donkey Kong Land 2.
This is another swamp level, and the first appearance of Kutlass. The real challenge here is having to rely on Krocheads for stepping stones, as they only appear briefly when the Kongs touch one of the Krochead Barrels. Kaboings, Klingers, Zingers and Flitters can be found here as well. Squitter is playable in this level, not on the main path, but in a Bonus Level.
Level Layout
Donkey Kong Country 2
When the level begins, the Kongs must travel along the path, jump over the Kutlass and grab onto the vine hanging out of the water. From there, they need to hop across the platforms floating atop the swampy water and also bounce off a few Flitters flying by to avoid falling in the water. Many Kaboings hop around the platforms and attempt to knock the heroes off, so they must be careful. They soon find the first Krochead in the level, between two vines. The monkeys can use it as a stepping stone over the water to get to the next vine, which is followed by some more platforms and half-sunken barrels. Eventually, they come up to a vine, with the Star Barrel looming slightly ahead. They can break it to mark the halfway point.
Now halfway through the level, the group needs to jump across a couple platforms and get back on the mushy ground. There, they need to defeat another Kutlass and hit the Krochead Barrel. It should make Krocheads sneak slightly out of the water, so the Kongs can hop on their heads to get across the lake. After crossing the first few Krocheads and platforms, another Krochead Barrel is in sight to hit. They should bounce across the next crocodiles and soon make it up to a vine with a Klinger on it. This enemy can be easily beat with a nearby barrel. After that, the monkeys must break the next Krochead Barrel and jump on each crocodile that comes up. There are also Flitters in between every two Krocheads, so the heroes can use them as an extra boost to get over the water. Later, they must jump two vines, both having Klingers on them, and then bounce on several more Flitters to reach some more vines, where a Krochead Barrel can be seen. Once they hit it, they need to hop across the Krocheads and watch out for Zingers floating around. Eventually, the group is flung to another Krochead Barrel by a red Krochead. They should bounce across the next crocodiles and grab onto a couple vines. Right after that, the heroes should see a Zinger over the ending pad. If the monkeys can avoid the wasp, they can land on the pad and finish the level.
Donkey Kong Land 2
At the start of the level, the Kongs must hop onto the platforms in the water. After they jump across the platforms, they can get back to land. From there, they must grab onto a couple of vines. There is a Klinger on one, who can easily be defeated. Then, they have to hop across more platforms in the water, followed by two Flitters to bounce off of and more vines. Eventually, the Kongs should get back on land and hit the Krochead Barrel, making Krocheads move their heads out of the water. The heroes can use them as stepping-stones to get across the dirty lake. After that, they should get on some vines and get on more platforms, where there is another Krochead Barrel. Using the crocodiles that stick out of the swamp, the monkeys should be able to reach land again, where there is a Star Barrel for them to break.
At this point, the heroes must jump over a Zinger and hit the third Krochead Barrel. Then they should bounce across the Krocheads. The crocodiles lead the group to another vine. From here, they need to hop off a Flitter and get to the next vine, then repeat the process, where they hit yet another Krochead Barrel. They then need to jump on two platforms and then get on the crocodiles. Flitters float between far apart Krocheads to help the Kongs, as the apes are able to bounce off of them to travel farther distances in air. Soon, the group should get to a lone vine, followed by platforms, which are cluttered with Kaboings. When the pests are past, the heroes reach land again. After that, they need to hit a Krochead Barrel and get over many platforms in the water. Soon, they should jump off a vine and get on the Krocheads, whom they should bounce across. The animals should get back to the mushy land again when this is done, where a spring is in view. It can take the Kongs out of the level.
Secrets
Donkey Kong Country 2
Bonus Level(s)
- Right after the Star Barrel, the group should see a Bonus Barrel above a No Animal Sign, with an arrow pointing up to it. They can easily get in the barrel if they use their Team-up move and toss a monkey in it. Once the heroes are teleported into the Bonus Level, they have to defeat four Zingers scattered about a small area. They can not do this alone, however. Squitter the Spider waits at the start, so the monkeys can get on him. The helpful buddy can shoot webs at the pests to beat them. When the foes are all defeated, the Kremkoin appears.
DK Coin
- At the very beginning of the level, the Kongs must look behind themselves. They should see two Zingers. Carefully, they need to use their Team-up move and toss a monkey over them. From here, the heroes need to cartwheel down in the path of the bananas, jump back up, and cross the dangerous waters. Then, they need to carefully use their Team-up move to go over two groups of Zingers. They are very close together (closer together in the Super Nintendo version), so the monkeys need to be very cautious. Right after that, they should see the DK Coin in reach.
Golden Feather (GBA Only)
- Past the Star Barrel, the heroes must travel to the second Krochead Barrel, which has a Zinger flying around it. The Golden Feather is right above the barrel, and the Kongs can easily get it, as long as they don't hit into the Zinger.
Photograph (GBA Only)
- As the monkeys bounce atop of the last set of Flitters in the level, they can find one of them with a photograph over its head. They have to defeat the insect to get the photo. Once it is obtained, they are given another picture for their scrapbook.
Donkey Kong Land 2
Bonus Level(s)
- A little before the first Krochead Barrel, the heroes need to get on the vine in the water. There is a Flitter hovering to the right of the vine. They must bounce off the foe and land into a Bonus Barrel, leading to the Bonus Level. Here, the group gets into aseveral Rotatable Barrels and shoots themselves across the stage with them. Eventually, they should reach the end of the stage, where they find the Kremkoin.
DK Coin
- Right before Diddy and Dixie get to the platforms cluttered with Kaboings, they should see a vine. They need to climb to the top of it and jump to the left. If the heroes hop high enough, they should grab the DK Coin.
Gallery
Next to the Squitter sign.
- Krochead Klamber GBA 65.jpg
The Game Boy Advance version of Krockhead Klamber.

Trivia
- Although the correct spelling of "Krochead" lacks a second K, this level's name is spelled with one.
Names in Other Languages