Krockhead Klamber (Donkey Kong Country 2: Diddy's Kong Quest): Difference between revisions
No edit summary |
m (Text replacement - "<br />" to "<br>") |
||
| (68 intermediate revisions by 36 users not shown) | |||
| Line 1: | Line 1: | ||
{{ | {{italic title|id=yes}} | ||
| | {{level infobox | ||
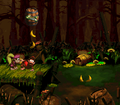
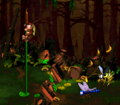
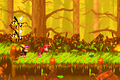
|image=[[ | |image=[[File:Krockhead Klamber DKC2 screenshot.png]] | ||
|code=3 - 3 | |code=3 - 3 | ||
|game=''[[Donkey Kong Country 2: Diddy's Kong Quest | |world=[[Krem Quay]] | ||
| | |game=''[[Donkey Kong Country 2: Diddy's Kong Quest]]'' | ||
|before=[[Glimmer's Galleon|<<]] | |track=Bayou Boogie | ||
|after=[[Rattle Battle|>>]] | |before=[[Glimmer's Galleon (Donkey Kong Country 2: Diddy's Kong Quest)|<<]] | ||
|after=[[Rattle Battle (Donkey Kong Country 2: Diddy's Kong Quest)|>>]] | |||
}} | }} | ||
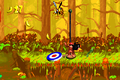
'''Krockhead Klamber''' is the thirteenth level of ''[[Donkey Kong Country 2: Diddy's Kong Quest]]'' and | '''Krockhead Klamber''' is the thirteenth level of ''[[Donkey Kong Country 2: Diddy's Kong Quest]]'' and the third area of [[Krem Quay]]. It is the second swamp level, after [[Barrel Bayou (Donkey Kong Country 2: Diddy's Kong Quest)|Barrel Bayou]]. [[Diddy Kong]] and [[Dixie Kong]] have to quickly cross the swampy water by jumping from many [[Krockhead]]s, many of which have a pattern of emerging for a few seconds, then retreating into the water, and reemerging. Some Krockheads only appear when the [[Kong]]s jump at a [[Krockhead Barrel]], but they also retreat back into the water after a while. The swamp has many {{wp|Typha|cattail plants}} that Diddy and Dixie can grab onto, as well as large barrel platforms partially submerged in the swamp. There are also many [[Flitter]]s that the Kongs must jump from. [[Squitter]] appears in a Bonus Level, though he cannot continue with the Kongs in the main level due to the [[No Animal Sign]] that appears just outside the [[Bonus Barrel]]. | ||
==Layout== | |||
[[File:Krockhead Klamber GBA throwing crate.png|thumb|left|Krockhead Klamber in the Game Boy Advance version]] | |||
The Kongs begin the level in front of a pair of Zingers, who they can travel over with their [[team up]] move in order to reach a hidden area that consists of a [[Treasure Chest|treasure chest]] containing a [[Red Balloon|Life Balloon]] and a pit with a few Zingers and a Flitter above it. With their super-jump ability, the heroes can cross the pit to reach a platform that holds an arrow pointing to the left that is formed by bananas, which is followed by two more of groups of two Zingers that they must pass. A [[Banana Coin]] is between the two groups, and a treasure chest containing a [[DK Coin|Video Game Hero Coin]] follows them. There is also a [[Blast Barrel]] above the previous pit, and the primates can enter it to be shot back to the beginning of the level. In the [[Game Boy Advance]] version, the area's location was made more obvious to the player. In the original version, the Zingers are not heard or shown unless the Kongs look to the left. | |||
If Diddy and Dixie head to the right from the starting point on the level, instead of traveling over the Zingers behind them, they come up to a [[DK Barrel]] that is guarded by a yellow Kutlass. A large area of water is ahead of here, and a pair of vines with a Flitter between them float on it. Some platforms that float at the surface of the water are also ahead of here; the first platform holds some bananas, the second carries a [[crate]], and the third supports a hopping Kaboing. The first two of the platforms are separated by a wide gap, but the Kongs can cross this gap by bouncing on a Flitter that flies over it. Once the heroes cross the platform with the Kaboing on it, they reach another two vines that surround a Flitter, who orbits the [[KONG Letters|letter K]]. Two more solid platforms follow these vines, and both of them support Kaboings. If the primates manage to pass these foes and travel ahead, they reach a vine that is guarded by a Zinger. | |||
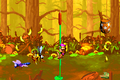
[[File:Krockhead Klamber DKC2 shot.png|thumb|upright=1.1|Diddy Kong holds the second DK Barrel in the level]] | |||
A quadruplet of Flitters are present near here, and one of them hovers over a Banana Coin. Diddy and Dixie must bounce on the insects in order to cross a portion of the swamp and reach an additional vine that is followed by some solid platforms. The first platform holds a DK Barrel, while the two ahead of it are jumped on by a Kaboing, who jumps back and forth with the two platforms. A Flitter also hovers over the third platform. Once the primates travel past this platform, they grab onto a vine that is followed by a Flitter, who is surrounded by a Zinger. While dodging the restless Zinger, they can bounce on the Flitter in order to reach another vine. An additional vine is ahead of it, and a Krockhead with the letter O above its head is between them. The Kongs can discover a third vine after here, and a Flitter being orbited by a Zinger is to the left of it. To the right of the vine, the primates can find a Flitter with a Zinger next to it and the final vine before the [[Star Barrel]], which hovers nearby above a Krockhead. | |||
A long, solid area of land is ahead of here, and a Blast Barrel that can shoot them straight up into the air is next to it. The area of land holds a yellow Kutlass and a [[No Animal Sign]] with Squitter pictured on it. An arrow formed by bananas is also above the sign, and it points towards a hidden [[Bonus Barrel]]. If this is entered, the heroes reach a Bonus Level that contains Squitter. If they exit the bonus with Squitter and pass the No Animal Sign, the spider disappears and they are given a Life Balloon. If the duo continues from here, they reach a Krockhead Barrel that causes the two Krockheads in the water area nearby to stick their heads out. They must use the crocodiles to reach a pair of vines with a Banana Coin guarded by a Zinger between them. A DK Barrel is to the left of the first vine. After the primates pass the second vine and dodge a Zinger in mid-air, they land on a solid platform with a Krockhead Barrel and, in the [[Game Boy Advance]] version only, a [[golden feather]] above it. A Zinger hovers over the barrel and the feather. | |||
If they hit the barrel, four Krockheads emerge from the water. The Kongs can use these nearby creatures to reach a vine that they can use to reach a solid platform that a Zinger guards. An additional platform follows here, and it holds a small crate that they can defeat enemies with. If the two friends continue from here, they reach a vine with a Klinger on it and another Krockhead Barrel that floats above the dangerous water. After they hit the barrel, a Krockhead appears under them. Some more Krockheads are ahead of here that appear after the barrel is touched, and a Flitter is between every two Krockheads. The letter N is also between the second and third Krockheads in the area. Soon, the primates reach a solid platform with a DK Barrel high above it. They can only reach the barrel if they use their team up move or jump to it from the vine found to the right, which holds a Klinger. | |||
Another vine with a Klinger on it is near here, and it is followed by a quadruplet of Flitters that the heroes must bounce on to cross a small portion of the water area. The two friends can find a pair of vines after the section of Flitters, and one of these vines holds a Klinger. A Krockhead Barrel floats above the water next to the vines, and once it is touched, some Krockheads appear ahead above the water. Two of these Krockheads are guarded by Zingers, and a red Krockhead follows them that can fling the Kongs to a Krockhead Barrel located nearby. After they hit it, some more Krockheads appear, who can enable them to cross a portion of the water area and reach a pair of vines with a solid section of land next to them. An [[End of Level Target]] is on this land area, and a Zinger floats above it. If they hit the target, the level is completed; they can also win a prize from the target if they jump on it from the top of the previous vine. The prizes include a banana, a Banana Bunch, or the letter G. | |||
{{br}} | |||
==Enemies== | |||
The following enemies appear in the following quantities: | |||
<gallery> | |||
Flitter DKC2.png|[[Flitter]] (2) | |||
Kaboing DKC2 gray.png|[[Kaboing]] (gray) (4) | |||
Klinger DKC2.png|[[Klinger]] (10) | |||
Krockhead DKC2 green.png|[[Krockhead]] (green) (20) | |||
Krockhead DKC2 red.png|Krockhead (brown) (1) | |||
Kutlass DKC2 yellow.png|[[Kutlass]] (yellow) (2) | |||
Zinger DKC2 yellow.png|[[Zinger]] (yellow) (22) | |||
</gallery> | |||
== | ==Items and objects== | ||
The following items and objects appear in the following quantities: | |||
<gallery> | |||
Banana Coin.png|[[Banana Coin]] (3) | |||
DK Barrel.png|[[DK Barrel]] (4) | |||
Krockhead Barrel.png|[[Krockhead Barrel]] (5) | |||
Red Extra Life Balloon DKC2.png|[[Red Balloon|Life Balloon]] (red) (2) | |||
Treasure Chest DKC2.png|[[Treasure Chest]] (2) | |||
</gallery> | |||
=== | ===KONG Letters=== | ||
*'''K:''' Circled around by the third Flitter | |||
* | *'''O:''' Shortly after the second DK Barrel, the letter O appears between two cattails, hovering just above the swamp water. A Krockhead can be used for a platform to reach the letter O. | ||
*'''N:''' Just after the third Krockhead Barrel, the letter N is hovering above a Flitter, whom the Kongs must bounce on to reach the letter. | |||
*'''G:''' One of the prizes at the End of Level Target. | |||
=== | ===Key items=== | ||
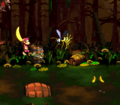
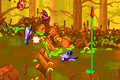
* | [[File:Krockhead Klamber DKC2 crate.png|thumb|Dixie carrying the chest containing the Video Game Hero Coin]] | ||
*'''[[DK Coin|Cranky's Video Game Hero Coin]]:''' At the very start, Diddy and Dixie must backtrack behind two vertically-stacked Zingers and then jump across a pit to land on another platform. There are two more pairs of vertically stacked Zingers, and the Kongs must use [[team up]] to pass them and grab the [[Treasure Chest]] containing the Video Game Hero Coin. | |||
*'''[[Golden feather]] (Game Boy Advance version only):''' After the Star Barrel, the Kongs can find a Zinger circling a Krockhead Barrel just after the second cattail. By jumping from the cattail, Diddy and Dixie can obtain the golden feather, which is floating above the Krockhead Barrel. | |||
*'''[[Photograph]] (Game Boy Advance version only):''' As the Kongs bounce on the last four Flitters in the level, they must bounce on the fourth and final one to obtain the [[photograph]]. Flitter is depicted in the photograph, which appears in the third page of the [[Scrapbook (Donkey Kong Country series)|scrapbook]]. | |||
{{br}} | |||
==Bonus Level== | |||
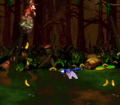
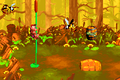
[[File:Krockhead Klamber Bonus Area.png|thumb|The Bonus Level of Krockhead Klamber]] | |||
Krockhead Klamber has only one Bonus Level, listed by its type: | |||
*'''''Destroy them All!''''': Just after the Star Barrel, the Kongs can find a group of [[banana]]s arranged as an upward-pointing arrow. Diddy and Dixie must use [[team up]] and follow the direction of the arrow to move up into a [[Bonus Barrel]]. In the Bonus Level, the Kongs must ride [[Squitter]] and use his web projectiles to defeat four [[Zinger]]s within 15 seconds. Some of the Zingers can only be reached from Squitter creating web platforms. After defeating every Zinger, the [[Kremkoin]] appears on the right side of the area. | |||
==Gallery== | ==Gallery== | ||
===Super Nintendo Entertainment System=== | |||
<gallery> | <gallery> | ||
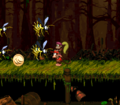
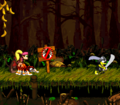
Krockhead Klamber DKC2 Flitter.png|Dixie jumping at a Flitter at the start of the level | |||
Krockhead Klamber DKC2 first Krockhead Barrel.png|The Kongs at the first Krockhead Barrel | |||
Krockhead Klamber DKC2 shot 2.png|Diddy Kong jumps to a Krockhead Barrel | |||
Krockhead Klamber DKC2 shot 3.png|The Kongs prepare to pass over some Zingers in the hidden area with the Video Game Hero Coin | |||
Krockhead Klamber DKC2 shot 4.png|Dixie Kong hits a Krockhead Barrel | |||
Krockhead Klamber DKC2 shot 5.png|One of the vines that the Kongs must use to progress | |||
Krockhead Klamber.png|The Kongs and Squitter at the No Animal Sign | |||
KrocheadKlamber-SNES-N.png|The N letter | |||
KrocheadKlamber-SNES-G.png|The G letter | |||
</gallery> | </gallery> | ||
== | ===Game Boy Advance=== | ||
<gallery> | |||
Krockhead Klamber GBA start.png|The start of the level | |||
Krockhead Klamber GBA Star Barrel.png|Dixie holding onto a cattail before the Star Barrel | |||
Krochead Klamber DKC2 GBA.png|The Kongs riding on Squitter just outside the Bonus Level | |||
KrocheadKlamber-GBA-Feather.png|The location of the golden feather | |||
Krockhead Klamber GBA Flitter bounce.png|Dixie bouncing off a Flitter | |||
KrocheadKlamber-GBA-Photograph.png|The location of the photograph | |||
Krockhead Klamber GBA Diddy boombox.png|Diddy celebrating on his boombox after hitting the End of Level Target | |||
</gallery> | |||
==Names in | ==Names in other languages== | ||
{{ | {{foreign names | ||
|Jap=どろどろクロコジャンプ | |||
|JapR=Dorodoro Kuroko Janpu | |||
|JapM=Muddy Croc Jump | |||
|Spa=Subida de Krock | |Spa=Subida de Krock | ||
|SpaM=Krock Rise | |SpaM=Krock Rise | ||
|Ger=Sumpf des Wahnsinns (SNES)<br | |Fre=Crapahute des Croqueurs | ||
|GerM=Swamp of Madness<br | |FreM=Cruncher Battle | ||
|Ger=Sumpf des Wahnsinns (SNES)<br>Krockhead-Kraxler (GBA) | |||
|GerM=Swamp of Madness<br>Krockhead Clamber | |||
|Ita=Di Stelo in Stelo | |||
|ItaM=From Stem to Stem | |||
}} | |||
{{DKC2}} | {{DKC2}} | ||
[[Category:Swamps]] | |||
[[Category: | |||
[[Category:Crocodile Isle]] | [[Category:Crocodile Isle]] | ||
[[Category | [[Category:Donkey Kong Country 2: Diddy's Kong Quest levels]] | ||
Latest revision as of 12:31, April 1, 2024
| Level | |
|---|---|
| Krockhead Klamber | |

| |
| Level code | 3 - 3 |
| World | Krem Quay |
| Game | Donkey Kong Country 2: Diddy's Kong Quest |
| Music track | Bayou Boogie |
| << Directory of levels >> | |
Krockhead Klamber is the thirteenth level of Donkey Kong Country 2: Diddy's Kong Quest and the third area of Krem Quay. It is the second swamp level, after Barrel Bayou. Diddy Kong and Dixie Kong have to quickly cross the swampy water by jumping from many Krockheads, many of which have a pattern of emerging for a few seconds, then retreating into the water, and reemerging. Some Krockheads only appear when the Kongs jump at a Krockhead Barrel, but they also retreat back into the water after a while. The swamp has many cattail plants that Diddy and Dixie can grab onto, as well as large barrel platforms partially submerged in the swamp. There are also many Flitters that the Kongs must jump from. Squitter appears in a Bonus Level, though he cannot continue with the Kongs in the main level due to the No Animal Sign that appears just outside the Bonus Barrel.
Layout[edit]

The Kongs begin the level in front of a pair of Zingers, who they can travel over with their team up move in order to reach a hidden area that consists of a treasure chest containing a Life Balloon and a pit with a few Zingers and a Flitter above it. With their super-jump ability, the heroes can cross the pit to reach a platform that holds an arrow pointing to the left that is formed by bananas, which is followed by two more of groups of two Zingers that they must pass. A Banana Coin is between the two groups, and a treasure chest containing a Video Game Hero Coin follows them. There is also a Blast Barrel above the previous pit, and the primates can enter it to be shot back to the beginning of the level. In the Game Boy Advance version, the area's location was made more obvious to the player. In the original version, the Zingers are not heard or shown unless the Kongs look to the left.
If Diddy and Dixie head to the right from the starting point on the level, instead of traveling over the Zingers behind them, they come up to a DK Barrel that is guarded by a yellow Kutlass. A large area of water is ahead of here, and a pair of vines with a Flitter between them float on it. Some platforms that float at the surface of the water are also ahead of here; the first platform holds some bananas, the second carries a crate, and the third supports a hopping Kaboing. The first two of the platforms are separated by a wide gap, but the Kongs can cross this gap by bouncing on a Flitter that flies over it. Once the heroes cross the platform with the Kaboing on it, they reach another two vines that surround a Flitter, who orbits the letter K. Two more solid platforms follow these vines, and both of them support Kaboings. If the primates manage to pass these foes and travel ahead, they reach a vine that is guarded by a Zinger.

A quadruplet of Flitters are present near here, and one of them hovers over a Banana Coin. Diddy and Dixie must bounce on the insects in order to cross a portion of the swamp and reach an additional vine that is followed by some solid platforms. The first platform holds a DK Barrel, while the two ahead of it are jumped on by a Kaboing, who jumps back and forth with the two platforms. A Flitter also hovers over the third platform. Once the primates travel past this platform, they grab onto a vine that is followed by a Flitter, who is surrounded by a Zinger. While dodging the restless Zinger, they can bounce on the Flitter in order to reach another vine. An additional vine is ahead of it, and a Krockhead with the letter O above its head is between them. The Kongs can discover a third vine after here, and a Flitter being orbited by a Zinger is to the left of it. To the right of the vine, the primates can find a Flitter with a Zinger next to it and the final vine before the Star Barrel, which hovers nearby above a Krockhead.
A long, solid area of land is ahead of here, and a Blast Barrel that can shoot them straight up into the air is next to it. The area of land holds a yellow Kutlass and a No Animal Sign with Squitter pictured on it. An arrow formed by bananas is also above the sign, and it points towards a hidden Bonus Barrel. If this is entered, the heroes reach a Bonus Level that contains Squitter. If they exit the bonus with Squitter and pass the No Animal Sign, the spider disappears and they are given a Life Balloon. If the duo continues from here, they reach a Krockhead Barrel that causes the two Krockheads in the water area nearby to stick their heads out. They must use the crocodiles to reach a pair of vines with a Banana Coin guarded by a Zinger between them. A DK Barrel is to the left of the first vine. After the primates pass the second vine and dodge a Zinger in mid-air, they land on a solid platform with a Krockhead Barrel and, in the Game Boy Advance version only, a golden feather above it. A Zinger hovers over the barrel and the feather.
If they hit the barrel, four Krockheads emerge from the water. The Kongs can use these nearby creatures to reach a vine that they can use to reach a solid platform that a Zinger guards. An additional platform follows here, and it holds a small crate that they can defeat enemies with. If the two friends continue from here, they reach a vine with a Klinger on it and another Krockhead Barrel that floats above the dangerous water. After they hit the barrel, a Krockhead appears under them. Some more Krockheads are ahead of here that appear after the barrel is touched, and a Flitter is between every two Krockheads. The letter N is also between the second and third Krockheads in the area. Soon, the primates reach a solid platform with a DK Barrel high above it. They can only reach the barrel if they use their team up move or jump to it from the vine found to the right, which holds a Klinger.
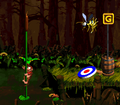
Another vine with a Klinger on it is near here, and it is followed by a quadruplet of Flitters that the heroes must bounce on to cross a small portion of the water area. The two friends can find a pair of vines after the section of Flitters, and one of these vines holds a Klinger. A Krockhead Barrel floats above the water next to the vines, and once it is touched, some Krockheads appear ahead above the water. Two of these Krockheads are guarded by Zingers, and a red Krockhead follows them that can fling the Kongs to a Krockhead Barrel located nearby. After they hit it, some more Krockheads appear, who can enable them to cross a portion of the water area and reach a pair of vines with a solid section of land next to them. An End of Level Target is on this land area, and a Zinger floats above it. If they hit the target, the level is completed; they can also win a prize from the target if they jump on it from the top of the previous vine. The prizes include a banana, a Banana Bunch, or the letter G.
Enemies[edit]
The following enemies appear in the following quantities:

Flitter (2)

Kaboing (gray) (4)

Klinger (10)

Krockhead (green) (20)

Krockhead (brown) (1)

Kutlass (yellow) (2)

Zinger (yellow) (22)


Items and objects[edit]
The following items and objects appear in the following quantities:

Banana Coin (3)

DK Barrel (4)

Krockhead Barrel (5)

Life Balloon (red) (2)

Treasure Chest (2)


KONG Letters[edit]
- K: Circled around by the third Flitter
- O: Shortly after the second DK Barrel, the letter O appears between two cattails, hovering just above the swamp water. A Krockhead can be used for a platform to reach the letter O.
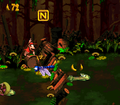
- N: Just after the third Krockhead Barrel, the letter N is hovering above a Flitter, whom the Kongs must bounce on to reach the letter.
- G: One of the prizes at the End of Level Target.
Key items[edit]

- Cranky's Video Game Hero Coin: At the very start, Diddy and Dixie must backtrack behind two vertically-stacked Zingers and then jump across a pit to land on another platform. There are two more pairs of vertically stacked Zingers, and the Kongs must use team up to pass them and grab the Treasure Chest containing the Video Game Hero Coin.
- Golden feather (Game Boy Advance version only): After the Star Barrel, the Kongs can find a Zinger circling a Krockhead Barrel just after the second cattail. By jumping from the cattail, Diddy and Dixie can obtain the golden feather, which is floating above the Krockhead Barrel.
- Photograph (Game Boy Advance version only): As the Kongs bounce on the last four Flitters in the level, they must bounce on the fourth and final one to obtain the photograph. Flitter is depicted in the photograph, which appears in the third page of the scrapbook.
Bonus Level[edit]

Krockhead Klamber has only one Bonus Level, listed by its type:
- Destroy them All!: Just after the Star Barrel, the Kongs can find a group of bananas arranged as an upward-pointing arrow. Diddy and Dixie must use team up and follow the direction of the arrow to move up into a Bonus Barrel. In the Bonus Level, the Kongs must ride Squitter and use his web projectiles to defeat four Zingers within 15 seconds. Some of the Zingers can only be reached from Squitter creating web platforms. After defeating every Zinger, the Kremkoin appears on the right side of the area.
Gallery[edit]
Super Nintendo Entertainment System[edit]

Dixie jumping at a Flitter at the start of the level
The Kongs at the first Krockhead Barrel
Diddy Kong jumps to a Krockhead Barrel
The Kongs prepare to pass over some Zingers in the hidden area with the Video Game Hero Coin
Dixie Kong hits a Krockhead Barrel
One of the vines that the Kongs must use to progress
The Kongs and Squitter at the No Animal Sign
The N letter
The G letter


Game Boy Advance[edit]
The start of the level
Dixie holding onto a cattail before the Star Barrel

The Kongs riding on Squitter just outside the Bonus Level
The location of the golden feather

Dixie bouncing off a Flitter
The location of the photograph
Diddy celebrating on his boombox after hitting the End of Level Target


Names in other languages[edit]
| Language | Name | Meaning |
|---|---|---|
| Japanese | どろどろクロコジャンプ Dorodoro Kuroko Janpu |
Muddy Croc Jump |
| French | Crapahute des Croqueurs |
Cruncher Battle |
| German | Sumpf des Wahnsinns (SNES) Krockhead-Kraxler (GBA) |
Swamp of Madness Krockhead Clamber |
| Italian | Di Stelo in Stelo |
From Stem to Stem |
| Spanish | Subida de Krock |
Krock Rise |