Summer Festival Tour: Difference between revisions
LinkTheLefty (talk | contribs) mNo edit summary |
|||
| (36 intermediate revisions by 16 users not shown) | |||
| Line 1: | Line 1: | ||
{{ | {{distinguish|Summer Tour}} | ||
{{tour infobox | |||
|image=[[File:MKT Summer Festival Tour.png|200px]] | |image=[[File:MKT Summer Festival Tour.png|200px]] | ||
|start=August 25, 2020<br>11:00 p.m. (PT) | |start=August 25, 2020<br>11:00 p.m. (PT) | ||
| Line 5: | Line 6: | ||
|cups=12 | |cups=12 | ||
|rank=[[Daisy Cup]] (week 1)<br>[[Lakitu Cup]] (week 2) | |rank=[[Daisy Cup]] (week 1)<br>[[Lakitu Cup]] (week 2) | ||
|coin=[[Tokyo Blur 3]] | |coin=[[Tour Tokyo Blur|Tokyo Blur 3]] | ||
|before=[[Pirate Tour|<<]] | |before=[[Pirate Tour|<<]] | ||
|after=[[Super Mario Kart Tour|>>]] | |after=[[Super Mario Kart Tour|>>]] | ||
}} | }} | ||
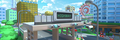
The '''Summer Festival Tour''' was the twenty-fifth tour of ''[[Mario Kart Tour]]'', which began on August 26, 2020 and ended on September 8, 2020. Reflecting its theme, the tour introduced a variant of [[Princess Daisy|Daisy]] in a yukata outfit and | The '''Summer Festival Tour''' was the twenty-fifth tour of ''[[Mario Kart Tour]]'', which began on August 26, 2020 and ended on September 8, 2020. Reflecting its theme, the tour introduced a variant of [[Princess Daisy|Daisy]] in a yukata outfit and a new layout of [[Tour Tokyo Blur|Tokyo Blur]] known as Tokyo Blur 3, as well as the return of Tokyo Blur and Tokyo Blur 2, likely due to [[Tokyo]]'s reputation for hosting summer festivals nearly every year. It was the first tour since the [[Baby Rosalina Tour]], which was twelve tours prior, to feature city courses, as well as the first tour overall to see the return of previously introduced city courses. This is the second tour to introduce a new layout of a city course in the same year as a previous layout of the course, with the first being the [[Holiday Tour (2019)|2019 Holiday Tour]] eighteen tours prior. The menu's background featured {{wp|Mount Fuji}}, the {{wp|Tokyo Tower}}, and {{wp|Kaminarimon}} as landmarks for this tour. This tour's trailer featured fireworks during its opening splash screen. | ||
The second set of [[List of challenge cards in Mario Kart Tour#Expert Challenges|Expert Challenges]] were made available at the start of the tour, which later ended with the [[Sunset Tour]]. | |||
{{br|toc=1}} | |||
==Spotlights== | ==Spotlights== | ||
{| align=center width=66% cellspacing=0 border=1 cellpadding=3 style="border-collapse:collapse; font-family:Arial; text-align:center" | {|align=center width=66% cellspacing=0 border=1 cellpadding=3 style="border-collapse:collapse; font-family:Arial; text-align:center" | ||
|-style="background: #89A" | |-style="background: #89A" | ||
|colspan=3|'''Summer Festival Pipe 1'''<br>August 25, 2020, 11:00 p.m. (PT) – <br>September 8, 2020, 10:59 p.m. (PT) | |colspan=3|'''Summer Festival Pipe 1'''<br>August 25, 2020, 11:00 p.m. (PT) – <br>September 8, 2020, 10:59 p.m. (PT) | ||
| Line 22: | Line 23: | ||
|colspan=3|[[File:MKT Tour25 SummerFestivalPipe2.png|x150px]] | |colspan=3|[[File:MKT Tour25 SummerFestivalPipe2.png|x150px]] | ||
|-style="background: #ABC" | |-style="background: #ABC" | ||
! style="width: 16.6%;"|Driver | !style="width: 16.6%;"|Driver | ||
! style="width: 16.7%;"|Kart | !style="width: 16.7%;"|Kart | ||
! style="width: 16.7%;"|Glider | !style="width: 16.7%;"|Glider | ||
! style="width: 16.6%;"|Drivers | !style="width: 16.6%;"|Drivers | ||
! style="width: 16.7%;"|Karts | !style="width: 16.7%;"|Karts | ||
! style="width: 16.7%;"|Gliders | !style="width: 16.7%;"|Gliders | ||
|- | |- | ||
|[[File:MKT Artwork DaisyYukata.png|80x80px]] | |[[File:MKT Artwork DaisyYukata.png|80x80px]] | ||
|[[File:MKT Icon FestivalGirl.png|80x80px]] | |[[File:MKT Icon FestivalGirl.png|80x80px]] | ||
|[[File:MKT Icon CrimsonCrane.png|80x80px]] | |[[File:MKT Icon CrimsonCrane.png|80x80px]] | ||
|[[File:MKT Artwork | |[[File:MKT Artwork MarioHakama.png|80x80px]][[File:MKT Artwork MarioHappi.png|80x80px]][[File:MKT Artwork PeachKimono.png|80x80px]] | ||
|[[File:MKT Icon Quickshaw.png|80x80px]][[File:MKT Icon KabukiDasher.png|80x80px]][[File:MKT Icon GlamBruiser.png|80x80px]] | |[[File:MKT Icon Quickshaw.png|80x80px]][[File:MKT Icon KabukiDasher.png|80x80px]][[File:MKT Icon GlamBruiser.png|80x80px]] | ||
|[[File:MKT Icon PurpleOilpaperUmbrella.png|80x80px]][[File:MKT Icon FullFlight.png|80x80px]][[File:MKT Icon FireworksParachute.png|80x80px]] | |[[File:MKT Icon PurpleOilpaperUmbrella.png|80x80px]][[File:MKT Icon FullFlight.png|80x80px]][[File:MKT Icon FireworksParachute.png|80x80px]] | ||
| Line 39: | Line 40: | ||
|[[Festival Girl]] | |[[Festival Girl]] | ||
|[[Crimson Crane]] | |[[Crimson Crane]] | ||
|[[ | |[[Mario|Mario (Hakama)]], [[Mario|Mario (Happi)]] and [[Princess Peach|Peach (Kimono)]] | ||
|[[Quickshaw]], [[Kabuki Dasher]], and [[Glam Bruiser]] | |[[Quickshaw]], [[Kabuki Dasher]], and [[Glam Bruiser]] | ||
|[[Purple Oilpaper Umbrella]], [[Full Flight]], and [[Fireworks Parachute]] | |[[Purple Oilpaper Umbrella]], [[Full Flight]], and [[Fireworks Parachute]] | ||
| Line 45: | Line 46: | ||
==Special pipe== | ==Special pipe== | ||
{| align=center width=50% cellspacing=0 border=1 cellpadding=3 style="border-collapse:collapse; font-family:Arial; text-align:center" | {|align=center width=50% cellspacing=0 border=1 cellpadding=3 style="border-collapse:collapse; font-family:Arial; text-align:center" | ||
|-style="background: #89A" | |-style="background: #89A" | ||
|colspan=2|'''B Dasher Pipe'''<br>August 29, 2020, 11:00 p.m. (PT) – <br>September 3, 2020, 10:59 p.m. (PT) | |colspan=2|'''B Dasher Pipe'''<br>August 29, 2020, 11:00 p.m. (PT) – <br>September 3, 2020, 10:59 p.m. (PT) | ||
| Line 57: | Line 58: | ||
|[[B Dasher]], [[Kabuki Dasher]], [[Black B Dasher]], [[Red B Dasher]], [[Black Kabuki Dasher]] | |[[B Dasher]], [[Kabuki Dasher]], [[Black B Dasher]], [[Red B Dasher]], [[Black Kabuki Dasher]] | ||
|} | |} | ||
====Names in other languages==== | ====Names in other languages==== | ||
{{foreign names | {{foreign names | ||
| Line 65: | Line 65: | ||
==Cups== | ==Cups== | ||
{| align=center width=90% cellspacing=0 border=1 cellpadding=3 style="border-collapse:collapse; font-family:Arial; text-align:center" | {|align=center width=90% cellspacing=0 border=1 cellpadding=3 style="border-collapse:collapse; font-family:Arial; text-align:center" | ||
{{ | {{MKT cup table row | ||
|C=Daisy||Ra=1 | |C=Daisy||Ra=1 | ||
|R1=[[Tokyo Blur 3]]||R1.I=TokyoBlur3||R1.1=1,200||R1.2=1,900||R1.3=2,500||R1.4=3,100||R1.5=6,200 | |R1=[[Tour Tokyo Blur|Tokyo Blur 3]]||R1.I=TokyoBlur3 MarioHappi||R1.1=1,200||R1.2=1,900||R1.3=2,500||R1.4=3,100||R1.5=6,200 | ||
|R2=[[Cheep Cheep Lagoon | |R2=[[3DS Cheep Cheep Lagoon|3DS Cheep Cheep Lagoon R]]||R2.I=CheepCheepLagoonR3DS||R2.1=1,100||R2.2=1,600||R2.3=2,100||R2.4=2,700||R2.5=5,300 | ||
|R3=[[Luigi's Mansion | |R3=[[DS Luigi's Mansion|DS Luigi's Mansion R]]||R3.I=LuigisMansionRDS Pauline||R3.1=1,400||R3.2=2,100||R3.3=2,800||R3.4=3,500||R3.5=6,900 | ||
|CN=[[Time Trial (Mario Kart Tour)|Time Trial]]||C.I=Tour25 DaisyCupChallenge||CC=Bowser||CT=[[Mario Circuit 3|SNES Mario Circuit 3R]]||C.1=2:05.00||C.2=1:35.00||C.3=1:25.00 | |CN=[[Time Trial (Mario Kart Tour)|Time Trial]]||C.I=Tour25 DaisyCupChallenge||CC=Bowser||CT=[[SNES Mario Circuit 3|SNES Mario Circuit 3R]]||C.1=2:05.00||C.2=1:35.00||C.3=1:25.00 | ||
}} | }} | ||
{{ | {{MKT cup table row | ||
|C=Morton||Ra= | |C=Morton||Ra= | ||
|R1=[[Airship Fortress|DS Airship Fortress R]]||R1.I=AirshipFortressRDS||R1.1=1,400||R1.2=2,100||R1.3=2,800||R1.4=3,500||R1.5=6,800 | |R1=[[DS Airship Fortress|DS Airship Fortress R]]||R1.I=AirshipFortressRDS||R1.1=1,400||R1.2=2,100||R1.3=2,800||R1.4=3,500||R1.5=6,800 | ||
|R2=SNES Mario Circuit 3R||R2.I=MarioCircuit3RSNES Morton||R2.1=1,100||R2.2=1,700||R2.3=2,300||R2.4=2,900||R2.5=5,600 | |R2=SNES Mario Circuit 3R||R2.I=MarioCircuit3RSNES Morton||R2.1=1,100||R2.2=1,700||R2.3=2,300||R2.4=2,900||R2.5=5,600 | ||
|R3=[[Tokyo Blur | |R3=[[Tour Tokyo Blur|Tokyo Blur 2T]]||R3.I=TokyoBlur2T PeachKimono||R3.1=1,500||R3.2=2,300||R3.3=3,100||R3.4=3,900||R3.5=7,500 | ||
|CN=[[Ring Race]]||C.I=Tour25 MortonCupChallenge||CC=Lakitu||CT=Tokyo Blur 3||C.1=15||C.2=25||C.3=35 | |CN=[[Ring Race]]||C.I=Tour25 MortonCupChallenge||CC=Lakitu||CT=Tokyo Blur 3||C.1=15||C.2=25||C.3=35 | ||
}} | }} | ||
{{ | {{MKT cup table row | ||
|C=Lakitu||Ra=2 | |C=Lakitu||Ra=2 | ||
|R1=SNES Mario Circuit 3T||R1.I=MarioCircuit3TSNES||R1.1=1,100||R1.2=1,800||R1.3=2,400||R1.4=3,000||R1.5=5,500 | |R1=SNES Mario Circuit 3T||R1.I=MarioCircuit3TSNES||R1.1=1,100||R1.2=1,800||R1.3=2,400||R1.4=3,000||R1.5=5,500 | ||
|R2=[[ | |R2=[[SNES Koopa Troopa Beach 2]]||R2.I=KoopaTroopaBeach2SNES DaisyYukata||R2.1=1,300||R2.2=2,000||R2.3=2,700||R2.4=3,400||R2.5=6,300 | ||
|R3=Tokyo Blur 3T||R3.I=TokyoBlur3T||R3.1=2,300||R3.2=3,600||R3.3=4,900||R3.4=6,100||R3.5=11,300 | |R3=Tokyo Blur 3T||R3.I=TokyoBlur3T MarioHakama||R3.1=2,300||R3.2=3,600||R3.3=4,900||R3.4=6,100||R3.5=11,300 | ||
|CN=[[Glider Challenge]] | |CN=[[Glider Challenge]]||C.I=Tour9 ToadetteCupChallenge||CC=Toadette||CT=3DS Cheep Cheep Lagoon||C.1=200||C.2=400||C.3=600 | ||
}} | }} | ||
{{ | {{MKT cup table row | ||
|C=Baby Rosalina||Ra= | |C=Baby Rosalina||Ra= | ||
|R1=[[Tokyo Blur|Tokyo Blur R]]||R1.I=TokyoBlurR||R1.1=1,100||R1.2=1,700||R1.3=2,400||R1.4=3,000||R1.5=5,300 | |R1=[[Tour Tokyo Blur|Tokyo Blur R]]||R1.I=TokyoBlurR||R1.1=1,100||R1.2=1,700||R1.3=2,400||R1.4=3,000||R1.5=5,300 | ||
|R2=DS Luigi's Mansion T||R2.I=LuigisMansionTDS BabyRosalina||R2.1=1,300||R2.2=2,100||R2.3=2,800||R2.4=3,600||R2.5=6,400 | |R2=DS Luigi's Mansion T||R2.I=LuigisMansionTDS BabyRosalina||R2.1=1,300||R2.2=2,100||R2.3=2,800||R2.4=3,600||R2.5=6,400 | ||
|R3=[[ | |R3=[[SNES Choco Island 2]]||R3.I=ChocoIsland2SNES||R3.1=1,200||R3.2=1,900||R3.3=2,600||R3.4=3,200||R3.5=5,800 | ||
|CN=[[Break Item Boxes]] | |CN=[[Break Item Boxes]]||C.I=Tour9 BowserJrCupChallenge||CC=Larry||CT=SNES Mario Circuit 3||C.1=4||C.2=8||C.3=15 | ||
}} | }} | ||
{{ | {{MKT cup table row | ||
|C=Yoshi||Ra= | |C=Yoshi||Ra= | ||
|R1=SNES Koopa Troopa Beach 2T||R1.I=KoopaTroopaBeach2TSNES||R1.1=1,400||R1.2=2,400||R1.3=3,300||R1.4=4,100||R1.5=7,100 | |R1=SNES Koopa Troopa Beach 2T||R1.I=KoopaTroopaBeach2TSNES||R1.1=1,400||R1.2=2,400||R1.3=3,300||R1.4=4,100||R1.5=7,100 | ||
|R2=Tokyo Blur 3R||R2.I=TokyoBlur3R||R2.1=1,400||R2.2=2,400||R2.3=3,200||R2.4=4,100||R2.5=7,000 | |R2=Tokyo Blur 3R||R2.I=TokyoBlur3R MarioHakama||R2.1=1,400||R2.2=2,400||R2.3=3,200||R2.4=4,100||R2.5=7,000 | ||
|R3=[[ | |R3=[[N64 Royal Raceway]]||R3.I=RoyalRacewayN64 Yoshi||R3.1=1,600||R3.2=2,700||R3.3=3,600||R3.4=4,500||R3.5=7,800 | ||
|CN=[[Goomba Takedown]] | |CN=[[Goomba Takedown]]||C.I=Tour4 BabyDaisyCupChallenge||CC=Baby Daisy||CT=SNES Choco Island 2||C.1=10||C.2=25||C.3=45 | ||
}} | }} | ||
{{ | {{MKT cup table row | ||
|C=Dry Bones||Ra= | |C=Dry Bones||Ra= | ||
|R1=DS Airship Fortress||R1.I=AirshipFortressDS DaisyYukata||R1.1=1,500||R1.2=2,600||R1.3=3,600||R1.4=4,500||R1.5=7,500 | |R1=DS Airship Fortress||R1.I=AirshipFortressDS DaisyYukata||R1.1=1,500||R1.2=2,600||R1.3=3,600||R1.4=4,500||R1.5=7,500 | ||
| Line 108: | Line 108: | ||
|CN=[[Combo Attack]]||C.I=Tour25 DryBonesCupChallenge||CC=Baby Peach||CT=N64 Royal Raceway T||C.1=10||C.2=15||C.3=23 | |CN=[[Combo Attack]]||C.I=Tour25 DryBonesCupChallenge||CC=Baby Peach||CT=N64 Royal Raceway T||C.1=10||C.2=15||C.3=23 | ||
}} | }} | ||
{{ | {{MKT cup table row | ||
|C=Monty Mole||Ra= | |C=Monty Mole||Ra= | ||
|R1=Tokyo Blur 2||R1.I=TokyoBlur2 PinkShyGuy||R1.1=1,100||R1.2=2,100||R1.3=2,800||R1.4=3,500||R1.5=5,700 | |R1=Tokyo Blur 2||R1.I=TokyoBlur2 PinkShyGuy||R1.1=1,100||R1.2=2,100||R1.3=2,800||R1.4=3,500||R1.5=5,700 | ||
|R2=SNES Koopa Troopa Beach 2R||R2.I=KoopaTroopaBeach2RSNES MontyMole||R2.1=1,400||R2.2=2,400||R2.3=3,300||R2.4=4,200||R2.5=6,800 | |R2=SNES Koopa Troopa Beach 2R||R2.I=KoopaTroopaBeach2RSNES MontyMole||R2.1=1,400||R2.2=2,400||R2.3=3,300||R2.4=4,200||R2.5=6,800 | ||
|R3=SNES Mario Circuit 3||R3.I=MarioCircuit3SNES ToadPitCrew||R3.1=1,300||R3.2=2,300||R3.3=3,100||R3.4=4,000||R3.5=6,400 | |R3=SNES Mario Circuit 3||R3.I=MarioCircuit3SNES ToadPitCrew||R3.1=1,300||R3.2=2,300||R3.3=3,100||R3.4=4,000||R3.5=6,400 | ||
|CN=[[Vs. Mega]] [[Dry Bowser]]||C.I=Tour25 MontyMoleCupChallenge||CC=Any character||CT=[[ | |CN=[[Vs. Mega]] [[Dry Bowser]]||C.I=Tour25 MontyMoleCupChallenge||CC=Any character||CT=[[GBA Bowser's Castle 1]]||C.1=50cc||C.2=100cc||C.3=150cc | ||
}} | }} | ||
{{ | {{MKT cup table row | ||
|C=Baby Daisy||Ra= | |C=Baby Daisy||Ra= | ||
|R1=3DS Cheep Cheep Lagoon||R1.I=CheepCheepLagoon3DS BabyDaisy||R1.1=1,200||R1.2=2,100||R1.3=2,900||R1.4=3,700||R1.5=5,800 | |R1=3DS Cheep Cheep Lagoon||R1.I=CheepCheepLagoon3DS BabyDaisy||R1.1=1,200||R1.2=2,100||R1.3=2,900||R1.4=3,700||R1.5=5,800 | ||
| Line 122: | Line 122: | ||
|CN=[[Smash Small Dry Bones]]||C.I=Tour25 BabyDaisyCupChallenge||CC=Birdo||CT=DS Luigi's Mansion||C.1=5||C.2=7||C.3=10 | |CN=[[Smash Small Dry Bones]]||C.I=Tour25 BabyDaisyCupChallenge||CC=Birdo||CT=DS Luigi's Mansion||C.1=5||C.2=7||C.3=10 | ||
}} | }} | ||
{{ | {{MKT cup table row | ||
|C=Bowser Jr.||Ra= | |C=Bowser Jr.||Ra= | ||
|R1=SNES Choco Island 2R||R1.I=ChocoIsland2RSNES BowserJr||R1.1=1,400||R1.2=2,600||R1.3=3,500||R1.4=4,500||R1.5=6,800 | |R1=SNES Choco Island 2R||R1.I=ChocoIsland2RSNES BowserJr||R1.1=1,400||R1.2=2,600||R1.3=3,500||R1.4=4,500||R1.5=6,800 | ||
|R2=Tokyo Blur||R2.I=TokyoBlur ToadPitCrew||R2.1=1,600||R2.2=3,000||R2.3=4,200||R2.4=5,300||R2.5=8,000 | |R2=Tokyo Blur||R2.I=TokyoBlur ToadPitCrew||R2.1=1,600||R2.2=3,000||R2.3=4,200||R2.4=5,300||R2.5=8,000 | ||
|R3=DS Airship Fortress T||R3.I=AirshipFortressTDS||R3.1=2,900||R3.2=5,500||R3.3=7,500||R3.4=9,600||R3.5=14,500 | |R3=DS Airship Fortress T||R3.I=AirshipFortressTDS||R3.1=2,900||R3.2=5,500||R3.3=7,500||R3.4=9,600||R3.5=14,500 | ||
|CN=[[Do Jump Boosts]]||C.I=Tour25 BowserJrCupChallenge||CC=Shy Guy||CT=[[ | |CN=[[Do Jump Boosts]]||C.I=Tour25 BowserJrCupChallenge||CC=Shy Guy||CT=[[3DS Rainbow Road]]||C.1=18||C.2=32||C.3=44 | ||
}} | }} | ||
{{ | {{MKT cup table row | ||
|C=Birdo||Ra= | |C=Birdo||Ra= | ||
|R1=DS Luigi's Mansion||R1.I=LuigisMansionDS||R1.1=1,300||R1.2=2,600||R1.3=3,500||R1.4=4,500||R1.5=6,600 | |R1=DS Luigi's Mansion||R1.I=LuigisMansionDS||R1.1=1,300||R1.2=2,600||R1.3=3,500||R1.4=4,500||R1.5=6,600 | ||
| Line 136: | Line 136: | ||
|CN=[[Steer Clear of Obstacles]]||C.I=Tour25 BirdoCupChallenge||CC=Rosalina||CT=DS Airship Fortress||C.1=1||C.2=2||C.3=3 | |CN=[[Steer Clear of Obstacles]]||C.I=Tour25 BirdoCupChallenge||CC=Rosalina||CT=DS Airship Fortress||C.1=1||C.2=2||C.3=3 | ||
}} | }} | ||
{{ | {{MKT cup table row | ||
|C=Bowser||Ra= | |C=Bowser||Ra= | ||
|R1=Tokyo Blur 3R||R1.I=TokyoBlur3R Lakitu||R1.1=1,700||R1.2=3,400||R1.3=4,600||R1.4=5,900||R1.5=8,400 | |R1=Tokyo Blur 3R||R1.I=TokyoBlur3R Lakitu||R1.1=1,700||R1.2=3,400||R1.3=4,600||R1.4=5,900||R1.5=8,400 | ||
|R2=3DS Cheep Cheep Lagoon T||R2.I=CheepCheepLagoonT3DS Mario||R2.1=1,800||R2.2=3,600||R2.3=5,000||R2.4=6,400||R2.5=9,100 | |R2=3DS Cheep Cheep Lagoon T||R2.I=CheepCheepLagoonT3DS Mario||R2.1=1,800||R2.2=3,600||R2.3=5,000||R2.4=6,400||R2.5=9,100 | ||
|R3=GBA Bowser's Castle 1R/T||R3.I=BowsersCastle1RTGBA Bowser New||R3.1=1,900||R3.2=3,800||R3.3=5,300||R3.4=6,700||R3.5=9,600 | |R3=GBA Bowser's Castle 1R/T||R3.I=BowsersCastle1RTGBA Bowser New||R3.1=1,900||R3.2=3,800||R3.3=5,300||R3.4=6,700||R3.5=9,600 | ||
|CN=Time Trial | |CN=Time Trial||C.I=Tour5 MarioCupChallenge||CC=Mario||CT=SNES Choco Island 2||C.1=1:35.00||C.2=1:20.00||C.3=1:08.00 | ||
}} | }} | ||
{{ | {{MKT cup table row | ||
|C=Peachette||Ra= | |C=Peachette||Ra= | ||
|R1=N64 Royal Raceway R||R1.I=RoyalRacewayRN64 Peachette||R1.1=2,100||R1.2=4,600||R1.3=6,000||R1.4=7,700||R1.5=10,700 | |R1=N64 Royal Raceway R||R1.I=RoyalRacewayRN64 Peachette||R1.1=2,100||R1.2=4,600||R1.3=6,000||R1.4=7,700||R1.5=10,700 | ||
|R2=Tokyo Blur 3||R2.I=TokyoBlur3||R2.1=1,900||R2.2=3,900||R2.3=5,300||R2.4=6,800||R2.5=9,400 | |R2=Tokyo Blur 3||R2.I=TokyoBlur3 MarioHappi||R2.1=1,900||R2.2=3,900||R2.3=5,300||R2.4=6,800||R2.5=9,400 | ||
|R3=[[Mario Circuit 2|SNES Mario Circuit 2R/T]]||R3.I=MarioCircuit2RTSNES BirdoLightBlue||R3.1=2,200||R3.2=4,500||R3.3=6,200||R3.4=7,900||R3.5=11,000 | |R3=[[SNES Mario Circuit 2|SNES Mario Circuit 2R/T]]||R3.I=MarioCircuit2RTSNES BirdoLightBlue||R3.1=2,200||R3.2=4,500||R3.3=6,200||R3.4=7,900||R3.5=11,000 | ||
|CN=[[Big Reverse Race]]||C.I=Tour25 PeachetteCupChallenge||CC=Any character||CT=Tokyo Blur 3||C.1=50cc||C.2=100cc||C.3=150cc | |CN=[[Big Reverse Race]]||C.I=Tour25 PeachetteCupChallenge||CC=Any character||CT=Tokyo Blur 3||C.1=50cc||C.2=100cc||C.3=150cc | ||
}} | }} | ||
|} | |} | ||
===Signature kart sets=== | ===Signature kart sets=== | ||
Drivers with a corresponding cup in the tour were bumped one rank up in every course of their cup. | Drivers with a corresponding cup in the tour were bumped one rank up in every course of their cup. | ||
{| class="wikitable" style="text-align: center" width=40% | {|class="wikitable"style="text-align: center"width=40% | ||
!width=10%|Cup | !width=10%|Cup | ||
!width=10%|Character | !width=10%|Character | ||
| Line 233: | Line 232: | ||
==Rewards== | ==Rewards== | ||
Gold cells indicate rewards exclusive to Gold Pass members. | Gold cells indicate rewards exclusive to Gold Pass members. | ||
{|class="wikitable" style="margin:auto; text-align:center" | {|class="wikitable"style="margin:auto; text-align:center" | ||
|- | |- | ||
![[File:MKT Icon GrandStar.png|20x20px]] 30 | ![[File:MKT Icon GrandStar.png|20x20px]] 30 | ||
| Line 259: | Line 258: | ||
|} | |} | ||
<br> | <br> | ||
{|class="wikitable" style="margin:auto; text-align:center" | {|class="wikitable"style="margin:auto; text-align:center" | ||
|- | |- | ||
!Grand Stars!![[File:MKT Icon GrandStar.png|20x20px]]!!15!!30!!45!!60!!75!!90!!105!!120!!135!!150!!165!!180!!190!!200!!210!!220!!225!!230!!235!!240!!245!!250!!255!!260!!265!!270!!Total!!Grand total | !Grand Stars!![[File:MKT Icon GrandStar.png|20x20px]]!!15!!30!!45!!60!!75!!90!!105!!120!!135!!150!!165!!180!!190!!200!!210!!220!!225!!230!!235!!240!!245!!250!!255!!260!!265!!270!!Total!!Grand total | ||
| Line 343: | Line 342: | ||
===Courses=== | ===Courses=== | ||
<gallery> | <gallery heights=50px> | ||
MKT Icon Tokyo Blur 3.png|[[Tokyo Blur 3]] (N, R, T) | MKT Icon Tokyo Blur 3.png|[[Tour Tokyo Blur|Tokyo Blur 3]] (N, R, T) | ||
</gallery> | </gallery> | ||
==Paid banners== | ==Paid banners== | ||
{| align=center width=960px cellspacing=0 border=1 cellpadding=3 style="border-collapse:collapse; font-family:Arial; text-align:center" | {|align=center width=960px cellspacing=0 border=1 cellpadding=3 style="border-collapse:collapse; font-family:Arial; text-align:center" | ||
|-style="background: #ABC" | |-style="background: #ABC" | ||
!Name | !Name | ||
| Line 398: | Line 397: | ||
==Challenges== | ==Challenges== | ||
{{ | {{MKT challenge table | ||
|TCR1=[[File:MKT Icon QuickTicket.png|70px]] [[Quick ticket]] ×1 | |TCR1=[[File:MKT Icon QuickTicket.png|70px]] [[Quick ticket]] ×1 | ||
|T1.1=068 | |T1.1=068 | ||
| Line 486: | Line 485: | ||
==Initial pipe appearance rates== | ==Initial pipe appearance rates== | ||
===All-Clear Pipe=== | ===All-Clear Pipe=== | ||
The All-Clear Pipe randomly shot out one of the following regular High-End items. | The All-Clear Pipe randomly shot out one of the following regular High-End items. | ||
{|class="wikitable" style="margin:auto; text-align:center" | {|class="wikitable"style="margin:auto; text-align:center" | ||
!colspan=2|High-End items obtained from the All-Clear Pipe during the Summer Festival Tour | !colspan=2|High-End items obtained from the All-Clear Pipe during the Summer Festival Tour | ||
|- | |- | ||
!High-End drivers | !High-End drivers | ||
|[[Dry Bowser]], [[ | |[[Dry Bowser]], [[Metal Mario]], [[Pink Gold Peach]], [[Pauline]], [[Peachette]], [[Ice Mario (Super Mario Galaxy)|Ice Mario]] | ||
|- | |- | ||
!High-End karts | !High-End karts | ||
| Line 504: | Line 502: | ||
===Summer Festival Pipe 1=== | ===Summer Festival Pipe 1=== | ||
{|class="wikitable" style="margin:auto; text-align:center" | {|class="wikitable"style="margin:auto; text-align:center" | ||
!Class | !Class | ||
!Parts | !Parts | ||
| Line 522: | Line 520: | ||
|- | |- | ||
!High-End drivers | !High-End drivers | ||
|[[Dry Bowser]], [[ | |[[Dry Bowser]], [[Metal Mario]], [[Pink Gold Peach]], [[Pauline]], [[Mario]] (Hakama), [[Peach]] (Kimono), [[Peachette]], Mario (Happi), [[Ice Mario (Super Mario Galaxy)|Ice Mario]] | ||
|0.1111% | |0.1111% | ||
|- | |- | ||
| Line 534: | Line 532: | ||
|- | |- | ||
!Super drivers | !Super drivers | ||
|[[Donkey Kong]], [[Toad]], [[Bowser]], [[Luigi]], [[Mario]], [[Peach]], [[Yoshi]], [[Daisy]], [[Lakitu]], [[King Boo]], [[Toadette]], [[Bowser Jr.]], [[Waluigi]], [[Wario]], [[Rosalina]], [[Birdo]], [[Diddy Kong]], [[Hammer Bro]], [[Boomerang Bro]], [[Fire Bro]], [[Ice Bro]], [[Red Yoshi]], [[Black Shy Guy]], [[Pink Shy Guy]], [[Toad]] (Pit Crew), [[Monty Mole]], [[ | |[[Donkey Kong]], [[Toad]], [[Bowser]], [[Luigi]], [[Mario]], [[Peach]], [[Yoshi]], [[Daisy]], [[Lakitu]], [[King Boo]], [[Toadette]], [[Bowser Jr.]], [[Waluigi]], [[Wario]], [[Rosalina]], [[Birdo]], [[Diddy Kong]], [[Hammer Bro]], [[Boomerang Bro]], [[Fire Bro]], [[Ice Bro]], [[Red Yoshi]], [[Black Shy Guy]], [[Pink Shy Guy]], [[Toad]] (Pit Crew), [[Monty Mole]], [[Birdo]] (Light Blue), [[Birdo]] (Yellow), [[Roving Racers|Red Koopa]] (Freerunning) | ||
|0.3103% | |0.3103% | ||
|- | |- | ||
| Line 560: | Line 558: | ||
===Summer Festival Pipe 2=== | ===Summer Festival Pipe 2=== | ||
{|class="wikitable" style="margin:auto; text-align:center" | {|class="wikitable"style="margin:auto; text-align:center" | ||
!colspan=16|Items obtained from a new pipe during the Summer Festival Tour | !colspan=16|Items obtained from a new pipe during the Summer Festival Tour | ||
|- | |- | ||
| Line 590: | Line 588: | ||
|} | |} | ||
<br> | <br> | ||
{|class="wikitable"style="margin:auto; text-align:center" | |||
{|class="wikitable" style="margin:auto; text-align:center" | |||
!Class | !Class | ||
!Parts | !Parts | ||
| Line 609: | Line 606: | ||
|- | |- | ||
!Super drivers | !Super drivers | ||
|[[Donkey Kong]], [[Toad]], [[Bowser]], [[Luigi]], [[Mario]], [[Peach]], [[Yoshi]], [[Daisy]], [[Lakitu]], [[King Boo]], [[Toadette]], [[Bowser Jr.]], [[Waluigi]], [[Wario]], [[Rosalina]], [[Birdo]], [[Diddy Kong]], [[Hammer Bro]], [[Boomerang Bro]], [[Fire Bro]], [[Ice Bro]], [[Red Yoshi]], [[Black Shy Guy]], [[Pink Shy Guy]], [[Toad]] (Pit Crew), [[Monty Mole]], [[ | |[[Donkey Kong]], [[Toad]], [[Bowser]], [[Luigi]], [[Mario]], [[Peach]], [[Yoshi]], [[Daisy]], [[Lakitu]], [[King Boo]], [[Toadette]], [[Bowser Jr.]], [[Waluigi]], [[Wario]], [[Rosalina]], [[Birdo]], [[Diddy Kong]], [[Hammer Bro]], [[Boomerang Bro]], [[Fire Bro]], [[Ice Bro]], [[Red Yoshi]], [[Black Shy Guy]], [[Pink Shy Guy]], [[Toad]] (Pit Crew), [[Monty Mole]], [[Birdo]] (Light Blue), [[Birdo]] (Yellow), [[Roving Racers|Red Koopa]] (Freerunning) | ||
|0.3103% | |0.3103% | ||
|- | |- | ||
| Line 635: | Line 632: | ||
===B Dasher Pipe=== | ===B Dasher Pipe=== | ||
{|class="wikitable" style="margin:auto; text-align:center" | {|class="wikitable"style="margin:auto; text-align:center" | ||
!colspan=16|Items obtained from a new B Dasher Pipe | !colspan=16|Items obtained from a new B Dasher Pipe | ||
|- | |- | ||
| Line 665: | Line 662: | ||
|} | |} | ||
<br> | <br> | ||
{|class="wikitable"style="margin:auto; text-align:center" | |||
{|class="wikitable" style="margin:auto; text-align:center" | |||
!Class | !Class | ||
!Parts | !Parts | ||
| Line 684: | Line 680: | ||
|} | |} | ||
== | ==Token Shop== | ||
The limited-time event where [[event token]]s appeared lasted from September 1, 2020 to September 8, 2020. However, the shop was available for two more days until September 10, 2020 for players to spend any already collected event tokens. Event tokens could be earned from landing hits with Bob-ombs. | The limited-time event where [[event token]]s appeared lasted from September 1, 2020 to September 8, 2020. However, the shop was available for two more days until September 10, 2020 for players to spend any already collected event tokens. Event tokens could be earned from landing hits with Bob-ombs. | ||
{| class="wikitable" style="margin:auto; text-align:center" width=50% | {|class="wikitable"style="margin:auto; text-align:center" width=50% | ||
!colspan=3|'''Event Shop''' (September 1, 2020 - September 10, 2020) | !colspan=3|'''Event Shop''' (September 1, 2020 - September 10, 2020) | ||
|- | |- | ||
| Line 771: | Line 767: | ||
{{MKT}} | {{MKT}} | ||
[[Category:Mario Kart Tour | [[Category:Mario Kart Tour tours]] | ||
[[it:Tour festival estivo]] | [[it:Tour festival estivo]] | ||
Latest revision as of 10:45, January 2, 2024
- Not to be confused with Summer Tour.
| Summer Festival Tour | |
|---|---|

| |
| Start date | August 25, 2020 11:00 p.m. (PT) |
| End date | September 8, 2020 10:59 p.m. (PT) |
| Number of cups | 12 |
| Ranked cups | Daisy Cup (week 1) Lakitu Cup (week 2) |
| Coin Rush course | Tokyo Blur 3 |
| << List of tours >> | |
The Summer Festival Tour was the twenty-fifth tour of Mario Kart Tour, which began on August 26, 2020 and ended on September 8, 2020. Reflecting its theme, the tour introduced a variant of Daisy in a yukata outfit and a new layout of Tokyo Blur known as Tokyo Blur 3, as well as the return of Tokyo Blur and Tokyo Blur 2, likely due to Tokyo's reputation for hosting summer festivals nearly every year. It was the first tour since the Baby Rosalina Tour, which was twelve tours prior, to feature city courses, as well as the first tour overall to see the return of previously introduced city courses. This is the second tour to introduce a new layout of a city course in the same year as a previous layout of the course, with the first being the 2019 Holiday Tour eighteen tours prior. The menu's background featured Mount Fuji, the Tokyo Tower, and Kaminarimon as landmarks for this tour. This tour's trailer featured fireworks during its opening splash screen.
The second set of Expert Challenges were made available at the start of the tour, which later ended with the Sunset Tour.
Spotlights[edit]
| Summer Festival Pipe 1 August 25, 2020, 11:00 p.m. (PT) – September 8, 2020, 10:59 p.m. (PT) |
Summer Festival Pipe 2 September 1, 2020, 11:00 p.m. (PT) – September 8, 2020, 10:59 p.m. (PT) | ||||

|

| ||||
| Driver | Kart | Glider | Drivers | Karts | Gliders |
|---|---|---|---|---|---|
 |
|||||
| Daisy (Yukata) | Festival Girl | Crimson Crane | Mario (Hakama), Mario (Happi) and Peach (Kimono) | Quickshaw, Kabuki Dasher, and Glam Bruiser | Purple Oilpaper Umbrella, Full Flight, and Fireworks Parachute |
Special pipe[edit]
| B Dasher Pipe August 29, 2020, 11:00 p.m. (PT) – September 3, 2020, 10:59 p.m. (PT) | |

| |
| Karts | |
|---|---|
| B Dasher, Kabuki Dasher, Black B Dasher, Red B Dasher, Black Kabuki Dasher | |
Names in other languages[edit]
| Language | Name | Meaning |
|---|---|---|
| Italian | Tubo dei Fulmini |
B Dashers Pipe |
Cups[edit]
Daisy Cup Ranked cup (week 1) |
Tokyo Blur 3 |
3DS Cheep Cheep Lagoon R |
DS Luigi's Mansion R |
Time Trial | ||||
 SNES Mario Circuit 3R |
Bowser | |||||||
Morton Cup |
DS Airship Fortress R |
SNES Mario Circuit 3R |
Tokyo Blur 2T |
Ring Race | ||||
 Tokyo Blur 3 |
Lakitu | |||||||
Lakitu Cup Ranked cup (week 2) |
SNES Mario Circuit 3T |
SNES Koopa Troopa Beach 2 |
Tokyo Blur 3T |
Glider Challenge | ||||
 3DS Cheep Cheep Lagoon |
Toadette | |||||||
Baby Rosalina Cup |
Tokyo Blur R |
DS Luigi's Mansion T |
SNES Choco Island 2 |
Break Item Boxes | ||||
 SNES Mario Circuit 3 |
Larry | |||||||
Yoshi Cup |
SNES Koopa Troopa Beach 2T |
Tokyo Blur 3R |
N64 Royal Raceway |
Goomba Takedown | ||||
 SNES Choco Island 2 |
Baby Daisy | |||||||
Dry Bones Cup |
DS Airship Fortress |
SNES Choco Island 2T |
Tokyo Blur 2R |
Combo Attack | ||||
 N64 Royal Raceway T |
Baby Peach | |||||||
Monty Mole Cup |
Tokyo Blur 2 |
SNES Koopa Troopa Beach 2R |
SNES Mario Circuit 3 |
Vs. Mega Dry Bowser | ||||
 GBA Bowser's Castle 1 |
Any character | |||||||
Baby Daisy Cup |
3DS Cheep Cheep Lagoon |
N64 Royal Raceway T |
Tokyo Blur T |
Smash Small Dry Bones | ||||
 DS Luigi's Mansion |
Birdo | |||||||
Bowser Jr. Cup |
SNES Choco Island 2R |
Tokyo Blur |
DS Airship Fortress T |
Do Jump Boosts | ||||
 3DS Rainbow Road |
Shy Guy | |||||||
Birdo Cup |
DS Luigi's Mansion |
Tokyo Blur 3T |
3DS Rainbow Road R/T |
Steer Clear of Obstacles | ||||
 DS Airship Fortress |
Rosalina | |||||||
Bowser Cup |
Tokyo Blur 3R |
3DS Cheep Cheep Lagoon T |
GBA Bowser's Castle 1R/T |
Time Trial | ||||
 SNES Choco Island 2 |
Mario | |||||||
Peachette Cup |
N64 Royal Raceway R |
Tokyo Blur 3 |
SNES Mario Circuit 2R/T |
Big Reverse Race | ||||
 Tokyo Blur 3 |
Any character | |||||||
Signature kart sets[edit]
Drivers with a corresponding cup in the tour were bumped one rank up in every course of their cup.
| Cup | Character | Kart | Glider |
|---|---|---|---|
| Second course of every cup | |||
| Third course of every cup | |||
| — | — | ||
| — | — | ||
| — | — | ||
| — | — | ||
| — | — | ||
| — | — | ||
| — | — | ||
| — | — | ||
| — | — | ||
| — | — | ||
| — | — | ||
| — | — |
Rewards[edit]
Gold cells indicate rewards exclusive to Gold Pass members.

|
||||||
| Parachute | Oilpaper Umbrella | Cheep Charger | Red Koopa (Freerunning) | Baby Rosalina | Red Streamliner | Black Circuit |
| Grand Stars | 15 | 30 | 45 | 60 | 75 | 90 | 105 | 120 | 135 | 150 | 165 | 180 | 190 | 200 | 210 | 220 | 225 | 230 | 235 | 240 | 245 | 250 | 255 | 260 | 265 | 270 | Total | Grand total | |
|---|---|---|---|---|---|---|---|---|---|---|---|---|---|---|---|---|---|---|---|---|---|---|---|---|---|---|---|---|---|
| Free pipe launch | 1 | 1 | 1 | 1 | 4 | ||||||||||||||||||||||||
| Coin | 100 | 100 | 100 | 100 | 100 | 100 | 100 | 700 | 1800 | ||||||||||||||||||||
| 300 | 300 | 500 | 1100 | ||||||||||||||||||||||||||
| Rubies | 5 | 3 | 3 | 3 | 3 | 3 | 20 | 50 | |||||||||||||||||||||
| 5 | 5 | 5 | 5 | 5 | 5 | 30 | |||||||||||||||||||||||
| Item tickets | 2 | 2 | 2 | 2 | 2 | 10 | 25 | ||||||||||||||||||||||
| 2 | 2 | 2 | 3 | 3 | 3 | 15 | |||||||||||||||||||||||
| Star tickets | 1 | 1 | 2 | 3 | |||||||||||||||||||||||||
| 1 | 1 | ||||||||||||||||||||||||||||
| Point-boost tickets | 1 | 1 | 1 | 3 | 5 | ||||||||||||||||||||||||
| 1 | 1 | 2 | |||||||||||||||||||||||||||
| 1 | 1 | 1 | 3 | 5 | |||||||||||||||||||||||||
| 1 | 1 | 2 | |||||||||||||||||||||||||||
| 1 | 1 | 1 | 3 | 5 | |||||||||||||||||||||||||
| 1 | 1 | 2 | |||||||||||||||||||||||||||
| Level-boost ticket | 3 | 12 | |||||||||||||||||||||||||||
| 9 | |||||||||||||||||||||||||||||
New content[edit]
Drivers[edit]

Karts[edit]
Gliders[edit]
Courses[edit]
Tokyo Blur 3 (N, R, T)
Paid banners[edit]
| Name | Availability | Cost | Contents | Banner image |
|---|---|---|---|---|
| Value Pack | August 25, 2020 – September 8, 2020 | US$1.99 |
|

|
| Festival Wings Pack | August 25, 2020 – September 8, 2020 | US$19.99 |
|

|
| Pink Wing Pack | August 25, 2020 – September 8, 2020 | US$39.99 | 
| |
| Cheep Cheep Masks Pack | September 1, 2020 – September 8, 2020 | US$19.99 |
|

|
| Head Honcho Pack | September 1, 2020 – September 8, 2020 | US$39.99 |
|

|
Challenges[edit]
| Tour Challenges 1 | Tour Challenges 2 | Gold Challenges | ||||||||
|---|---|---|---|---|---|---|---|---|---|---|
| Completion reward: |
Completion reward: |
Completion reward: | ||||||||
 |
 |
 |
 |
 |
 |
 |
 |
 | ||
| Land 3 hits with Green Shells. | Do 50 Mini-Turbo boosts. | Do 10 Rocket Starts. | Land 3 hits with Bob-ombs. | Do a total of 3 Slipstream boosts. | Land 5 hits with Bananas. | Land 10 hits with Green Shells. | Do 100 Jump Boosts. | Get a Fantastic combo a total of 10 times. | ||
 |
 |
 |
 |
 |
 |
 |
 |
 | ||
| Earn a score of 7,000 or higher on a Tokyo course. | Land a hit with a Bob-omb using a driver with a ribbon. | Cause opponents to crash 3 times while underwater. | Cause an opponent to crash while gliding. | Earn a score of 9,000 or higher on a Tokyo course. | Get 1st place 3 times on a Tokyo course. | Do 30 Mini-Turbo boosts on a Tokyo course. | Earn a score of 10,000 or higher using a driver with a mustache. | Get a combo count of ×30 or higher. | ||
 |
 |
 |
 |
 |
 |
 |
 |
 | ||
| Do 50 Mini-Turbo boosts using a driver wearing a shell. | Earn a total score of 20,000 or higher in the Lakitu Cup. | Do 10 Mini-Turbo boosts in a single race on a Tokyo course. | Earn a score of 8,000 or higher using a driver wearing earrings. | Earn a total score of 20,000 or higher in the Bowser Cup. | Race in every course of every cup, including bonus challenges. | Do 10 Mini-Turbo boosts in a single race using a driver with a ribbon. | Earn a total score of 25,000 or higher in the Daisy Cup. | Cause opponents to crash 10 times in Frenzy mode. | ||
Initial pipe appearance rates[edit]
All-Clear Pipe[edit]
The All-Clear Pipe randomly shot out one of the following regular High-End items.
| High-End items obtained from the All-Clear Pipe during the Summer Festival Tour | |
|---|---|
| High-End drivers | Dry Bowser, Metal Mario, Pink Gold Peach, Pauline, Peachette, Ice Mario |
| High-End karts | B Dasher, Badwagon, Circuit Special, Bruiser, Wild Wing, Bumble V, Wildfire Flyer, Red B Dasher, P-Wing, Green Apple Kart, Poison Apple Kart, Dozer Dasher, Banana Master, Offroader, Head Honcho, Pink Wing, Koopa King, Cact-X |
| High-End gliders | Swooper, Cloud Glider, Gold Glider, Pink Gold Paper Glider, Butterfly Sunset, Crimson Crane, Strawberry Donut, Heart Balloons, Great Sail, Tropical Glider, Cheep Cheep Masks |
Summer Festival Pipe 1[edit]
Summer Festival Pipe 2[edit]
| Items obtained from a new pipe during the Summer Festival Tour | |||||||||||||||
|---|---|---|---|---|---|---|---|---|---|---|---|---|---|---|---|
| Item | Normal |
Super |
Featured High-End | ||||||||||||
| Character | Kart | Glider | Character | Kart | Glider | Character | Kart | Glider | |||||||
| Amount | 31 | 25 | 15 | 9 | 7 | 4 | 3 | 3 | 3 | ||||||
B Dasher Pipe[edit]
| Items obtained from a new B Dasher Pipe | |||||||||||||||
|---|---|---|---|---|---|---|---|---|---|---|---|---|---|---|---|
| Item | Normal |
Super |
High-End | ||||||||||||
| Character | Kart | Glider | Character | Kart | Glider | Character | Kart | Glider | |||||||
| Amount | 0 | 17 | 0 | 0 | 10 | 0 | 0 | 3 | 0 | ||||||
| Class | Parts | Rate (each) |
|---|---|---|
| High-End karts | B Dasher, Kabuki Dasher, Black B Dasher, Red B Dasher, Black Kabuki Dasher | 2.0000% |
| Super karts | Zucchini, Egg 1, Daytripper, Mach 8, Cloud 9, Soda Jet, Koopa Clown, Poltergust 4000, Royale, Barrel Train, Turbo Yoshi, Blue Seven, Flame Flyer, Para-Wing, Super Blooper, Turbo Birdo, Streamliner, DK Jumbo, Red Turbo Yoshi, Light-blue Turbo Birdo, Yellow Turbo Birdo | 1.5873% |
| Normal karts | Birthday Girl, Landship, Bullet Blaster, Mushmellow, Biddybuggy, Pipe Frame, Pipe Buggy, Cheep Charger, Red Kiddie Kart, Koopa Dasher, Birthday Girl Rosalina | 5.1515% |
Token Shop[edit]
The limited-time event where event tokens appeared lasted from September 1, 2020 to September 8, 2020. However, the shop was available for two more days until September 10, 2020 for players to spend any already collected event tokens. Event tokens could be earned from landing hits with Bob-ombs.
| Event Shop (September 1, 2020 - September 10, 2020) | ||
|---|---|---|
| Ruby ×3 Amount: 5 |
Coin ×500 Amount: 5 |
Coin Rush ticket Amount: 1 |

|
||
| Monty Mole Amount: 1 |
Bob-omb Parafoil Amount: 1 |
Green Cheep Charger Amount: 3 |
| Point-boost ticket (driver) Amount: 3 |
Point-boost ticket (kart) Amount: 3 |
Point-boost ticker (glider) Amount: 3 |
| Item ticket Amount: 10 |
Level-boost ticket (Normal) Amount: 2 |
Level-boost ticket (Super) Amount: 1 |
| Star ticket Amount: 3 |
Points-cap ticket (Normal) Amount: 1 |
Points-cap ticket (Super) Amount: 1 |
Profiles[edit]
- Mario Kart Tour Twitter:
- "The Pirate Tour is wrapping up in #MarioKartTour. Starting Aug. 25, 11 PM PT, you can return to Tokyo for the Summer Festival Tour! What's hotter—the weather or the competition?"[1]
- "It's time for the Summer Festival Tour! Return to the sizzling streets of Tokyo for some sunny fun. Blaze new paths in the Tokyo Blur course, but don't overheat!"[2]
- "The B Dasher Pipe is available from Aug. 29, 11 PM PT, to Sept. 3, 10:59 PM PT. The Black Kabuki Dasher makes its debut alongside a lineup of High-End karts from the B Dasher family!"[3]
- "Mario (Hakama), Peach (Kimono), and more are back in part 2 of the Summer Festival Tour. They're here to lighten the mood in Tokyo and beyond!"[4]
- "The Summer Festival Tour is almost over. Thanks for racing! Next up in #MarioKartTour is the Super Mario Kart Tour!"[5]
Names in other languages[edit]
| Language | Name | Meaning |
|---|---|---|
| Japanese | 夏祭りツアー Natsu Matsuri Tsuā |
Summer Festival Tour |
| Chinese (simplified) | 夏日祭典巡回赛 Xiàrì Jìdiǎn Xúnhuísài |
Summer Festival Tour |
| Chinese (traditional) | 夏日祭典巡迴賽 Xiàrì Jìdiǎn Xúnhuísài |
Summer Festival Tour |
| French | Saison festival estival |
Summer festival season |
| German | Sommerfest-Tour-Saison |
Summer Festival Tour Season |
| Italian | Tour festival estivo |
Summer festival tour |
| Korean | 여름 페스티벌 투어 Yeoleum Peseutibeol Tueo |
Summer Festival Tour |
| Portuguese | Temporada do Sol |
Sun Season |
| Spanish | Temporada festival estival |
Summer festival season |
Trivia[edit]
- This was the first time a course based on a real-life location did not have its R/T variation introduced at the same time as the other three variations.
References[edit]
- ^ mariokarttourEN (August 21, 2020). Twitter. Retrieved August 21, 2020.
- ^ mariokarttourEN (August 26, 2020). Twitter. Retrieved August 26, 2020.
- ^ mariokarttourEN (August 30, 2020). Twitter. Retrieved August 30, 2020.
- ^ mariokarttourEN (September 2, 2020). Twitter. Retrieved September 2, 2020.
- ^ mariokarttourEN (September 8, 2020). Twitter. Retrieved September 8, 2020.