New Year's Tour (2020): Difference between revisions
m (Added links to bonus challenges + Trivia.) |
|||
| Line 51: | Line 51: | ||
|R2=[[Mario Circuit 1|SNES Mario Circuit 1]]||R2.I=MarioCircuit1SNES ToadPitCrew||R2.1=900||R2.2=1,400||R2.3=1,800||R2.4=2,200||R2.5=4,500 | |R2=[[Mario Circuit 1|SNES Mario Circuit 1]]||R2.I=MarioCircuit1SNES ToadPitCrew||R2.1=900||R2.2=1,400||R2.3=1,800||R2.4=2,200||R2.5=4,500 | ||
|R3=[[Cheep Cheep Lagoon (3DS)|3DS Cheep Cheep Lagoon]]||R3.I=CheepCheepLagoon3DS Rosalina||R3.1=1,100||R3.2=1,700||R3.3=2,100||R3.4=2,600||R3.5=5,300 | |R3=[[Cheep Cheep Lagoon (3DS)|3DS Cheep Cheep Lagoon]]||R3.I=CheepCheepLagoon3DS Rosalina||R3.1=1,100||R3.2=1,700||R3.3=2,100||R3.4=2,600||R3.5=5,300 | ||
|CN=Ready, Set, Rocket Start||C.I=Tour8 MarioCupChallenge||CC=Toad||CT=SNES Mario Circuit 1||C.1=10||C.2=20||C.3=40 | |CN=[[Ready, Set, Rocket Start]]||C.I=Tour8 MarioCupChallenge||CC=Toad||CT=SNES Mario Circuit 1||C.1=10||C.2=20||C.3=40 | ||
}} | }} | ||
{{MKTCup | {{MKTCup | ||
| Line 58: | Line 58: | ||
|R2=[[Yoshi Circuit|GCN Yoshi Circuit]]||R2.I=YoshiCircuitGCN RedYoshi||R2.1=1,100||R2.2=1,800||R2.3=2,300||R2.4=3,000||R2.5=5,300 | |R2=[[Yoshi Circuit|GCN Yoshi Circuit]]||R2.I=YoshiCircuitGCN RedYoshi||R2.1=1,100||R2.2=1,800||R2.3=2,300||R2.4=3,000||R2.5=5,300 | ||
|R3=[[Shy Guy Bazaar|3DS Shy Guy Bazaar]]||R3.I=ShyGuyBazaar3DS||R3.1=1,400||R3.2=2,500||R3.3=3,200||R3.4=4,000||R3.5=6,900 | |R3=[[Shy Guy Bazaar|3DS Shy Guy Bazaar]]||R3.I=ShyGuyBazaar3DS||R3.1=1,400||R3.2=2,500||R3.3=3,200||R3.4=4,000||R3.5=6,900 | ||
|CN=Ring Race||C.I=Tour8 YoshiCupChallenge||CC=Yoshi||CT=[[Dino Dino Jungle|GCN Dino Dino Jungle]]||C.1=10||C.2=25||C.3=34 | |CN=[[Ring Race]]||C.I=Tour8 YoshiCupChallenge||CC=Yoshi||CT=[[Dino Dino Jungle|GCN Dino Dino Jungle]]||C.1=10||C.2=25||C.3=34 | ||
}} | }} | ||
{{MKTCup | {{MKTCup | ||
| Line 65: | Line 65: | ||
|R2=GCN Dino Dino Jungle||R2.I=DinoDinoJungleGCN||R2.1=1,400||R2.2=2,600||R2.3=3,400||R2.4=4,300||R2.5=6,900 | |R2=GCN Dino Dino Jungle||R2.I=DinoDinoJungleGCN||R2.1=1,400||R2.2=2,600||R2.3=3,400||R2.4=4,300||R2.5=6,900 | ||
|R3=[[Rainbow Road (3DS)|3DS Rainbow Road]]||R3.I=RainbowRoad3DS BabyRosalina||R3.1=1,700||R3.2=2,900||R3.3=3,600||R3.4=4,900||R3.5=8,500 | |R3=[[Rainbow Road (3DS)|3DS Rainbow Road]]||R3.I=RainbowRoad3DS BabyRosalina||R3.1=1,700||R3.2=2,900||R3.3=3,600||R3.4=4,900||R3.5=8,500 | ||
|CN=Break Item Boxes||C.I=Tour8 BabyRosalinaCupChallenge||CC=Mario (Hakama)||CT=Tokyo Blur 2||C.1=5||C.2=12||C.3=23 | |CN=[[Break Item Boxes]]||C.I=Tour8 BabyRosalinaCupChallenge||CC=Mario (Hakama)||CT=Tokyo Blur 2||C.1=5||C.2=12||C.3=23 | ||
}} | }} | ||
{{MKTCup | {{MKTCup | ||
| Line 72: | Line 72: | ||
|R2=Tokyo Blur 2T||R2.I=TokyoBlur2T||R2.1=1,500||R2.2=2,600||R2.3=3,200||R2.4=4,300||R2.5=7,300 | |R2=Tokyo Blur 2T||R2.I=TokyoBlur2T||R2.1=1,500||R2.2=2,600||R2.3=3,200||R2.4=4,300||R2.5=7,300 | ||
|R3=[[Luigi's Mansion (DS)|DS Luigi's Mansion]]||R3.I=LuigisMansionDS||R3.1=1,100||R3.2=2,200||R3.3=3,000||R3.4=3,800||R3.5=5,600 | |R3=[[Luigi's Mansion (DS)|DS Luigi's Mansion]]||R3.I=LuigisMansionDS||R3.1=1,100||R3.2=2,200||R3.3=3,000||R3.4=3,800||R3.5=5,600 | ||
|CN=Combo Attack||C.I=Tour8 LakituCupChallenge||CC=Lakitu||CT=SNES Mario Circuit 1T||C.1=3||C.2=10||C.3=18 | |CN=[[Combo Attack]]||C.I=Tour8 LakituCupChallenge||CC=Lakitu||CT=SNES Mario Circuit 1T||C.1=3||C.2=10||C.3=18 | ||
}} | }} | ||
{{MKTCup | {{MKTCup | ||
| Line 79: | Line 79: | ||
|R2=3DS Cheep Cheep Lagoon R||R2.I=CheepCheepLagoonR3DS KoopaTroopa||R2.1=1,100||R2.2=2,200||R2.3=3,000||R2.4=3,800||R2.5=5,500 | |R2=3DS Cheep Cheep Lagoon R||R2.I=CheepCheepLagoonR3DS KoopaTroopa||R2.1=1,100||R2.2=2,200||R2.3=3,000||R2.4=3,800||R2.5=5,500 | ||
|R3=SNES Mario Circuit 3||R3.I=MarioCircuit3SNES ToadPitCrew||R3.1=1,100||R3.2=2,300||R3.3=3,100||R3.4=3,900||R3.5=5,600 | |R3=SNES Mario Circuit 3||R3.I=MarioCircuit3SNES ToadPitCrew||R3.1=1,100||R3.2=2,300||R3.3=3,100||R3.4=3,900||R3.5=5,600 | ||
|CN=Do Jump Boosts||C.I=Tour8 KoopaTroopaCupChallenge||CC=Koopa Troopa||CT=DS Luigi's Mansion||C.1=5||C.2=9||C.3=15 | |CN=[[Do Jump Boosts]]||C.I=Tour8 KoopaTroopaCupChallenge||CC=Koopa Troopa||CT=DS Luigi's Mansion||C.1=5||C.2=9||C.3=15 | ||
}} | }} | ||
{{MKTCup | {{MKTCup | ||
| Line 86: | Line 86: | ||
|R2=GCN Dino Dino Jungle R||R2.I=DinoDinoJungleRGCN||R2.1=1,400||R2.2=2,700||R2.3=3,400||R2.4=4,700||R2.5=7,200 | |R2=GCN Dino Dino Jungle R||R2.I=DinoDinoJungleRGCN||R2.1=1,400||R2.2=2,700||R2.3=3,400||R2.4=4,700||R2.5=7,200 | ||
|R3=[[Waluigi Pinball (DS)|DS Waluigi Pinball]]||R3.I=WaluigiPinballDS||R3.1=1,300||R3.2=2,700||R3.3=3,600||R3.4=4,600||R3.5=6,300 | |R3=[[Waluigi Pinball (DS)|DS Waluigi Pinball]]||R3.I=WaluigiPinballDS||R3.1=1,300||R3.2=2,700||R3.3=3,600||R3.4=4,600||R3.5=6,300 | ||
|CN=Big Reverse Race||C.I=Tour8 DiddyKongCupChallenge||CC=Any character||CT=[[Neo Bowser City|3DS Neo Bowser City]]||C.1=50cc||C.2=100cc||C.3=150cc | |CN=[[Big Reverse Race]]||C.I=Tour8 DiddyKongCupChallenge||CC=Any character||CT=[[Neo Bowser City|3DS Neo Bowser City]]||C.1=50cc||C.2=100cc||C.3=150cc | ||
}} | }} | ||
{{MKTCup | {{MKTCup | ||
| Line 93: | Line 93: | ||
|R2=DS Luigi's Mansion R||R2.I=LuigisMansionRDS BabyLuigi||R2.1=1,400||R2.2=2,700||R2.3=3,500||R2.4=4,700||R2.5=7,100 | |R2=DS Luigi's Mansion R||R2.I=LuigisMansionRDS BabyLuigi||R2.1=1,400||R2.2=2,700||R2.3=3,500||R2.4=4,700||R2.5=7,100 | ||
|R3=GCN Yoshi Circuit R||R3.I=YoshiCircuitRGCN||R3.1=1,400||R3.2=2,900||R3.3=4,000||R3.4=5,100||R3.5=6,800 | |R3=GCN Yoshi Circuit R||R3.I=YoshiCircuitRGCN||R3.1=1,400||R3.2=2,900||R3.3=4,000||R3.4=5,100||R3.5=6,800 | ||
|CN=Steer Clear of Obstacles||C.I=Tour8 PeachCupChallenge||CC=Peach (Kimono)||CT=Tokyo Blur 2||C.1=1||C.2=2||C.3=3 | |CN=[[Steer Clear of Obstacles]]||C.I=Tour8 PeachCupChallenge||CC=Peach (Kimono)||CT=Tokyo Blur 2||C.1=1||C.2=2||C.3=3 | ||
}} | }} | ||
{{MKTCup | {{MKTCup | ||
| Line 100: | Line 100: | ||
|R2=Tokyo Blur 2||R2.I=TokyoBlur2||R2.1=1,100||R2.2=2,500||R2.3=3,400||R2.4=4,300||R2.5=5,700 | |R2=Tokyo Blur 2||R2.I=TokyoBlur2||R2.1=1,100||R2.2=2,500||R2.3=3,400||R2.4=4,300||R2.5=5,700 | ||
|R3=GCN Dino Dino Jungle R||R3.I=DinoDinoJungleRGCN Roy||R3.1=1,500||R3.2=3,000||R3.3=3,900||R3.4=5,200||R3.5=7,600 | |R3=GCN Dino Dino Jungle R||R3.I=DinoDinoJungleRGCN Roy||R3.1=1,500||R3.2=3,000||R3.3=3,900||R3.4=5,200||R3.5=7,600 | ||
|CN=vs. Mega Larry{{footnote|main|1}}||C.I=Tour8 RoyCupChallenge||CC=Any character||CT=[[Mario Circuit 2|SNES Mario Circuit 2]]||C.1=50cc||C.2=100cc||C.3=150cc | |CN=[[vs. Mega]] [[Larry Koopa|Larry]]{{footnote|main|1}}||C.I=Tour8 RoyCupChallenge||CC=Any character||CT=[[Mario Circuit 2|SNES Mario Circuit 2]]||C.1=50cc||C.2=100cc||C.3=150cc | ||
}} | }} | ||
{{MKTCup | {{MKTCup | ||
| Line 107: | Line 107: | ||
|R2=DS Luigi's Mansion T||R2.I=LuigisMansionTDS Luigi||R2.1=1,300|R2.2=3,000||R2.3=4,100||R2.4=5,200||R2.5=6,700 | |R2=DS Luigi's Mansion T||R2.I=LuigisMansionTDS Luigi||R2.1=1,300|R2.2=3,000||R2.3=4,100||R2.4=5,200||R2.5=6,700 | ||
|R3=3DS Rainbow Road R||R3.I=RainbowRoadR3DS Waluigi||R3.1=2,000||R3.2=3,900||R3.3=5,100||R3.4=6,900||R3.5=9,800 | |R3=3DS Rainbow Road R||R3.I=RainbowRoadR3DS Waluigi||R3.1=2,000||R3.2=3,900||R3.3=5,100||R3.4=6,900||R3.5=9,800 | ||
|CN=Goomba Takedown||C.I=Tour8 LuigiCupChallenge||CC=Luigi||CT=3DS Cheep Cheep Lagoon||C.1=20||C.2=40||C.3=75 | |CN=[[Goomba Takedown]]||C.I=Tour8 LuigiCupChallenge||CC=Luigi||CT=3DS Cheep Cheep Lagoon||C.1=20||C.2=40||C.3=75 | ||
}} | }} | ||
{{MKTCup | {{MKTCup | ||
| Line 114: | Line 114: | ||
|R2=SNES Mario Circuit 3R||R2.I=MarioCircuit3RSNES Morton||R2.1=1,200||R2.2=2,700||R2.3=3,700||R2.4=4,700||R2.5=6,000 | |R2=SNES Mario Circuit 3R||R2.I=MarioCircuit3RSNES Morton||R2.1=1,200||R2.2=2,700||R2.3=3,700||R2.4=4,700||R2.5=6,000 | ||
|R3=Tokyo Blur 2T||R3.I=TokyoBlur2T ToadPartyTime||R3.1=1,600||R3.2=3,300||R3.3=4,300||R3.4=5,800||R3.5=8,100 | |R3=Tokyo Blur 2T||R3.I=TokyoBlur2T ToadPartyTime||R3.1=1,600||R3.2=3,300||R3.3=4,300||R3.4=5,800||R3.5=8,100 | ||
|CN=Smash Small Dry Bones||C.I=Tour8 MortonCupChallenge||CC=Morton||CT=SNES Mario Circuit 2||C.1=3||C.2=8||C.3=12 | |CN=[[Smash Small Dry Bones]]||C.I=Tour8 MortonCupChallenge||CC=Morton||CT=SNES Mario Circuit 2||C.1=3||C.2=8||C.3=12 | ||
}} | }} | ||
{{MKTCup | {{MKTCup | ||
| Line 135: | Line 135: | ||
|R2=3DS Cheep Cheep Lagoon T||R2.I=CheepCheepLagoonT3DS BowserJr||R2.1=1,600||R2.2=3,400||R2.3=4,400||R2.4=6,000||R2.5=8,100 | |R2=3DS Cheep Cheep Lagoon T||R2.I=CheepCheepLagoonT3DS BowserJr||R2.1=1,600||R2.2=3,400||R2.3=4,400||R2.4=6,000||R2.5=8,100 | ||
|R3=GCN Yoshi Circuit T||R3.I=YoshiCircuitTGCN Yoshi||R3.1=1,500||R3.2=3,200||R3.3=4,100||R3.4=5,600||R3.5=7,500 | |R3=GCN Yoshi Circuit T||R3.I=YoshiCircuitTGCN Yoshi||R3.1=1,500||R3.2=3,200||R3.3=4,100||R3.4=5,600||R3.5=7,500 | ||
|CN=Glider Challenge||C.I=Tour8 DaisyCupChallenge||CC=Mario (Hakama)||CT=Tokyo Blur 2||C.1=150||C.2=300||C.3=440 | |CN=[[Glider Challenge]]||C.I=Tour8 DaisyCupChallenge||CC=Mario (Hakama)||CT=Tokyo Blur 2||C.1=150||C.2=300||C.3=440 | ||
}} | }} | ||
{{MKTCup | {{MKTCup | ||
| Line 149: | Line 149: | ||
|R2=[[Toad Circuit|3DS Toad Circuit R/T]]||R2.I=ToadCircuitRT3DS||R2.1=1,600||R2.2=3,500||R2.3=4,600||R2.4=6,200||R2.5=8,200 | |R2=[[Toad Circuit|3DS Toad Circuit R/T]]||R2.I=ToadCircuitRT3DS||R2.1=1,600||R2.2=3,500||R2.3=4,600||R2.4=6,200||R2.5=8,200 | ||
|R3=GCN Dino Dino Jungle T||R3.I=DinoDinoJungleTGCN||R3.1=2,000||R3.2=4,200||R3.3=5,500||R3.4=7,500||R3.5=9,800 | |R3=GCN Dino Dino Jungle T||R3.I=DinoDinoJungleTGCN||R3.1=2,000||R3.2=4,200||R3.3=5,500||R3.4=7,500||R3.5=9,800 | ||
|CN=Time Trial||C.I=Tour8 BowserCupChallenge||CC=Dry Bones||CT=DS Waluigi Pinball||C.1=3:00.00||C.2=2:35.00||C.3=2:02.00 | |CN=[[Time Trial (Mario Kart Tour)|Time Trial]]||C.I=Tour8 BowserCupChallenge||CC=Dry Bones||CT=DS Waluigi Pinball||C.1=3:00.00||C.2=2:35.00||C.3=2:02.00 | ||
}} | }} | ||
{{MKTCup | {{MKTCup | ||
| Line 170: | Line 170: | ||
|R2=3DS Neo Bowser City R/T||R2.I=NeoBowserCityRT3DS Pauline||R2.1=2,000||R2.2=4,500||R2.3=5,900||R2.4=8,000||R2.5=10,200 | |R2=3DS Neo Bowser City R/T||R2.I=NeoBowserCityRT3DS Pauline||R2.1=2,000||R2.2=4,500||R2.3=5,900||R2.4=8,000||R2.5=10,200 | ||
|R3=Tokyo Blur 2R/T||R3.I=TokyoBlur2RT RedYoshi||R3.1=2,100||R3.2=4,600||R3.3=6,000||R3.4=8,100||R3.5=10,400 | |R3=Tokyo Blur 2R/T||R3.I=TokyoBlur2RT RedYoshi||R3.1=2,100||R3.2=4,600||R3.3=6,000||R3.4=8,100||R3.5=10,400 | ||
|CN=Vs. Mega Donkey Kong||C.I=Tour8 PaulineCupChallenge||CC=Any character||CT=Tokyo Blur 2||C.1=50cc||C.2=100cc||C.3=150cc | |CN=Vs. Mega [[Donkey Kong]]||C.I=Tour8 PaulineCupChallenge||CC=Any character||CT=Tokyo Blur 2||C.1=50cc||C.2=100cc||C.3=150cc | ||
}} | }} | ||
|} | |} | ||
| Line 731: | Line 731: | ||
|ChiTM=New Year Tour | |ChiTM=New Year Tour | ||
}} | }} | ||
==Trivia== | |||
*While this is the third tour to include a [[Ready, Set, Rocket Start]] bonus challenge, it is currently the latest tour to include this type of bonus challenge. | |||
==References== | ==References== | ||
Revision as of 17:45, May 14, 2021
- This article is about the tour that took place to celebrate the year 2020. For the similarly named tour that took place to celebrate the year 2021, see New Year's 2021 Tour.
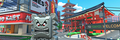
The New Year's Tour was the eighth tour of Mario Kart Tour, which began on January 1, 2020 and ended on January 14, 2020. The tour celebrated the new year of 2020 and introduced a new variation of Tokyo Blur known as Tokyo Blur 2, while also introducing a new variant of Mario in his happi outfit from Super Mario Odyssey and Toad in a celebratory costume as spotlight characters. Similar to the festive trees in the previous three tours, kadomatsu were added throughout many of the courses; hitting one with an item during a race granted "Happy New Year!" bonus points. The 10 daily log-in bonuses for this tour rewarded the player with 5 rubies each day, for a total of 50 rubies. The menu's background featured Mount Fuji, the Tokyo Tower, and Kaminarimon as landmarks for this tour.
Spotlights
| New Year's Pipe 1 December 31, 2019, 10:00 p.m. (PT) – January 14, 2020, 9:59 p.m. (PT) |
New Year's Pipe 2 January 7, 2020, 10:00 p.m. (PT) – January 14, 2020, 9:59 p.m. (PT) | ||||

|

| ||||
| Driver | Kart | Glider | Driver | Kart | Glider |
|---|---|---|---|---|---|

|

|
||||
| Mario (Happi) | Quickshaw | New Year's Kite | Toad (Party Time) | Glam Bruiser | Fireworks Parachute |
Cups
Template:MKTCupTemplate:MKTCupTemplate:MKTCupTemplate:MKTCupTemplate:MKTCupTemplate:MKTCupTemplate:MKTCupTemplate:MKTCupTemplate:MKTCupTemplate:MKTCupTemplate:MKTCupTemplate:MKTCupTemplate:MKTCupTemplate:MKTCupTemplate:MKTCupTemplate:MKTCupTemplate:MKTCupTemplate:MKTCup1 - Despite Larry being the opponent, the icon erroneously depicted Lemmy instead.
Signature kart sets
Drivers with a corresponding cup in the tour were bumped one rank up in every course of their cup. Each one had a specific kart and glider pair that were also bumped one rank up, though these sometimes changed between tours. This was the last tour to use set karts and gliders.
| Cup | Character | Kart | Glider |
|---|---|---|---|
| Second course of every cup | |||
| Third course of every cup | |||
Rewards
Gold cells indicate rewards exclusive to Gold Pass members.

|

|

|
||||
| Bob-omb Parafoil | Morton | Gold Blooper | Bullet Blaster | Gold Koopa (Freerunning) | Iggy | Baby Mario Hanafuda |
| Grand Stars | 39 | 52 | 67 | 84 | 99 | 108 | 120 | 135 | 150 | 167 | 184 | 200 | 218 | 233 | 250 | 262 | 275 | 288 | 300 | 313 | 330 | 340 | 350 | 360 | 370 | Total | Grand total | |
|---|---|---|---|---|---|---|---|---|---|---|---|---|---|---|---|---|---|---|---|---|---|---|---|---|---|---|---|---|
| Coin | 100 | 100 | 100 | 100 | 100 | 100 | 100 | 100 | 100 | 900 | 2400 | |||||||||||||||||
| 300 | 300 | 300 | 300 | 300 | 1500 | |||||||||||||||||||||||
| Rubies | 5 | 3 | 3 | 3 | 3 | 3 | 3 | 3 | 26 | 58 | ||||||||||||||||||
| 5 | 3 | 3 | 3 | 3 | 3 | 3 | 3 | 3 | 3 | 32 | ||||||||||||||||||
| Item tickets | 3 | 3 | 3 | 3 | 3 | 15 | 55 | |||||||||||||||||||||
| 5 | 5 | 10 | 10 | 10 | 40 | |||||||||||||||||||||||
| Star tickets | 2 | 2 | 5 | |||||||||||||||||||||||||
| 3 | 3 | |||||||||||||||||||||||||||
| Quick tickets | 0 | 2 | ||||||||||||||||||||||||||
| 1 | 1 | 2 | ||||||||||||||||||||||||||
| Point-boost tickets | 3 | 3 | 6 | 10 | ||||||||||||||||||||||||
| 1 | 3 | 4 | ||||||||||||||||||||||||||
| 3 | 3 | 6 | 10 | |||||||||||||||||||||||||
| 1 | 3 | 4 | ||||||||||||||||||||||||||
| 3 | 3 | 6 | 10 | |||||||||||||||||||||||||
| 1 | 3 | 4 | ||||||||||||||||||||||||||
| Level-boost ticket | 3 | 12 | ||||||||||||||||||||||||||
| 9 | ||||||||||||||||||||||||||||
New content
Drivers

Karts
Gliders
Courses
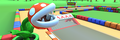
Tokyo Blur 2 (N, R, T, R/T)
SNES Mario Circuit 2 (R/T)

3DS Toad Circuit (R/T)

3DS Neo Bowser City (R/T)
Paid banners
| Name | Availability | Cost | Contents | Banner image |
|---|---|---|---|---|
| Value Pack | December 31, 2019 – January 7, 2020 (first pack) January 7, 2020 – January 14, 2020 (second pack) |
US$1.99 |
|

|
| New Year's 2020 Pack | December 17, 2019 – January 14, 2020 | US$1.99 |
|

|
| Luigi Pack - New Year's Edition | December 31, 2019 – January 7, 2020 | US$6.99 |
|

|
| Red Yoshi Pack | December 31, 2019 – January 7, 2020 | US$39.99 |
|

|
| King Boo Pack | January 7, 2020 – January 14, 2020 | US$19.99 |
|

|
| Crimson Crane Pack | January 7, 2020 – January 14, 2020 | US$39.99 |
|

|
Challenges
Initial pipe appearance rates
During the New Year's Tour, the amounts of the various items were changed:
| Items obtained from a new pipe during the New Year's Tour | ||||||||||||
|---|---|---|---|---|---|---|---|---|---|---|---|---|
| Item | Normal |
Super |
High-End |
Featured High-End | ||||||||
| Character | Kart | Glider | Character | Kart | Glider | Character | Kart | Glider | Character | Kart | Glider | |
| Amount | 31 | 25 | 15 | 9 | 7 | 4 | 2 | 2 | 2 | 1 | 1 | 1 |
New Year's Pipe 1
New Year's Pipe 2
Profiles
- Mario Kart Tour Twitter:
- "The first tour of 2020 is the aptly named New Year's Tour! And it starts Dec. 31, 10 PM PT!"[1]
- "New year, new tour...and a new Log-In Bonus! Start 2020 off right with the New Year's Log-In Bonus. You can get up to 50 rubies just by logging in! Here's a challenge to start the new year off with: try to find all six Yoshis hidden in this picture!"[2]
- "Thanks for racing in the New Year's Tour, the very first of 2020! This tour may be coming to a close, but the year is just getting started. The Ice Tour starts Jan. 14, 10 PM PT! Are you ready for some heated wintertime battles?"[3]
Names in other languages
| Language | Name | Meaning |
|---|---|---|
| Japanese | ニューイヤーツアー Nyū Iyā Tsuā |
New Year Tour |
| Chinese (simplified) | 新年巡回赛 Xīnnián Xúnhuísài |
New Year Tour |
| Chinese (traditional) | 新年巡迴賽 Xīnnián Xúnhuísài |
New Year Tour |
| French | Saison du nouvel an |
New Year's Season |
| German | Neujahrs-Tour-Saison |
New Years Tour Season |
| Italian | Tour di Capodanno |
New Year's Day Tour |
| Korean | 뉴 이어 투어 Nyu Ieo Tueo |
New York Tour |
| Portuguese | Temporada de Ano-Novo |
New Year Season |
| Spanish | Temporada de Año Nuevo |
New Year Season |
Trivia
- While this is the third tour to include a Ready, Set, Rocket Start bonus challenge, it is currently the latest tour to include this type of bonus challenge.